46
tina46e1-b (2017-12) BPG402.om
6
7
8
2
4
5
3
1
9
7
2
3
4
5
6
8
1
9
View on sensor pins
Hot cathode (FIL 1) ca. 0.15 Ohm
Ion collector
Pirani sensor 1 ca. 37 Ohm
Pirani sensor 2 ca. 37 Ohm
GND (connected to sensor housing)
Hot cathode (FIL 2) ca. 0.15 Ohm
All of the above faults can only be remedied by replacing the sensor (→ 46).
Error diagnosis of fieldbus gauges can only be performed as described above for
the basic sensor and sensor electronics. Diagnosis of the fieldbus interface can
only be done via the corresponding bus controller (→ [1], [2], [3]).
For diagnosis of the BPG402-SD (DeviceNet) gauges, the built in LEDs might pro-
duce some useful information (→ 36).
Replacement is necessary, when
• the sensor is severely contaminated
• the sensor is mechanically deformed
• the sensor is faulty, e.g. one / both filaments of hot cathode broken (→ 44)
• the sensor is faulty, e.g. Pirani element broken (→ 44)
INFICON recommends the replacement of the sensor as soon as the
first filament failure has been detected.
• Allen wrench, AF 2.5
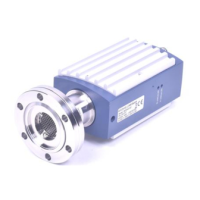
• Spare sensor (→ 47)
Deinstall the gauge (→ 41).
Deinstall the electronics unit from the faulty sensor and mount it to the new
sensor (→ 14).
Adjust the gauge (→ 43).
Correction
Troubleshooting on
Fieldbus gauges
(BPG402-SD, -SE, -SP)
6.4 Replacing the Sensor
Required tools / material
Procedure