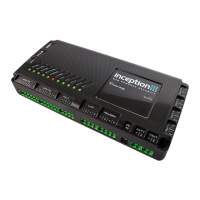
Inner Range Inception Security Controller Installation Manual. Rev. 6.0
© 2016 - 2023. Inner Range Pty Ltd.
8 www.innerrange.com
NOTES:
* Does not include current required by detectors, sounders, readers, locks, LEDs and other peripheral devices connected to
these modules.
† UniBus expander boards can only be connected to: - 8-32 Zone LAN Expander Modules
- Intelligent LAN Access Modules (ILAM)
Up to 6 UniBus boards in total may be connected to a host LAN Module. A suitable Inner Range Smart Power Supply must be
connected to the host Module when UniBus boards are used.
Refer to the relevant host Module & UniBus board Installation Manuals for full details.
INSTALLATION
Web connection
Use any web browser to navigate to Inception’s web page.
To connect, navigate to: https://skytunnel.com.au/inception/SERIALNUMBER, where SERIALNUMBER
is the serial number of your Inception, found on the top of the Controller.
(e.g IN01234567)
See the Quickstart Guide for full connection details.
Supporting Documentation
A list of supporting installation resources and documentation is provided on the last page of this manual.
In addition to the documentation provided with each Inception Controller, the downloadable document
“Inner Range System Design & Installation Guide” provides a range of general system design &
Installation guidelines including additional information on equipment location, power supplies & batteries,
wire & cable, tamper protection and installing detectors and warning devices.
Location and Housing
The installation environment should be maintained at a temperature of 0º to 49º Celsius (32º to 120º F)
and 15% to 85% Relative humidity (non-condensing).
If not already supplied in an enclosure, the Inception controller must be mounted in an approved Inner
Range tamper-protected enclosure such as those listed below. Powered enclosures are available to
provide power for additional LAN expansion modules mounted in the same enclosure.
• Unpowered Enclosure 995201NA
• Powered Enclosure 995201NAPS
Power Supply Options
The Inception controller has connections for an 18 to 24V DC Power Supply input and a 12V Sealed
Lead-Acid (SLA) Battery. These connections are labelled “DC IN” and “BATT” respectively and allow
two power supply options to be supported:
1. Power Supply & Battery (Recommended). The supplied 24V Power Supply is connected to “DC
IN” and a 12V SLA Battery is connected to “BATT”. A 7AH to 18AH Battery is required
depending on battery backup time required. See ‘Specifications’ section for guidance.
2. External Power Supply. Connect a battery-backed power supply with a nominal output of 12.8V
to 14V DC to the “BATT” input. e.g. Integriti 3A or 10A Power Supply (see ‘Accessories List' for
P/N) or an approved 3rd party battery-backed security system power supply.
NOTE: “DC IN” must not be used.
Ensure that the power requirements do not exceed the power supply’s current limit. Remember
to allow for the current required by detectors and other devices connected to the Inception
controller and other devices that may be powered from the same supply.