16
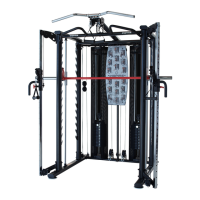
I.) Attaching the Heart Grip
J.) The inner part of the (#10) Heart Rate Grip will have two cables; pass these cables
through the aligned hole in the mast, then up toward the console mount.
K.) Secure (#10) Heart Rate Grip to the (#39) Console Mast using:
4x (#11) M6 * 12 Flathead Socket Screws
Attaching the Console
L.) Located, on the backside of (#19) Console, will be 4x (#17) Cross Head Screws
threaded into four corners of the console.
M.) Remove the four screws, these will be used to mount the console onto the console
mount.
N.) Orientate the console near the top of the mast ;
Connect cable end “B” to cable end (#37), as seen Step 4 Figure
Connect cable ends “A” to the cables coming from (#10) Hear Rate Grip, as seen in
Step 4 Figure
O.) Tuck cables away neatly inside the mast to avoid pinching, then mount the console
onto the mounting plate.
P.) Secure the console using the four screws removed in Step L.
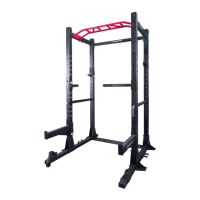
FINAL STEPS
Level the unit by unscrewing the leveler feet
under (#62) Front Stabilizer so that both sit flat
on the ground.
Unscrew center leveler (located under the center
point of the unit) so that it touches the ground.
Failure to do so could cause damage to your unit.