102
Advanced Setup—Continued
This section explains items on the “Input/Output
Assign” menu.
Note:
This procedure can also be performed on the AV control-
ler by using its [Setup] button, arrow buttons, and [Enter]
button.
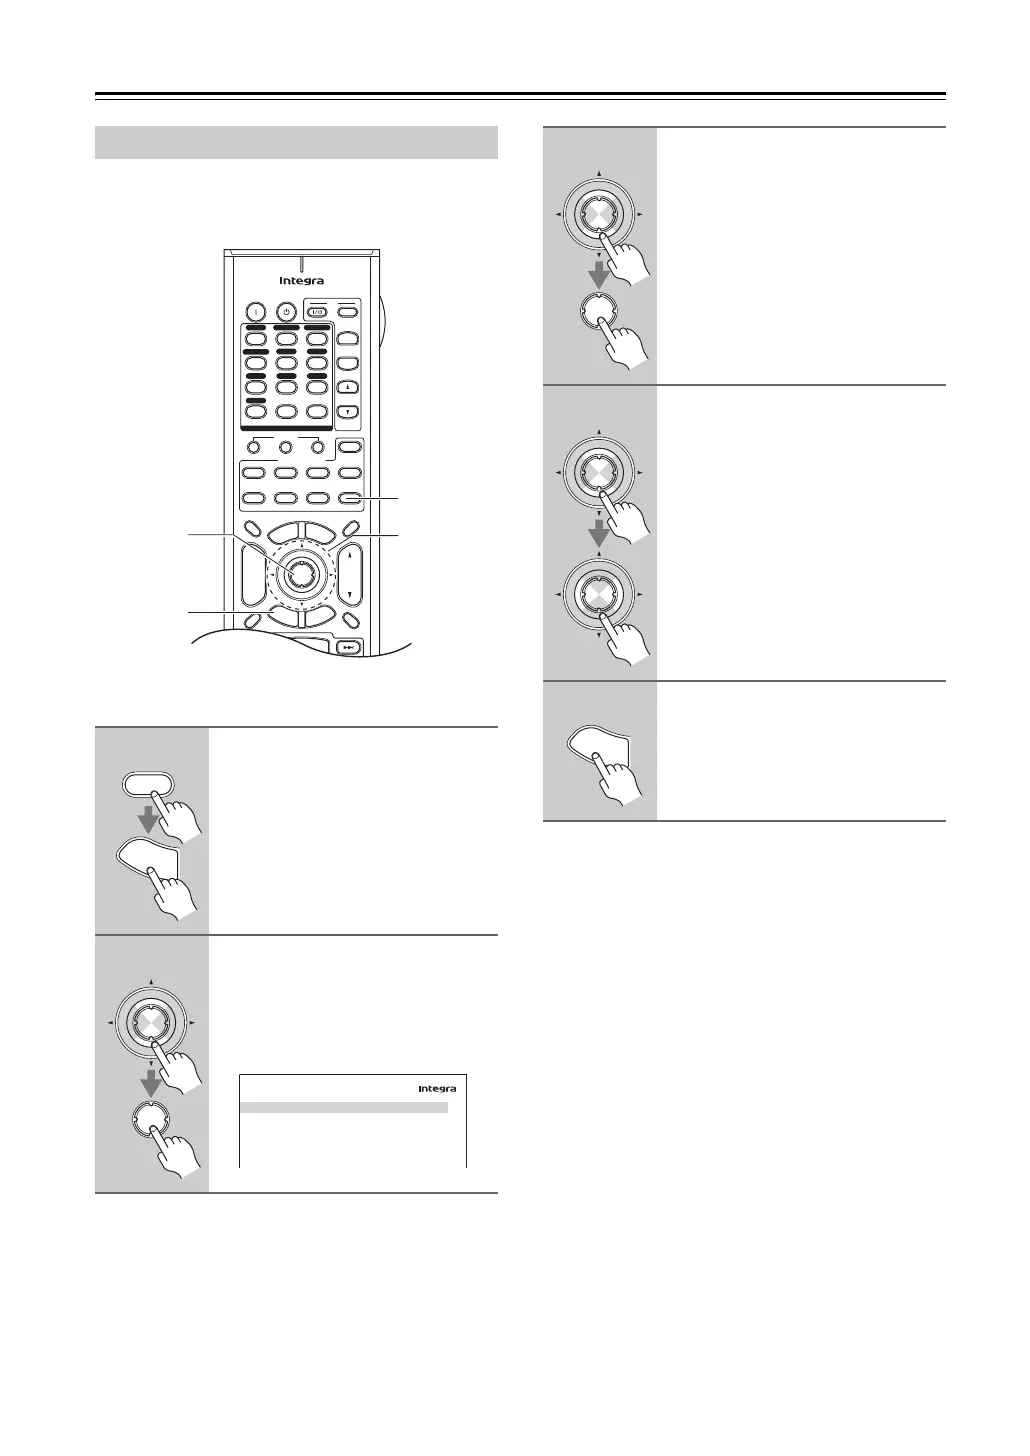
Monitor Out Setup
1
Press the [Receiver] button, fol-
lowed by the [Setup] button.
The main menu appears onscreen.
If the main menu doesn’t appear, make
sure the appropriate external input is
selected on your TV.
2
Use the Up and Down [q]/[w] but-
tons to select “1. Input/Output
Assign”, and then press [Enter].
The “Input/Output Assign” menu
appears.
+
-
On Standby
TV
Input
TV CH
TV VOL
--
/
---
10 11 12
D.TUN
+10
0
Clear
123
456
789
Input Selector
VCR
/
DVR CBL
/
SAT
DVD
Tape
Tuner
CD
Phono
Game
/
TV
Macro
123
VCRDVD
CDR/MD
CD
Zone
2
Remote Mode
Dimmer
Tape/AMP
Sleep
Receiver
TV
Dock
Cable
VOL
CH
Disc
Album
+
-
Enter
T
o
p
M
e
n
u
M
e
n
u
Display Muting
E
x
i
t
G
u
i
d
e
Prev
CH
R
e
t
u
r
n
S
e
t
u
p
Playlist
RandomRec
SAT
Zone
3
AUX 1 AUX 2
2, 3
2–
1
1, 5
Receiver
S
e
t
u
p
Enter
Enter
1. Input/Output Assign
1. Monitor Out
2. HDMI Input
3. Component Video Input
4. Digital Audio Input
5. Analog Audio Input
3
Use the Up and Down [q]/[w] but-
tons to select an item, and then
press [Enter].
The screen for that item appears.
4
Use the Up and Down [q]/[w] but-
tons to select an item, and use
the Left and Right [e]/[r] but-
tons to change it.
The items are explained below.
5
When you’ve finished, press the
[Setup] button.
Setup closes.
Enter
Enter
Enter
Enter
S
e
t
u
p