128
Advanced Setup—Continued
Note:
This procedure can also be performed on the AV control-
ler by using its [Setup] button, arrow buttons, and [Enter]
button.
Mac Address
This is the AV controller’s MAC (Media Access Control)
address. This address cannot be changed.
Control
This setting enables or disables control over the network.
Enable: Control over the network enabled.
Disable: Control over the network disabled.
Port
This is the network port used for control over the net-
work.
DHCP
This setting determines whether or not the AV controller
uses DHCP to automatically configure its IP Address,
Subnet Mask, and Gateway settings.
Enable: DHCP enabled.
Disable: DHCP disabled.
If you select “Disable”, you must configure the “IP
Address”, “Subnet Mask”, and “Gateway” settings your-
self.
IP Address
If you set the “DHCP” setting to “Disable”, you must
specify an IP address. Enter a static IP address provided
by your ISP.
The IP address must be within the following ranges.
Class A: 10.0.0.0 to 10.255.255.255
Class B: 172.16.0.0 to 172.31.255.255
Class C: 192.168.0.0 to 192.168.255.255
Most routers use Class C IP addresses.
Subnet Mask
If you set the “DHCP” setting to “Disable”, you must
specify a subnet mask address.
Enter the subnet mask address provided by your ISP
(typically: 255.255.255.0).
Gateway
If you set the “DHCP” setting to “Disable”, you must
specify a gateway address.
Enter the gateway address provided by your ISP.
Lock
With this setting, you can protect your settings by lock-
ing the setup menus.
Locked: Setup menus locked.
Unlocked: Setup menus unlocked (default).
When Locked is selected, only this “Lock Setup” item
can be accessed.
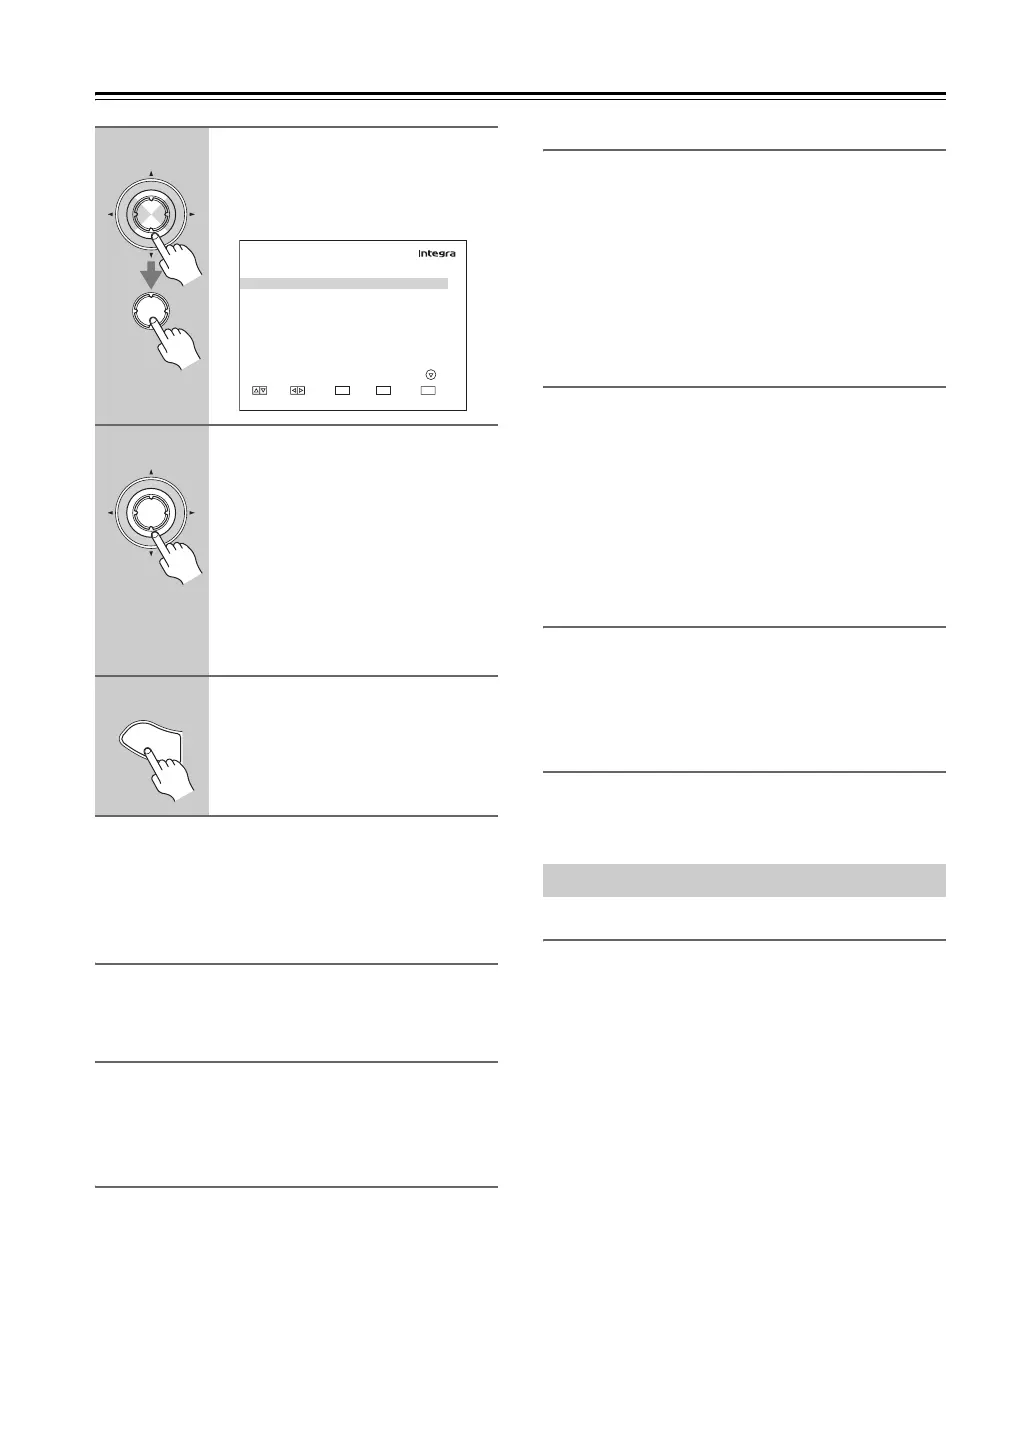
3
Use the Up and Down [q]/[w] but-
tons to select “6. Network”, and
then press [Enter].
The “Network” screen appears.
4
Use the Up and Down [q]/[w] but-
tons to select the settings, and
use the Left and Right [e]/[r]
buttons to set them.
To enter an IP address, select the set-
ting, and then press [Enter]. The arrow
[q]/[w]/[e]/[r] buttons can then be
used to enter numbers. Press [Enter]
again to set the number.
The settings are explained on the next
page.
5
When you’ve finished, press the
[Setup] button.
Setup closes.
Enter
Enter
7-6. Network
MAC Address
Control
Port
xx : xx : xx : xx : xx : xx
Enable
xxxxx
MOVE VALUE INPUT RETURN
ENTER
RETURN
EXIT
SETUP
Enter
S
e
t
u
p
Lock Setup