127
Advanced Setup—Continued
Power Control
To link the power functions of -compatible
components connected via HDMI, select “Enable”.
Notes:
• The “Power Control” setting can be set only when the
above
“Control” setting is set to “Enable”.
• HDMI power control only works with -com-
patible components that support it and may not work
properly with some components due to their settings
or compatibility.
• When set to “Enable”, power consumption will
increase.
• Refer to the connected component’s instruction man-
ual for details.
TV Control
Set to “Enable” when you want to control the AV con-
troller from an -compatible TV that is con-
nected to HDMI.
Notes:
•Set to
“Disable” when the TV is not compatible or
when it is unclear whether the TV is compatible or
not.
• The
“TV Control” setting can be set only when the
above
“Control” and “Power Control” settings are both
set to “Enable”.
• Refer to the connected component’s instruction man-
ual for details.
Note:
When modifying network settings, after modifying it is
necessary to execute Save Settings.
This section explains how to configure the AV control-
ler’s network settings manually.
If your router’s DHCP server is enabled, you don’t need
to change any of these settings, as the AV controller is set
use DHCP to configure itself automatically by default
(i.e., DHCP is set to Enable). If, however, your router’s
DHCP server is disabled, for example, you’re using
static IP addresses, you’ll need to configure these set-
tings yourself, in which case, a knowledge of Ethernet
networking is essential.
What’s DHCP?
DHCP (Dynamic Host Configuration Protocol) is used
by routers, computers, the AV controller, and other
devices to automatically configure themselves on a net-
work.
Disable: Power Control disabled.
Enable: Power Control enabled.
Disable: TV Control disabled.
Enable: TV Control enabled.
Note:
After changing the settings of the
“Control”, “Power
Control”
, or “TV Control”, turn off the power to all
connected pieces of equipment and then turn on
again. Refer to the User’s Manuals for all connected
pieces of equipment.
When linking to a TV that conforms to the CEC
standard, the “Monitor Out” setting must be set to
“HDMI Main”.
Network Settings
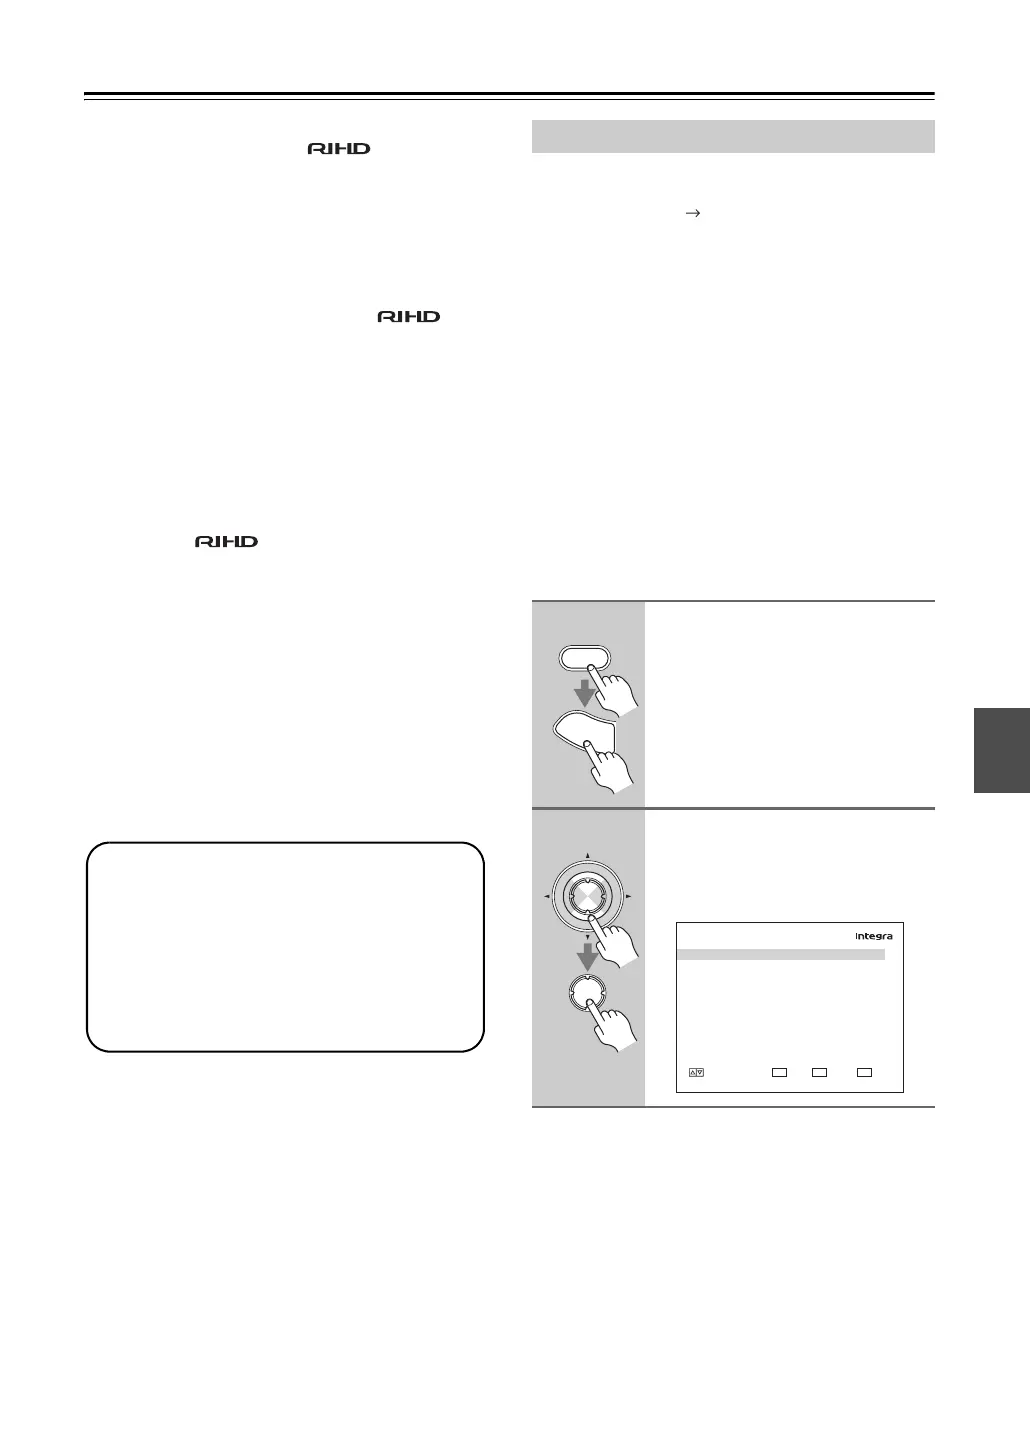
1
Press the [Receiver] Remote
Mode button, followed by the
[Setup] button.
The main menu appears onscreen.
If the main menu doesn’t appear, make
sure the appropriate external input is
selected on your TV.
2
Use the Up and Down [q]/[w] but-
tons to select “7. Hardware
Setup”, and then press [Enter].
The “Hardware Setup” menu appears.
Receiver
S
e
t
u
p
Enter
Enter
7. Hardware Setup
1. Remote Control
2. Zone2/Zone3
3. Tuner
4. Analog Multich
5. HDMI
6. Network
MOVE ENTER RETURN
ENTER
RETURN
EXIT
SETUP