Install Intel® PROSet/Wireless WiFi Connection Utility
1. Insert the Installation CD in your CD drive.
2. The installer presents the message:
Welcome to the Intel® PROSet Wireless Tools Installation Wizard. Click Next.
3. The next message displays:
Welcome to the InstallShield Wizard for Intel® PROSet/Wireless WiFi Software. Click Next.
4. Read the license agreement.
5. Click I accept the terms in the license agreement. You can click Print if you want a printed copy of the
agreement. Then click Next.
6. Click Next to accept the default install destination folder. Otherwise, click Change to specify a different
location. Then click OK and Next.
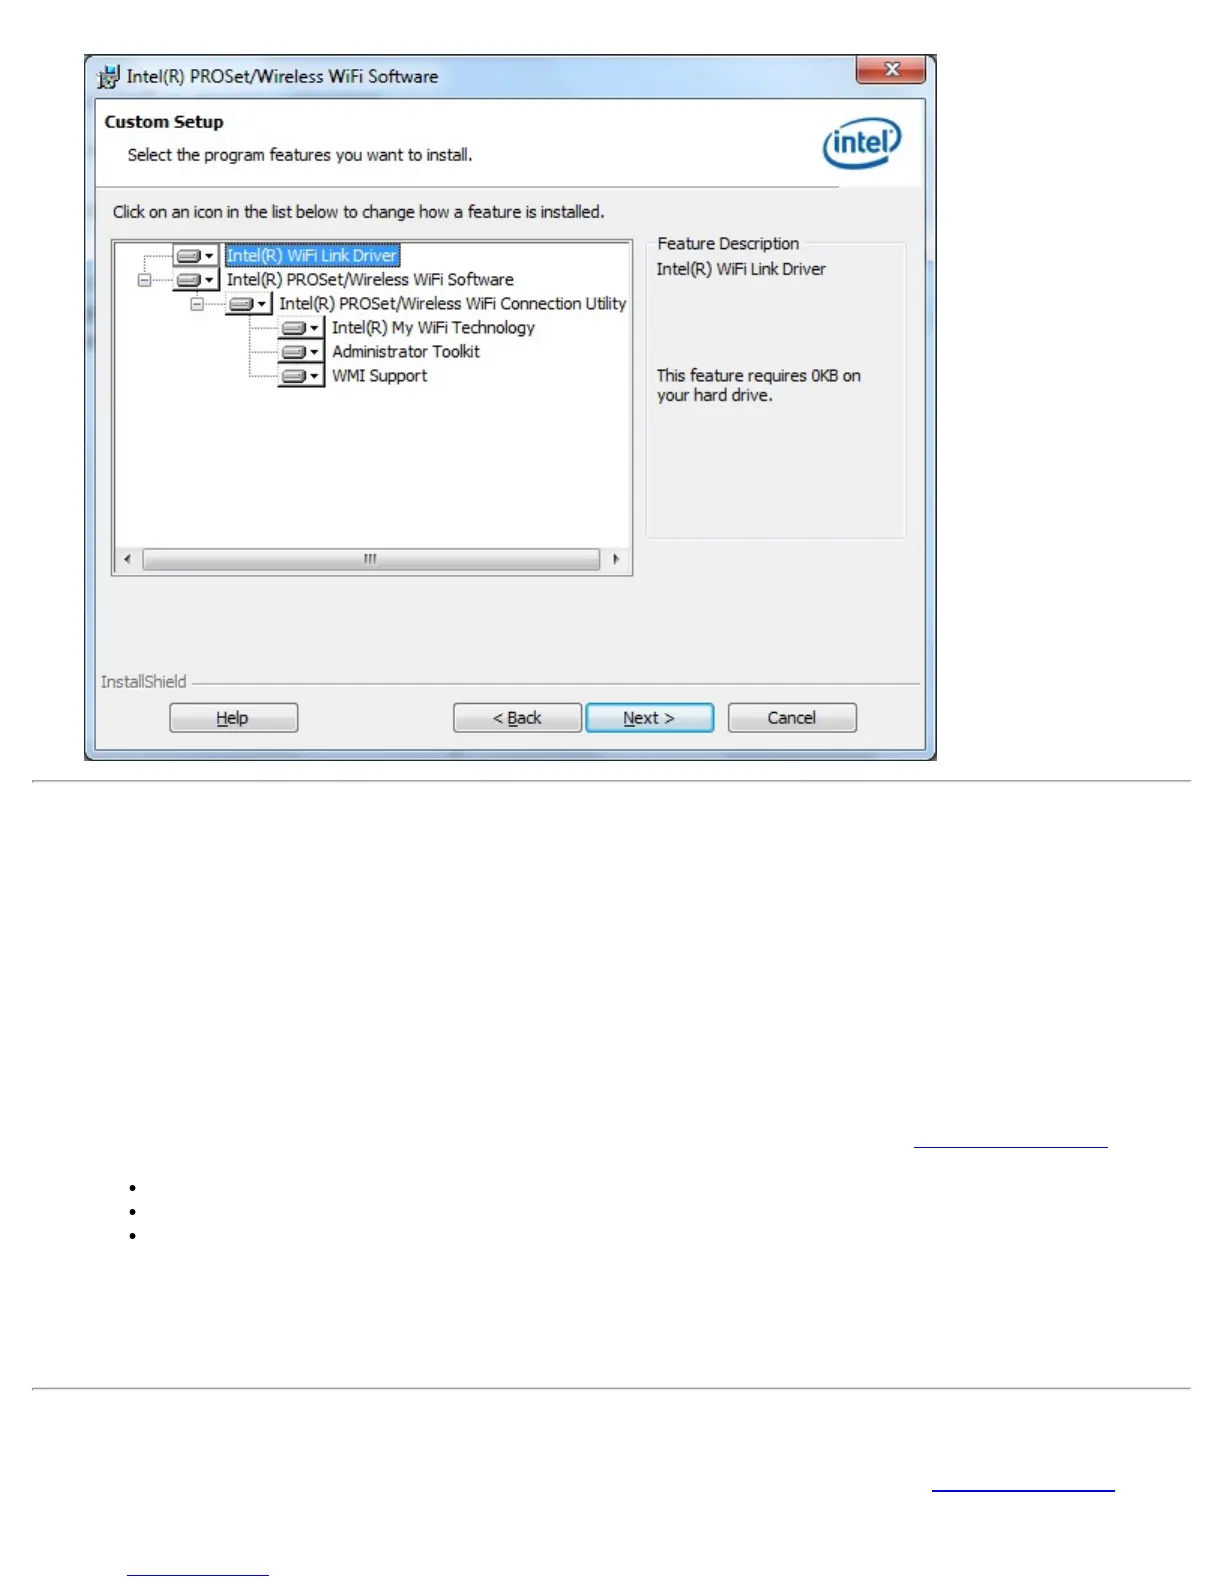
7. Click Typical or Custom. If you click Typical, proceed to step 9.
8. If performing a Custom installation, select from the list of features to install. See Custom Installation
for an
explanation of the available features. For each feature, you can select:
This feature will be installed on the local hard drive.
This feature, and all subfeatures, will be installed on the local hard drive.
The feature will not be available.
9. Click Next.
10. The installation may take several minutes. When the installation completes, the message InstallShield
Wizard Completed displays. Click Finish.
11. You may be asked to reboot the computer. If so, you should reboot you computer now. Click Yes to do so,
or No to reboot later.
Install Additional Software Features
If the WiFi connection utility is already installed, follow the instructions below to add the Administrator Tool and
Intel® PROSet/Wireless WiFi Connection Utility User's Guide