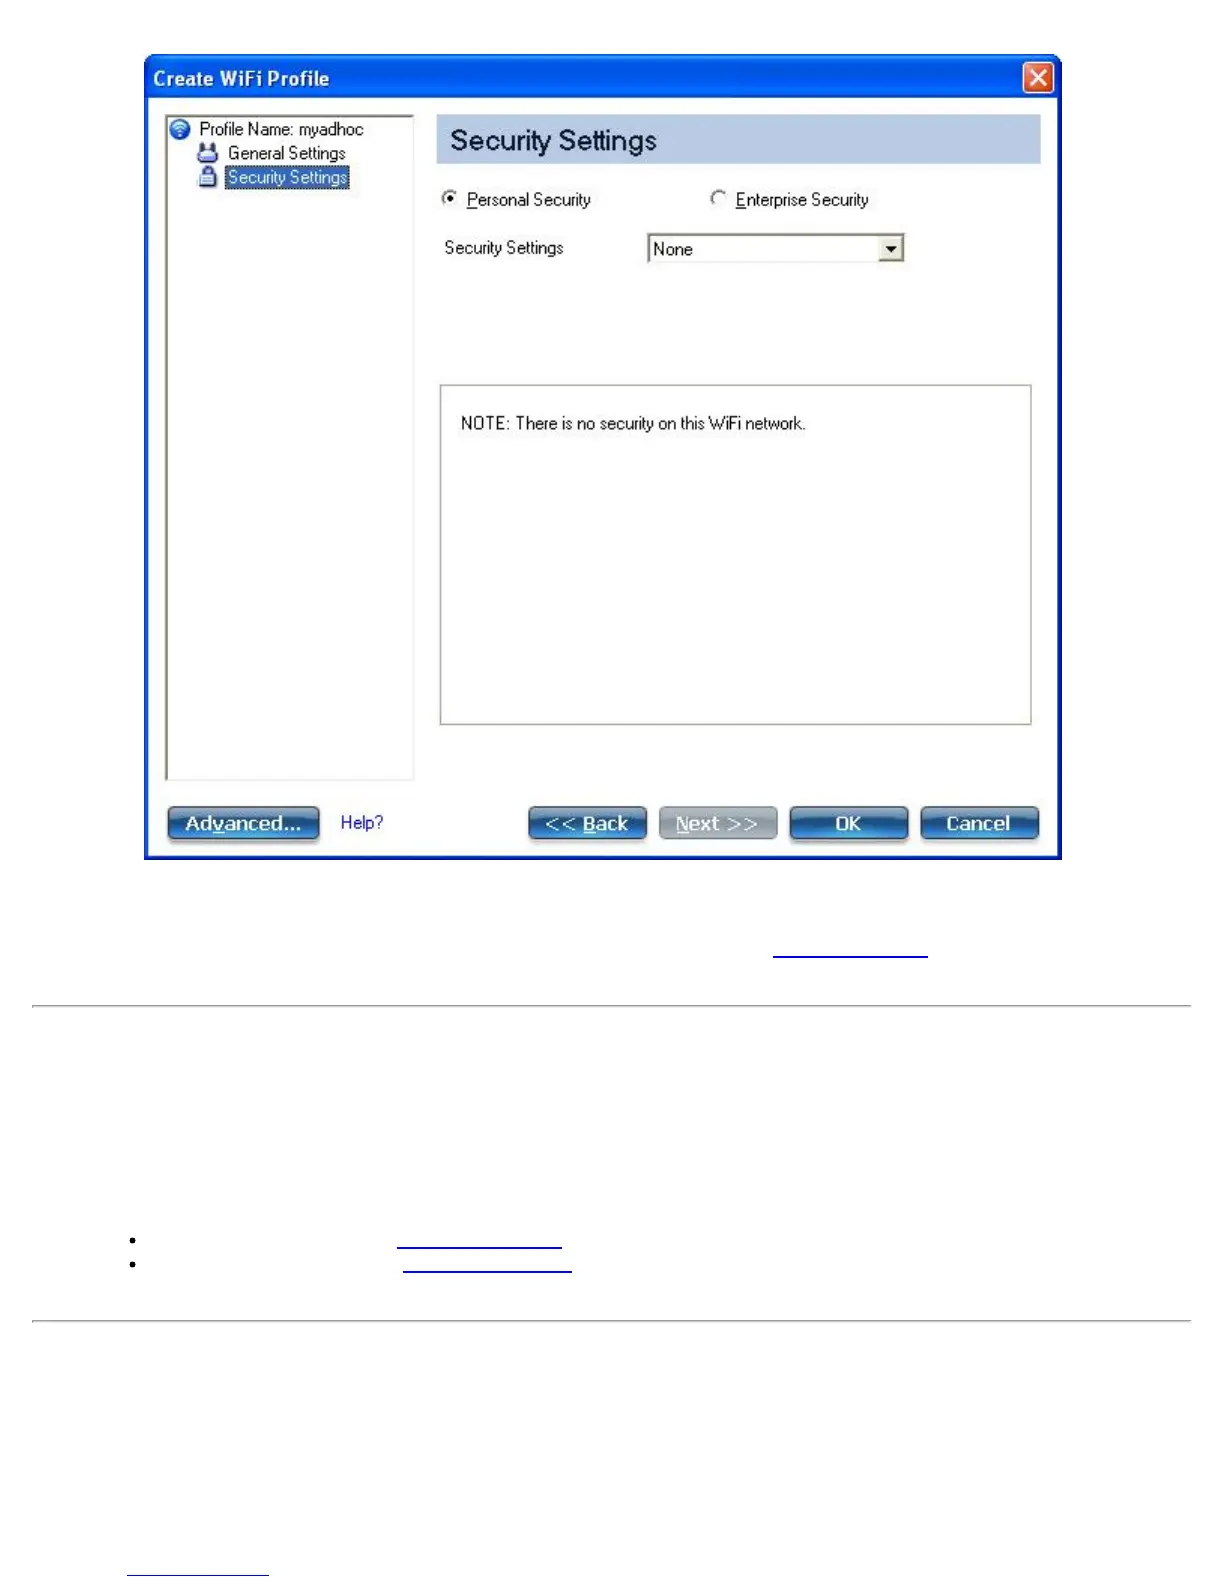
9. Click OK when you have completed the profile settings. To change or verify the profile settings, click Back.
10. If you are not currently connected to a network, Intel® PROSet/Wireless WiFi Connection Utility detects that
a new profile has been added and automatically attempts to connect to this new profile.
11. If you want to manually connect to this profile, click Connect. The connection icon
displays the current
connection status. The network name, transmit and receive speeds, and signal quality are also displayed.
Edit an Existing Profile
To edit an existing profile:
1. Click Profiles on the Intel® PROSet/Wireless WiFi Connection Utility main window.
2. Select the profile to edit from the Profiles List.
3. Click Properties to open the WiFi Profile Properties General Settings.
4. Click Next and Back to navigate through the WiFi Profile Properties' General and Security Settings:
General Settings: See General Settings for more information.
Security Settings: See Security Settings for more information.
5. Click OK to save the current settings and exit. Click Cancel to exit without saving changes.
Remove a Profile
To remove a profile:
1. Click Profiles on the Intel® PROSet/Wireless WiFi Connection Utility main window.
2. Select the profile from the list.
Intel® PROSet/Wireless WiFi Connection Utility User's Guide