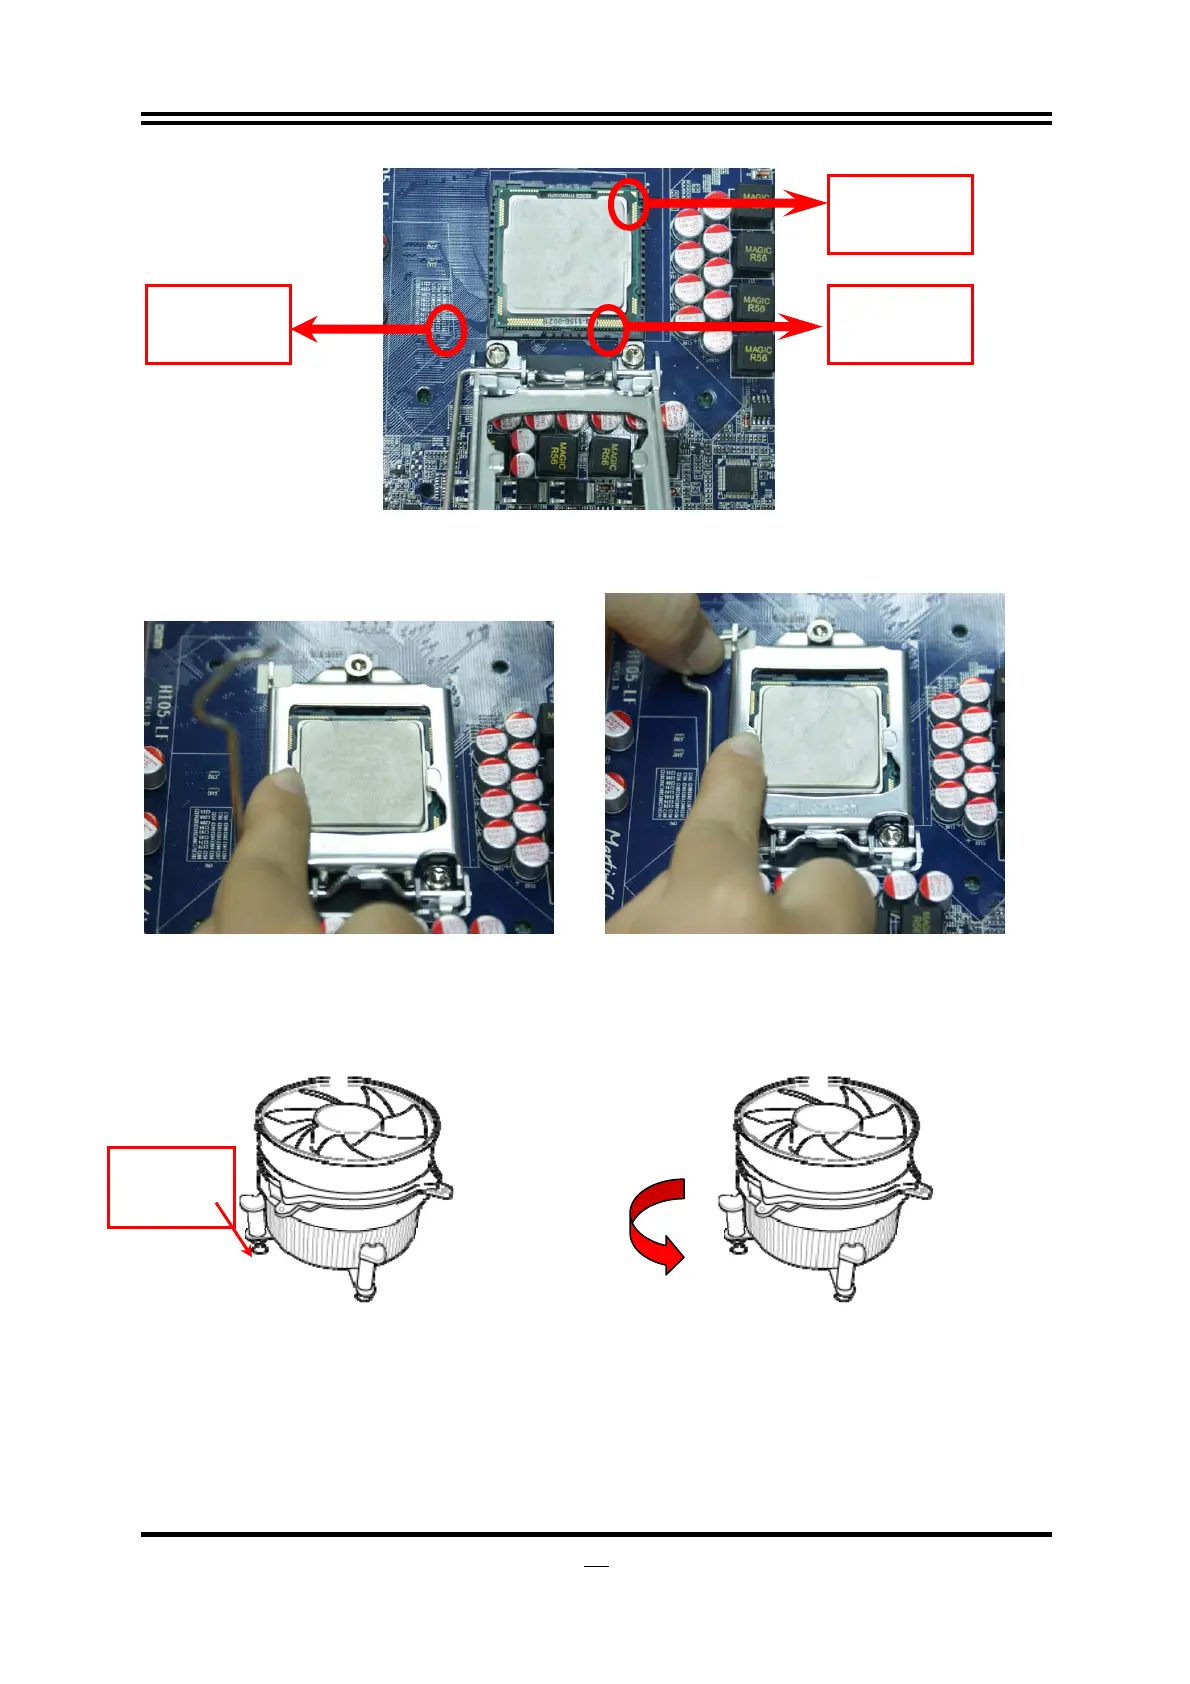
12
5. Make sire that golden finger in the right place as shown in the above illustration and match the two
alignment keys on the CPU with two points of the socket. CPU can only be correctly installed with
this direction. Incorrect installation might cause damage to CPU.
6.Put down the load plate in the direction shown above.
7.
Press down the load level and move it rightwards make
sure it is locked under the notch.
2-3-4 Intel Reference Thermal Solution Assembly
1. Put the heat sink vertically above the
CP-installed socket and make sure to align
the four fasteners with four holes around
the socket.
2 . Revolve the four fasteners in the
counter-clockwise direction.
Pin-1
Indicator
Alignment
Key
Alignment
Key
Align the
fastener with
the hole