95
TROUBLESHOOTING AND DISPOSAL
inVENTer Connect controller platform | Operating instructions
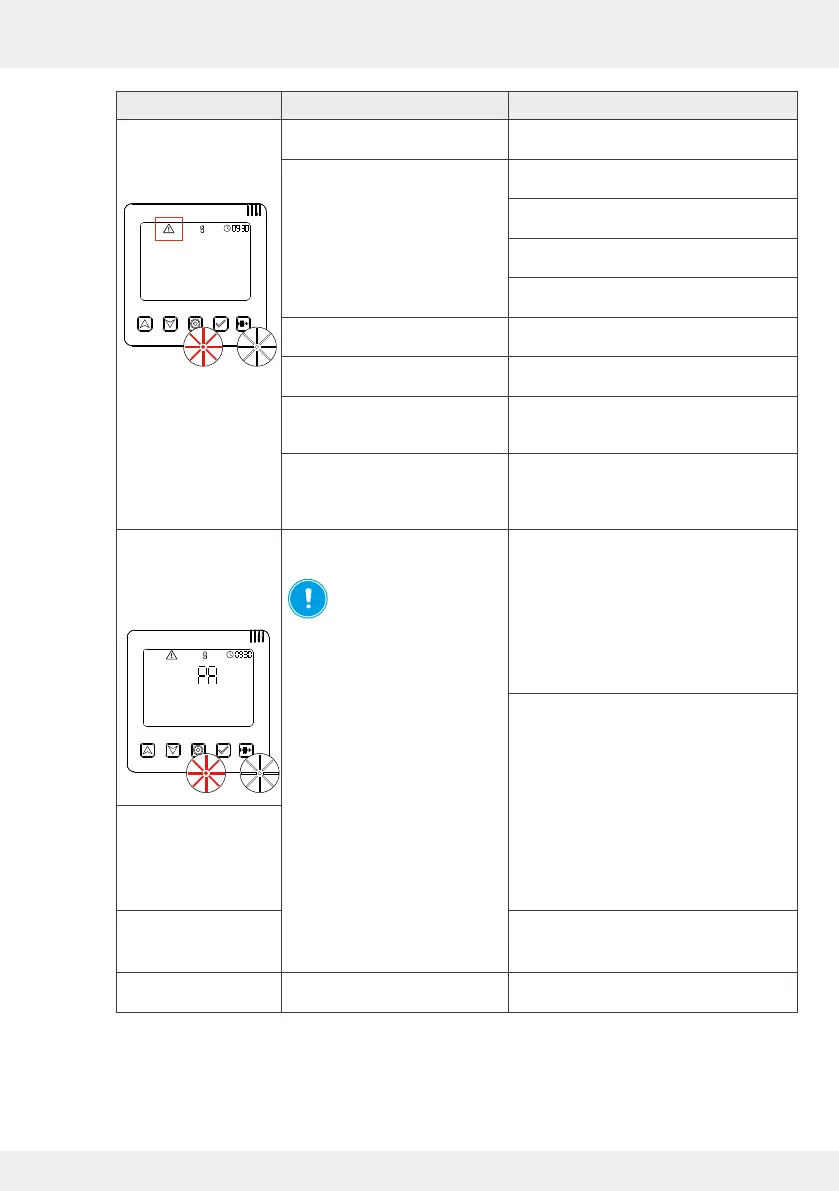
Fault Possible cause Remedy
The RED and WHITE
LEDs ash alternately
on the controller,
warning symbol.
F01: Time and date on the
controller not set/conrmed.
Set the time again. ( 2)
F 02: Controller component is no
longer accessible.
Check whether the component
is switched o.
Check the radio signal. If the signal is weak,
set an amplier ( 4.10).
Check whether the batteries need to be
changed (sensor system).
Pair the device with the controller again
( 3.3)
F 03: Firmware update failed Perform the update again
( 4.7: System update).
F 04: Battery status of the sensors
low.
Change the batteries ( 5.3).
F 06: Filter change required Clean the dust lter or replace it with a new
one if necessary (alternatively: pollen or
activated carbon lter, 5.2).
F 07: System cleaning required Clean the components of the ventilation unit
( 5.2 | Operating instructions for your
ventilation unit
[www.inventer.de/downloads])
The RED and WHITE
LEDs ash alternately
on the controller,
warning symbol,
display screen "PA".
F 05: Switching contact triggered /
out of operation.
NOTICE: If the switching
contact was damaged by
the safety-relevant limit value
being exceeded at the pressure
monitor, no troubleshooting has to
be carried out on components of
the ventilation system. The cause
of the negative pressure must be
eliminated!
If the value falls below the limit
value again, all ventilation units
restart in the previously set
operating mode.
All LEDs extinguish.
There is no power.
Check power supply.
Check the radio signal. If the signal is weak,
set an amplier ( 4.10).
LEDs on all inner covers
ash alternately RED
and GREEN.
Inner covers are/will be
opened.
LEDs on the switching
contact ash alternately
RED and GREEN.
Pair the device with the controller again
( 3.3)
Sensors without
measurement values
Sensors not paired.
Start device pairing ( 3.3).
Table 11: Troubleshooting components
If you cannot eliminate the fault, please contact our technical customer service.
You can nd information on how to do this in the following section ( 9: Service).