31
OPERATION AND SET-UP ON THE CONTROLLER
inVENTer Connect controller platform | Operating instructions
3.5 Changing the fan settings
For each ventilation zone (max. 4), time-limited settings for ventilation level and ventilation mode
can be made on the Easy Connect e16 controller. Ventilation proles can also be assigned to the
individual zones. These are then permanently assigned.
To do this, select the ventilation zone for which the settings are to be changed as described in
chapter 3.4.
If no ventilation zones are set up in the system, the settings you have made will be applied global-
ly to all ventilation devices in the system.
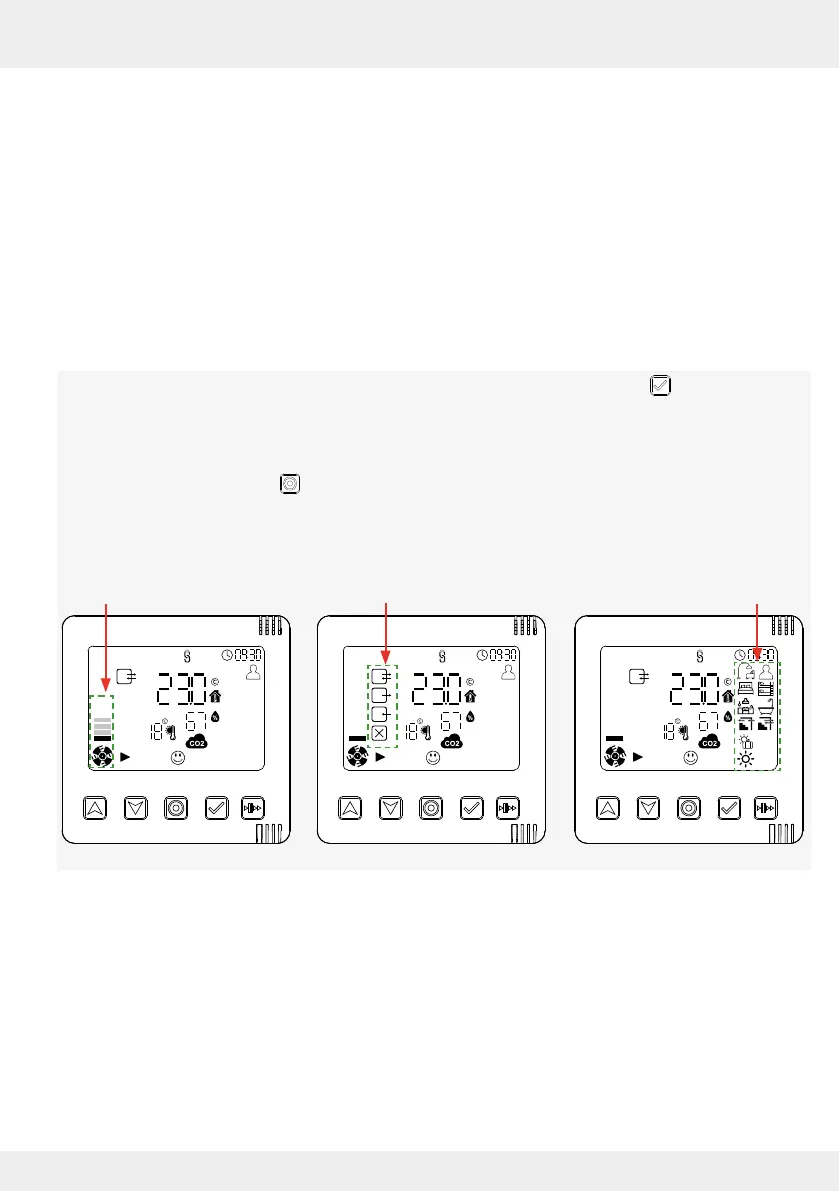
Changing the fan settings – brief overview
• Switching between the setting options is done by pressing the select key .
• The values can then be changed using the arrow keys.
When setting, the active symbol ashes in each case.
• Press the mode key to exit the settings menu and return to the display menu.
The last setting selected (last ashing symbol) is set as active.
The selection order is as follows:
Ventilation level Ventilation mode Ventilation prole
Setting the ventilation level (time-limited change)
You can set the air ow using the controller to up to 4 levels.
The default values for each of these levels are:
• Level 1 – 25 %
• Level 2 – 35 %
The air ow for each of these 4 levels can be changed via the app. If the default value was
changed via the app, the changed air ow is also eective on the controller.
• Level 3 – 50 %
• Level 4 – 100 %