13
Ioline
Sending a Cut File to the Cutter
Always load the cutter and make test cuts to determine the correct settings
before sending any files. See the Adjusting Blade Exposure and Force sec-
tion for more details.
Important: Make sure that the carriage and material are in the proper
position and that an origin is set by pressing Set Origin on the keypad
(LED is green).
If you are cutting material such as Thermo-Flock for transferring to fabric,
make sure you “Mirror” the image in the design software before sending to
the cutter. Send the file directly from the design software following the direc-
tions in the documentation or;
From the Ioline Control Center:
1. From the menu bar select File, Send Cut File.
2. Either enter the path and file name of the cut or select the correct location
from the directory\file lists in the dialog box. For example, the path
might be:
C:\IOLINE\<filename>.plt.
4. Select OK.
Pausing Cutting
Warning: Do not turn the material roll or pull material tight between
the drive shaft and the material roll while cutting is paused. If the
material becomes suddenly tight, the machine will jam.
1. Press the Start/Stop key to place the cutter in Stop mode (red LED).
2. When cutting is interrupted, the carriage and material can be moved with
the keypad Arrow keys.
3. Press the Start/Stop key to resume cutting. The cutter will return to the
original cutting position and continue cutting where it stopped. The
keypad LED will change from red to green.
Canceling a Cut
1. Press the Start/Stop key to place the cutter in Stop mode (red LED).
2. Cancel the cut from the design software (refer to the design software
manual or consult software dealer) or cancel the cut in the Control Center
software by clicking on the Abort button in the Send File window. Note:
If this step is skipped the cut will continue when a new origin is set.
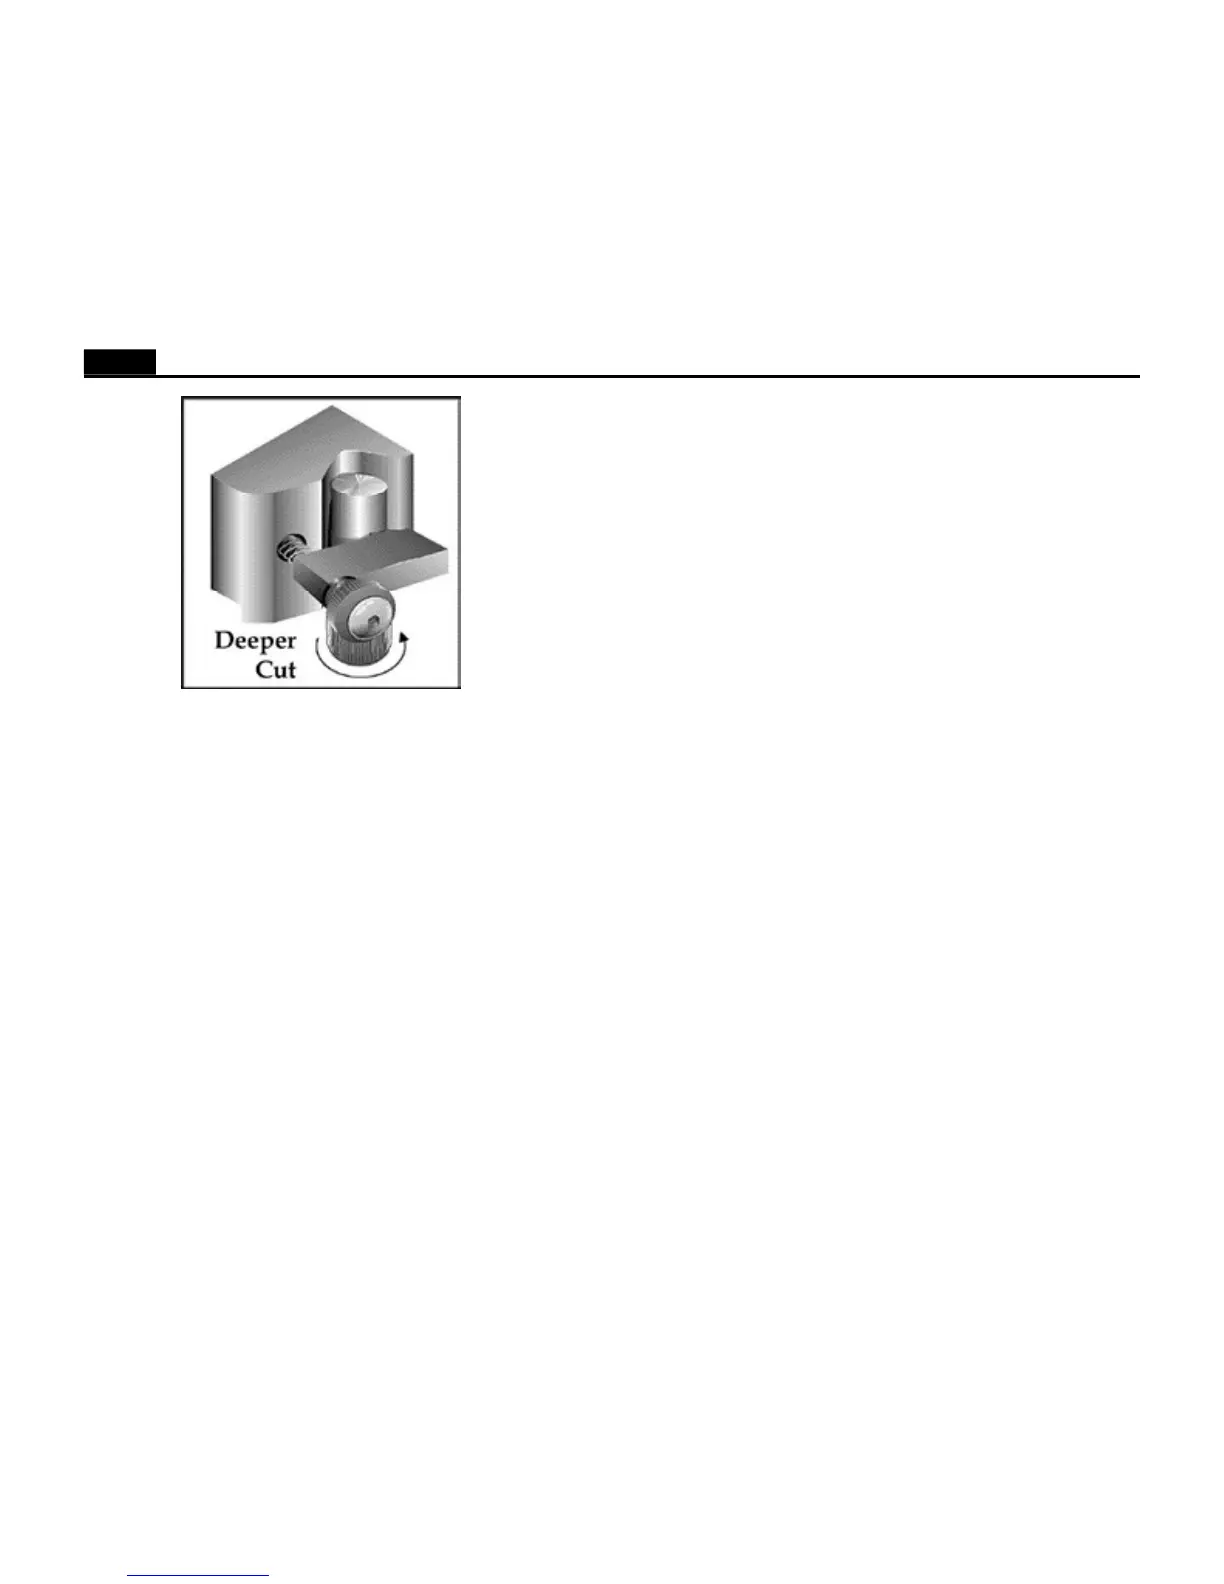
Figure 11. Turning the foot to add more blade exposure.
5. Turn the foot 1/8 turn upward (clockwise from below). Press the Test Cut
key. Note: Successive cuts will automatically be positioned to the left of
the previous test cut. The blade should be cutting the material.
6. Continue increasing the blade exposure and making test cuts. The test
design will completely separate from the surrounding material and lightly
score the material backing when enough blade is exposed.
Force Adjustment:
Every type of material requires different cutting force. Before adjusting force
make sure that the blade exposure is adjusted first. See instructions above.
1. Turn the force knob down slightly from maximum, about one mark, and
repeat the test cut. Use full force if the test cut is not complete.
2. If the test cut is complete, turn the force down again and repeat the test
cut. Continue until the cut is incomplete. This indicates that there is not
enough force to push the exposed blade fully into the material. At this
point turn the force knob up one mark, which should be just enough.
Verification:
1. Press the Test Cut key for 3 seconds. The cutter will cut a 1.9 inch x 7.1
inch design.
2. If the design does not separate cleanly and leave a light scoring on the
backing, try another 1/8 turn upward (counter clockwise from above) of
blade exposure and a very slight increase in force.
 Loading...