5
Ioline
INSTALLATION
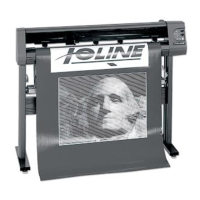
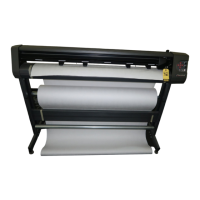
Unpack the Cutter
Warning: Do not lift the cutter by the plastic end covers, the dust cover,
or the carriage rail. This may permanently damage the cutter. Use the
bottom surfaces of the cutter to lift or move it.
Carefully remove the cutter from the box and place it on a flat-stable surface.
This procedure requires two people. Save all packing materials and the box.
Check the packing list to ensure that all of the accessories are present.
Assemble the Cradle
Assembly directions and hardware for the cradle are included in the accessory
kit. Assemble the stand and attach the cutter according to the directions be-
fore attempting to cut.
Attach the Cutter
Attach the cutter to the stand (see above). The directions are included in the
accessory kit. When using a stand, make sure that the media rollers are prop-
erly installed and that the cutter is facing the correct direction.
Prepare the Area
Prepare a large clean area to work. Make sure the floor is clean and clear of any
obstacles. Pull the cutter away from the wall so the material can move freely.
Connect the Cutter to the Computer
Note: Make sure the computer and the cutter have the power turned
off. Ioline recommends using a surge protector power strip for the
design cutter and the computer.
Connect the cutter to the computer with either a parallel or a serial cable. A
parallel cable is provided in the accessory kit. Standard serial cables are
available at a computer store or from Ioline if it is necessary to connect the
cutter to a serial port on the computer. A serial connection to the cutter is
required with Windows 3.1 or DOS based software.
The parallel port receptacle on the computer is a 25 pin female receptacle.
The serial port is either a 9 pin or 25 pin male receptacle. If the computer has
a 9 pin serial port, a 9 to 25 pin adapter is necessary. Adaptors are inexpensive
and available at computer stores or can be ordered from Ioline. The cutter will
not function if a serial cable is connected to a parallel port.
Select the correct port in the design software or the Control Center after the
cables are correctly connected to the computer and cutter. Consult the design
software manual or the dealer for further information.
Important Notes:
1. Always turn off the power to both the computer and the machine
before connecting any cables. This will protect the equipment and
reset the cutter if changing between parallel and serial communica-
tion.
2. If connected to a parallel port, an LPT port designation (i.e. LPT 1,
LPT 2, etc.) must be selected. If connected to a serial port, a COM
port designation (i.e. COM 1, COM 2, etc.) must be selected. The
choice of a port for the cutter will depend on the ports being used by
other devices on the computer. Consult with the dealer if a port is
not available.
Power On
Turn on the computer and the cutter to make sure they work. The cutter power
switch is located next to the power cord on the back. The carriage will move
toward the keypad side of the machine when the power is turned on. Keep
hands and loose clothing away from all moving parts of the cutter. The red
LED on the front panel will light when the start-up process is finished.
Installing the Ioline Control Center
The Control Center is an interface for adjusting parameters to optimize cutter
performance. The cutter comes with a CD-ROM which has the Microsoft
Windows
®
95, 98 and NT (3.51 or greater) version of the Ioline Control Center
program.
1. Turn on the power to the computer and start Windows
®
.
2. Insert the Ioline CD ROM into the CD ROM drive (usually D:)
3. Select the Start button.
4. Choose Run.
5. Type D:\SETUP (substitute the correct letter if the CD ROM drive letter is
not D:) and Click OK.
6. Follow the instructions that appear on the screen.
7. Consult the Operation chapter of this manual for details on using the
Ioline Control Center software.