EN
• Pull the handle up perpendicular to the machine.
• Tilt the machine backwards and rest the handle on the oor.
Front squeegee:
• Detach the suction hose from the squeegee (g. 39, ref. 1).
• Unscrew the knobs (g.39, ref. 2).
• Separate the squeegee from the machine (g. 40, ref. 1).
• Pull out the blade, so as to free the entire assembly (g. 41).
• Remove the blade.
• Either ret the same blade with the wiping edges reversed, so that
it can be used until both edges are worn out, or replace with a new
blade, clipping it to the slots in the body of the squeegee;
• Ret the squeegee to the machine, following the instructions
described previously.
Rear squeegee:
• Lower the squeegee control lever.
• Detach the suction hose from the squeegee (g. 42, ref. 1).
• Unscrew the knobs (g.42, ref. 2).
• Pull out the blade, so as to free the entire assembly (g. 43, ref. 1).
• Remove the blade (g. 44).
• Either ret the same blade with the wiping edges reversed, so that
it can be used until both edges are worn out, or replace with a new
blade, clipping it to the slots in the body of the squeegee;
• Ret the squeegee to the machine, following the instructions
described previously.
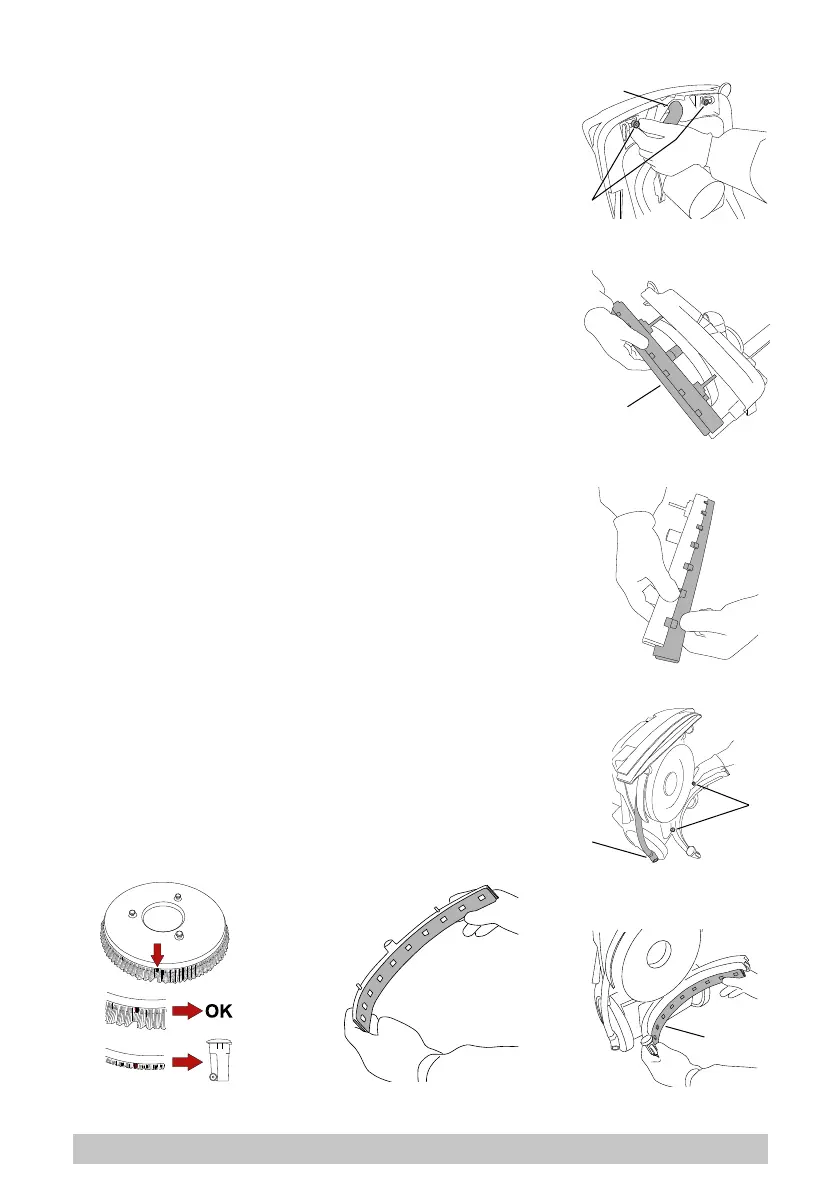
Replacing the brush
The brush presents a number of tufts, coloured red, with bristles shorter
in length than the rest (g. 45). When the tufts of black bristles wear down
to the same length as the red bristles, the brush must be replaced. For
directions on replacement of the brush, refer to the sections “Releasing
the brush/pad driver” and “Fitting the brush/pad driver”.
Fig.39
Fig.40
Fig.41
2
1
1
Fig.42
Fig.43
Fig.44
2
1
1
Fig.45
24