#18
iStorage datAshur
®
BT ADMIN MANUAL v 1.7
www.istorage-uk.com
ADMIN MANUAL
#18
www.istorage-uk.com
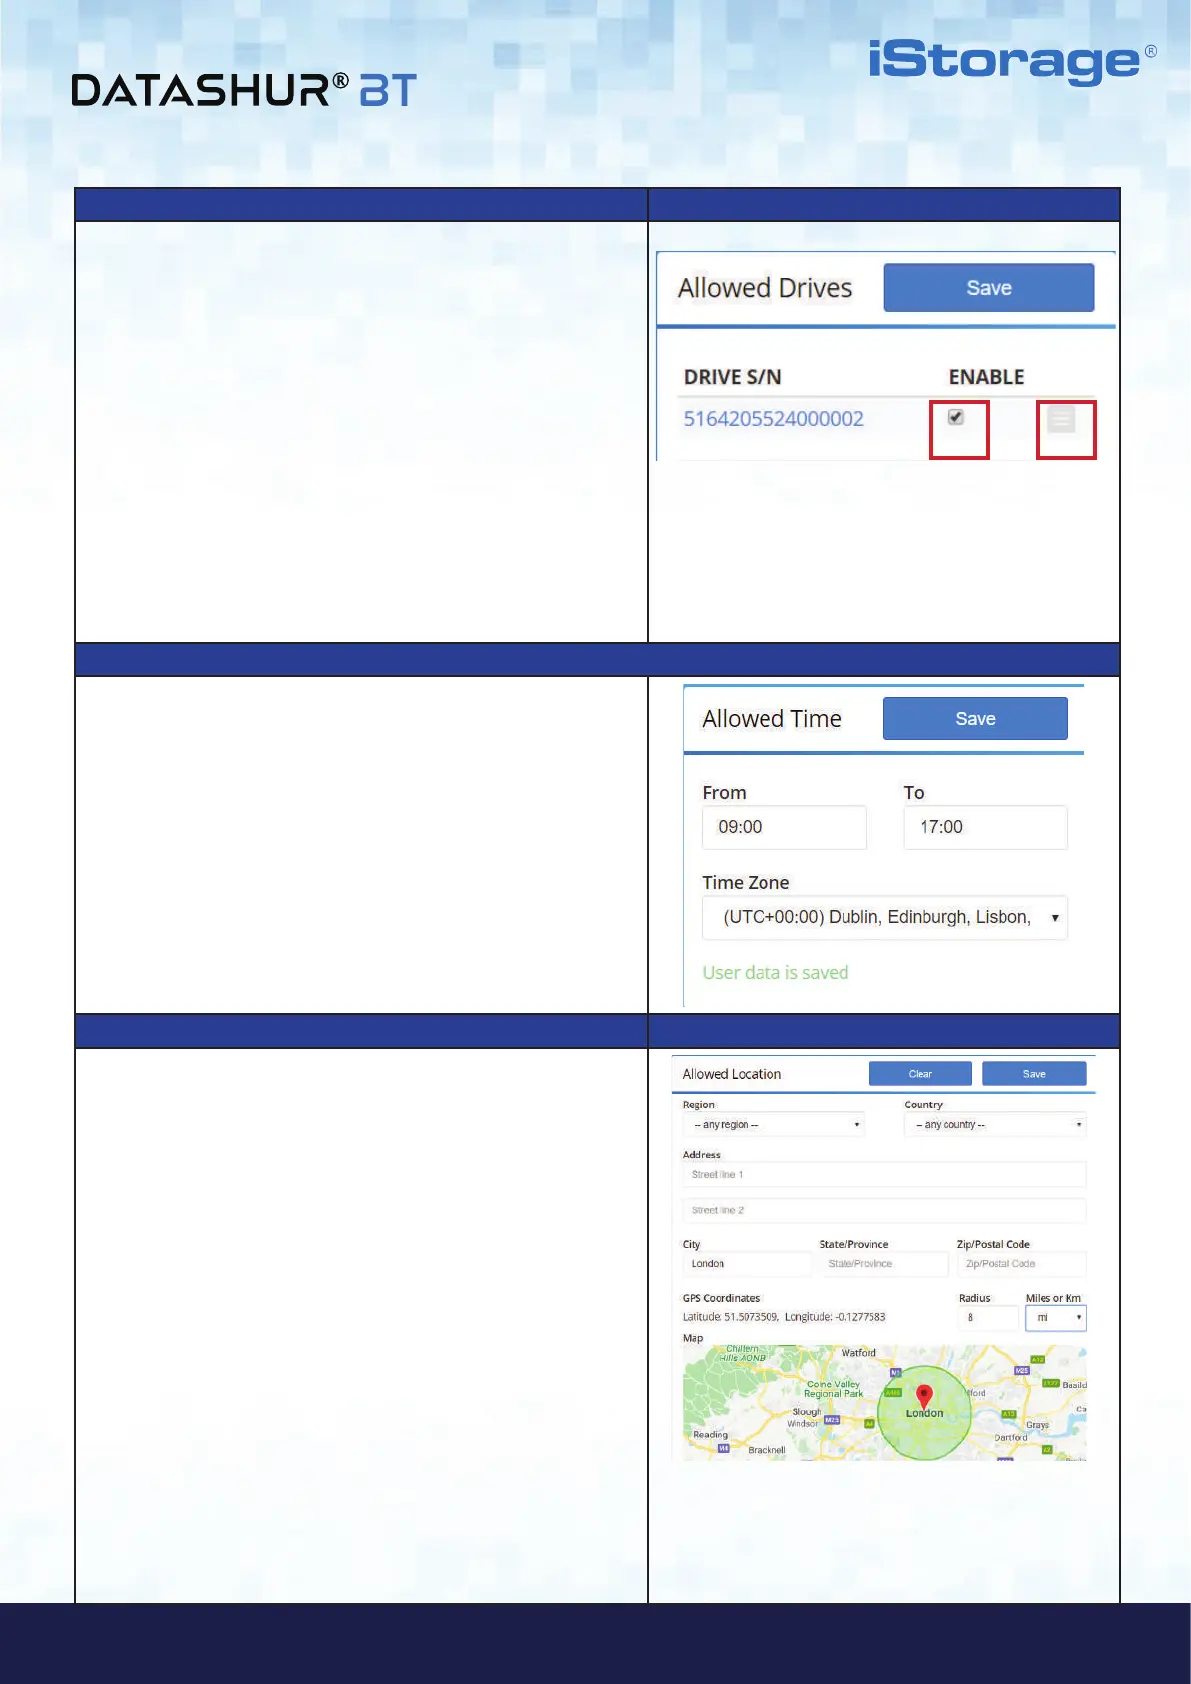
Allowed Drives
1. To Disable (prohibit) a User access to the datAshur BT
Managed Drive, click the Check box (1) under ‘Enable’ to
clear the check mark and click Save to disable access for the
User.
Note: To enable User access, click the Check box to restore the
check mark and click Save.
2. To delete a Drive from Remote Management, click on the
menu field (2), then click Delete Drive and
in the ‘Delete Confirmation’ dialog referencing the
Drive Serial Number to be deleted, click Delete.
Note: To add the Drive back to Remote Management, refer to
section 3 - How to Provision datAshur BT Managed
Drives.
How to set Time-Fencing Restrictions
Time-Fencing can be applied to any individual User
restricting the use of a Drive to within a specific time frame,
for instance between, ‘From 09:00’ - ‘To 17:00’ only.
1. To Set Time-Fencing, click in the ‘From’ field and either
select the time, or type in manually and do the same with the
‘To’ field. Then select your ‘Time Zone’ from the drop down
menu and click Save. A ‘User data is saved’ message will
be displayed as confirmation.
Note: To clear your time selection, click on the ‘From’ and ‘To’
fields and delete the entries, then click Save.
How to set Geo-Fencing Restrictions
A User’s access can be restricted by setting the ‘Allowed
Location’ as follows:
1. Region: User access can be set by ‘Region’, for instance
‘Europe’.
2. Country: First select the ‘Region’ and then select the
‘Country’ from the drop down menu.
3. Address: Complete the ‘Address’ field including Zip/Postal
Code to restrict User access to that Address only.
4. City: Enter a name of a ‘City’, for instance London.
5. State/Province: Restrict User access to a specific State or
Province.
6. Zip/Postal Code: Restrict User Access to a specific
Zip/Postal Code.
7. Radius: To expand the ‘Allowed Location’ radius, enter a
value under Radius and then choose either ‘Miles or Km’.
8. Click ‘Save’ to apply your restrictions or click ‘Clear’ to
remove all values.
 Loading...