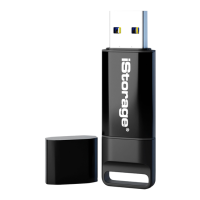
#8
iStorage datAshur
®
BT ADMIN MANUAL v 1.7
www.istorage-uk.com
ADMIN MANUAL
3. How to Provision datAshur BT Managed Drives
1. Open your datAshur BT Admin App and enter your Username and
Password and then tap on Login to RM (Remote Management) Account.
2. After successfully logging in, the Drive Settings menu will open ready for you to review and apply your security
settings as described below:
•
RM Enforced: This is switched on by default (GREEN light on) and MUST
remain ON to enable Remote Management provisioning. When switched off,
a Drive can be provisioned to work with the non-managed App (datAshur BT
App - refer to a separate user manual).
•
User Password: The datAshur BT ships with a default password
(11223344). To change the default password, tap on ‘User Password’ and
then enter and confirm your New 7-15 character Password and finally tap
on ‘Set User Password’.
Password Requirement: Password must be 7-15 characters in length and
cannot contain only consecutive or repetitive numbers or letters.
Note: For security reasons, we strongly recommend that each user change
the default or Admin set password to their own unique 7-15 character
password once the Drive has been issued to them.
•
Inactivity AutoLock: To protect against unauthorised access if the Drive
is unlocked and unattended, the datAshur BT can be set to automatically lock
after a pre-set amount of time. In its default state, the datAshur BT
Unattended Inactivity AutoLock feature is turned off (Never) but can be set to
autolock between 1 - 60 minutes.
To set a time limit, tap on Inactivity AutoLock and then tap to choose your
desired length of time.
Note: When Admin sets the Inactivity AutoLock, the User is prohibited from
disabling this feature.
After setting up as Admin (section 2), you will first need to provision all datAshur BT Managed Drives you intend to
manage via the Remote Management Console one Drive at a time.
To start provisioning, proceed with the following steps.
 Loading...