3-18 4247530-Rev A
ENGINE
3
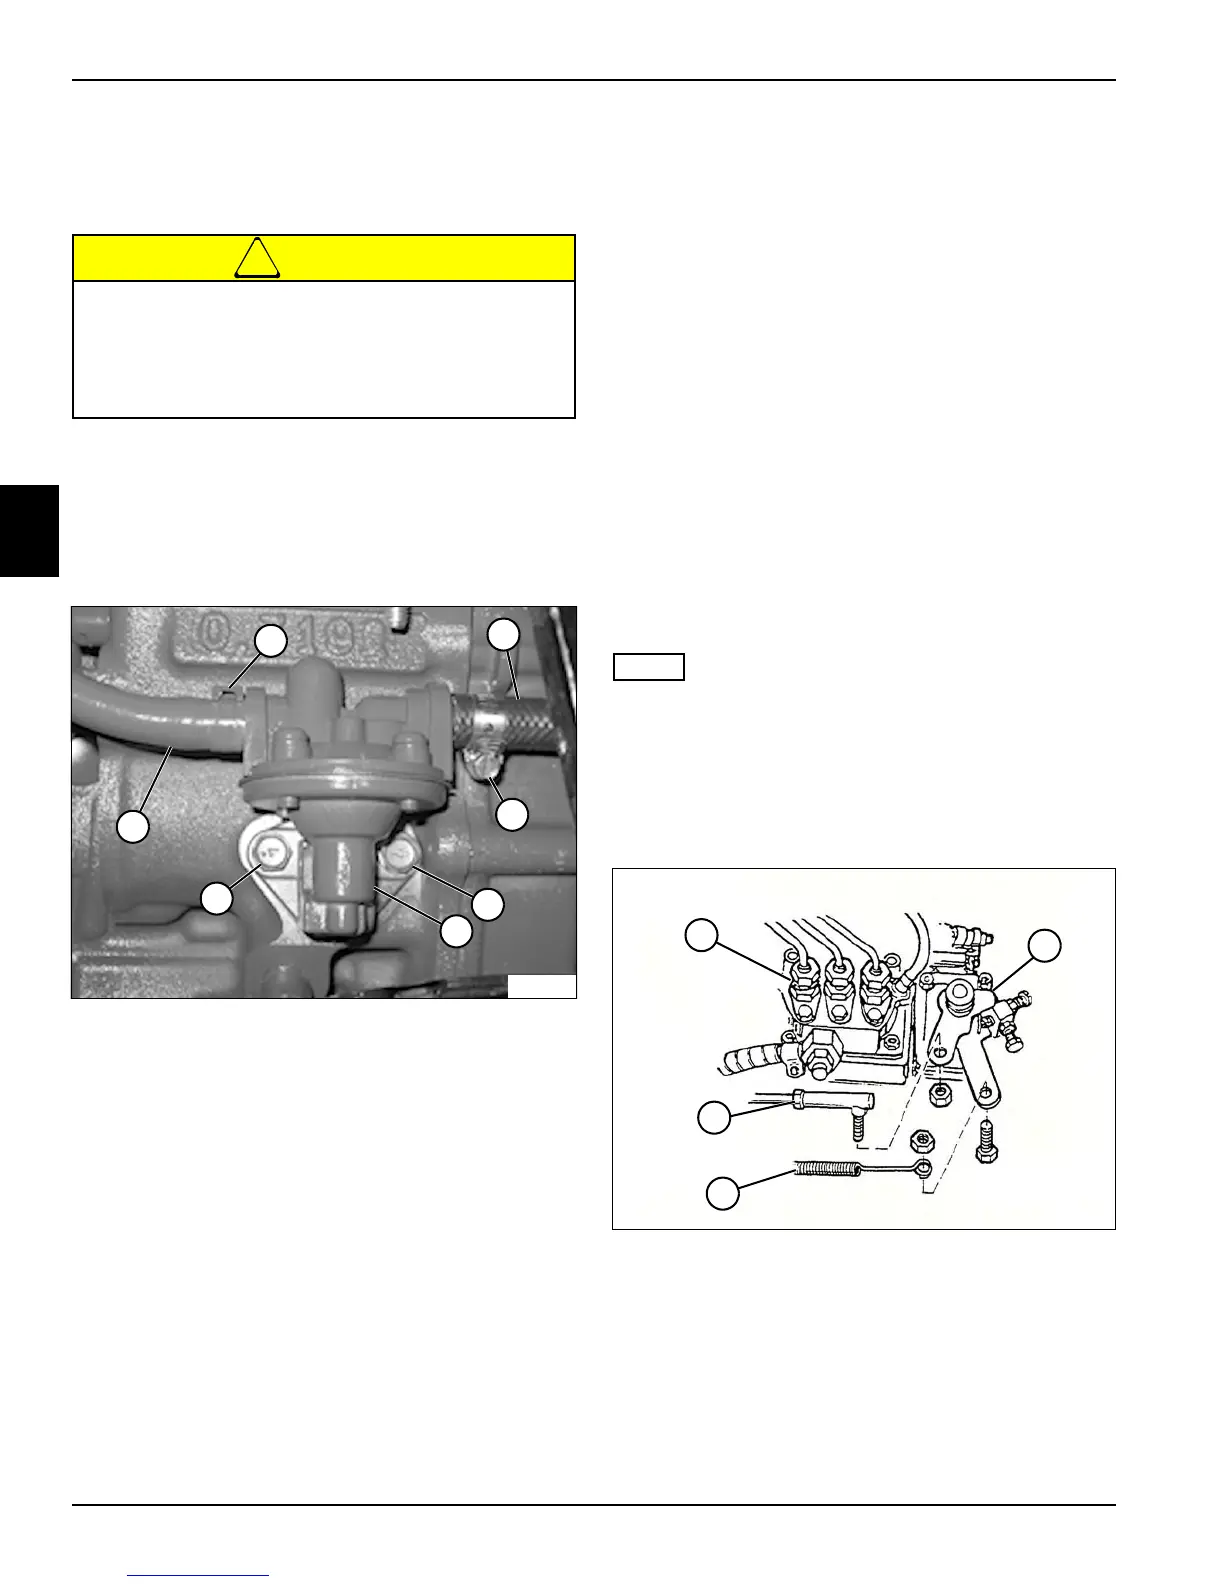
Fuel Pump (Diesel)
Removal and Installation
See Figure 3-31.
!
CAUTION
1. Park the mower safely. (See “Park Mower Safely” on
page 1-6.)
2. Allow the engine to cool completely.
3. Turn the fuel shutoff valve clockwise until valve
bottoms lightly. Valve is located on the fuel filter.
Figure 3-31
4. Loosen fuel hose clamps (2 and 4).
5. Disconnect fuel hoses (1 and 3) from fuel pump (6).
Use a suitable container to catch the fuel that will
flow from the fuel hoses. Cap the hoses.
6. Remove screws (5).
7. Remove fuel pump (6).
Installation Notes
• Install fuel pump by reversing the order of removal.
• Inspect the fuel pump gasket for any damage and
replace if necessary.
Engine (Diesel)
Removal and Installation
See Figures 3-32 through 3-36.
1. Park the mower safely. (See “Park Mower Safely” on
page 1-6.)
2. Allow the engine to cool completely before
attempting to service the engine.
3. Tag and disconnect the negative (–) battery cable.
4. Remove fuel tank. (See “Fuel Tank (Diesel)” on
page 9-7.)
5. Remove fuel tank support pan. (See “Fuel Tank
Support Pan” on page 9-8.)
6. Remove muffler. (See “Muffler (Diesel)” on
page 3-13.)
7. Remove radiator. (See “Radiator (Diesel)” on
page 3-15.)
8. Remove air filter assembly. (See “Air Filter Assembly
(Diesel)” on page 3-11.)
NOTE
Label all wires before disconnecting to ensure correct
installation.
9. Tag and disconnect the wiring harness at the engine,
engine temperature sensor, alternator, fuel shutoff
solenoid, starter, engine oil pressure switch, and
glow plug.
Figure 3-32
10. Disconnect the fuel shut-off solenoid (4) and throttle
cable (3) at the speed control plate (2), located next
to the fuel injection pump (1).
Diesel fuel is highly flammable. Handle with care.
Use an approved container with a spout that will
fit inside the fuel filler neck. Avoid using
unapproved containers to transport fuel. Keep all
fuel containers clean and closed when not in use.
2
6
4
1
TN3377
3
5
5
TN3390
4
1
3
2