Installation 6-6
Revision 2 - 20 March, 1997 HP SERIES DIMMER OPERATING MANUAL
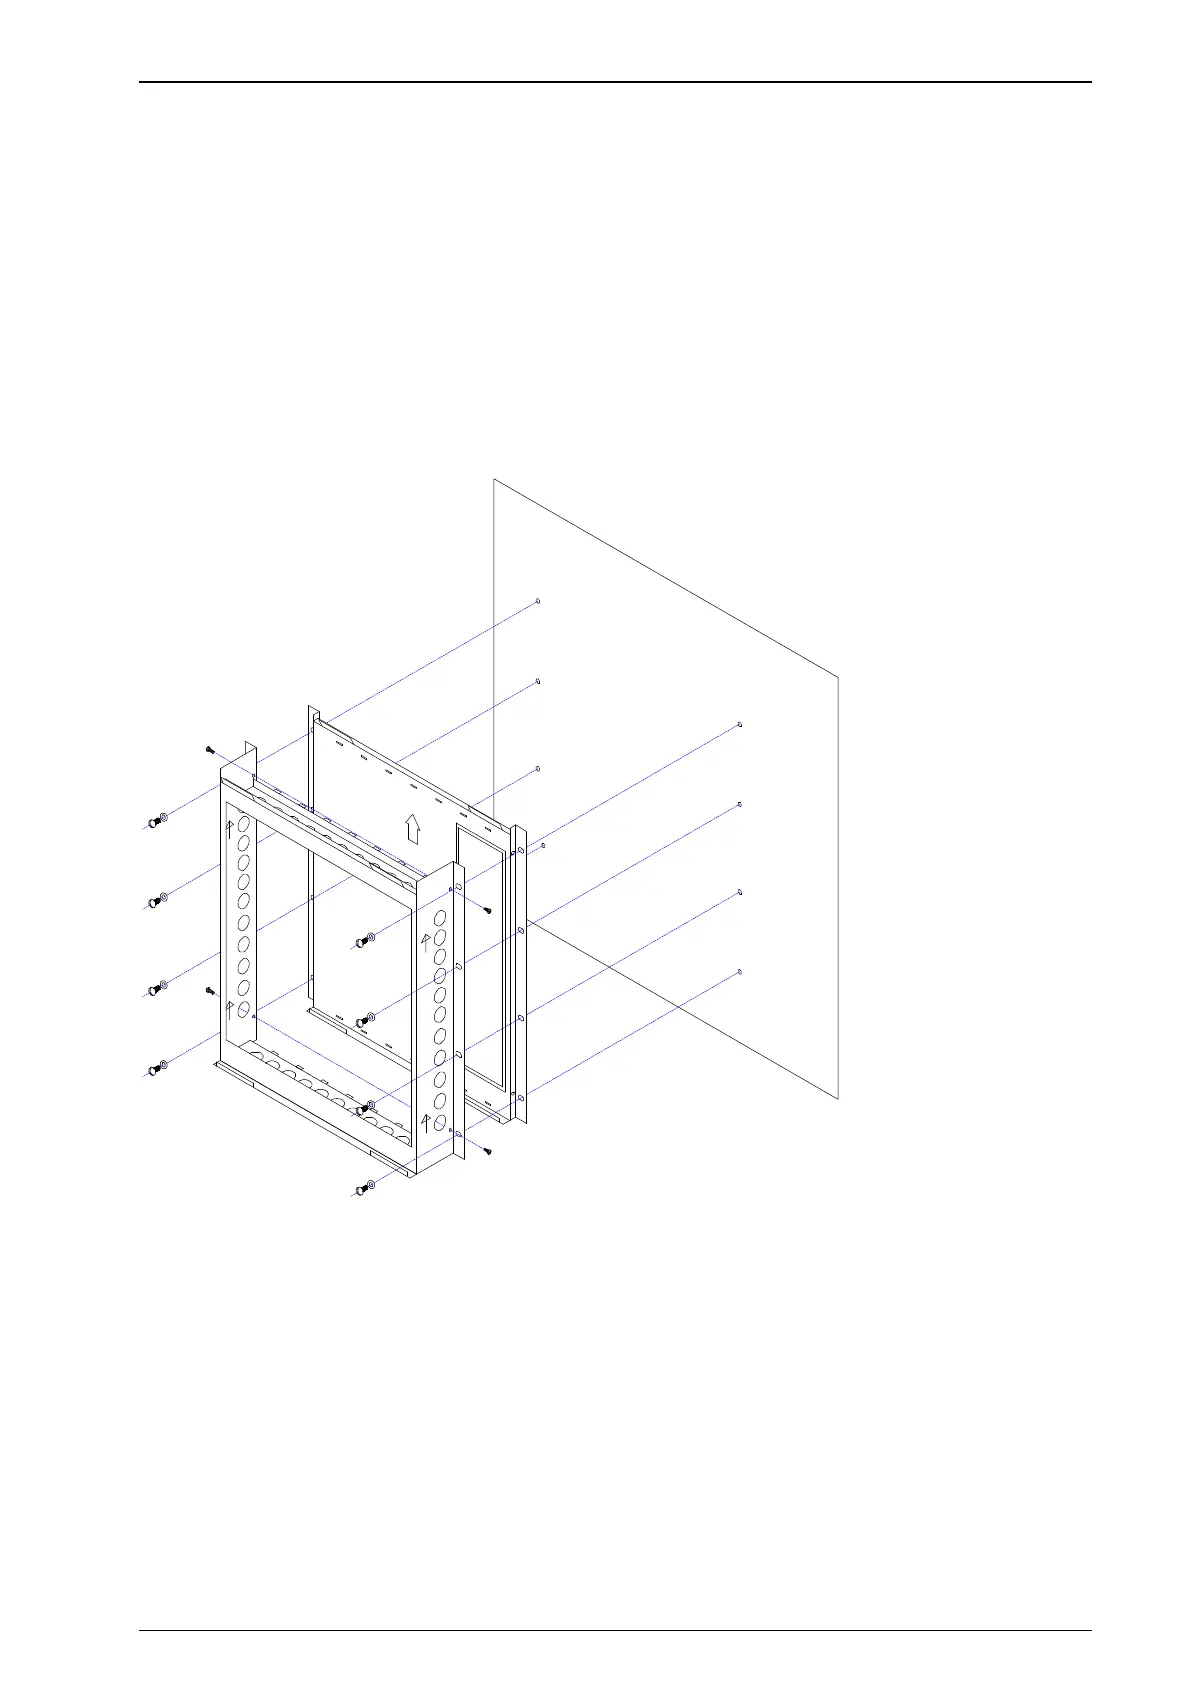
6.2.4 Wall Mounting Dimmers - Conduited Cable Entry
Use both the deep and shallow wall brackets to form an enclosure. Place the deep
bracket over the shallow bracket, so that the tags in the back of the deep plate fit into
the mating slots in the shallow bracket, noting the orientation marks on both pieces.
Use four thread-cutting screws (supplied) at each side to screw the two pieces
together, forming an 80mm deep enclosure. The enclosure formed has an assortment
of holes to suit 25mm and 32mm (1" and 1-1/4") conduit end nuts on all four sides.
Place the assembly against the wall at the desired location, and mark and drill holes
for at least 4 fixing points. Mount the enclosure on the wall.
Attach the dimmer to the bracket as described in section 6.3.
WALL
TOP