Installation 6-9
Revision 2 - 20 March, 1997 HP SERIES DIMMER OPERATING MANUAL
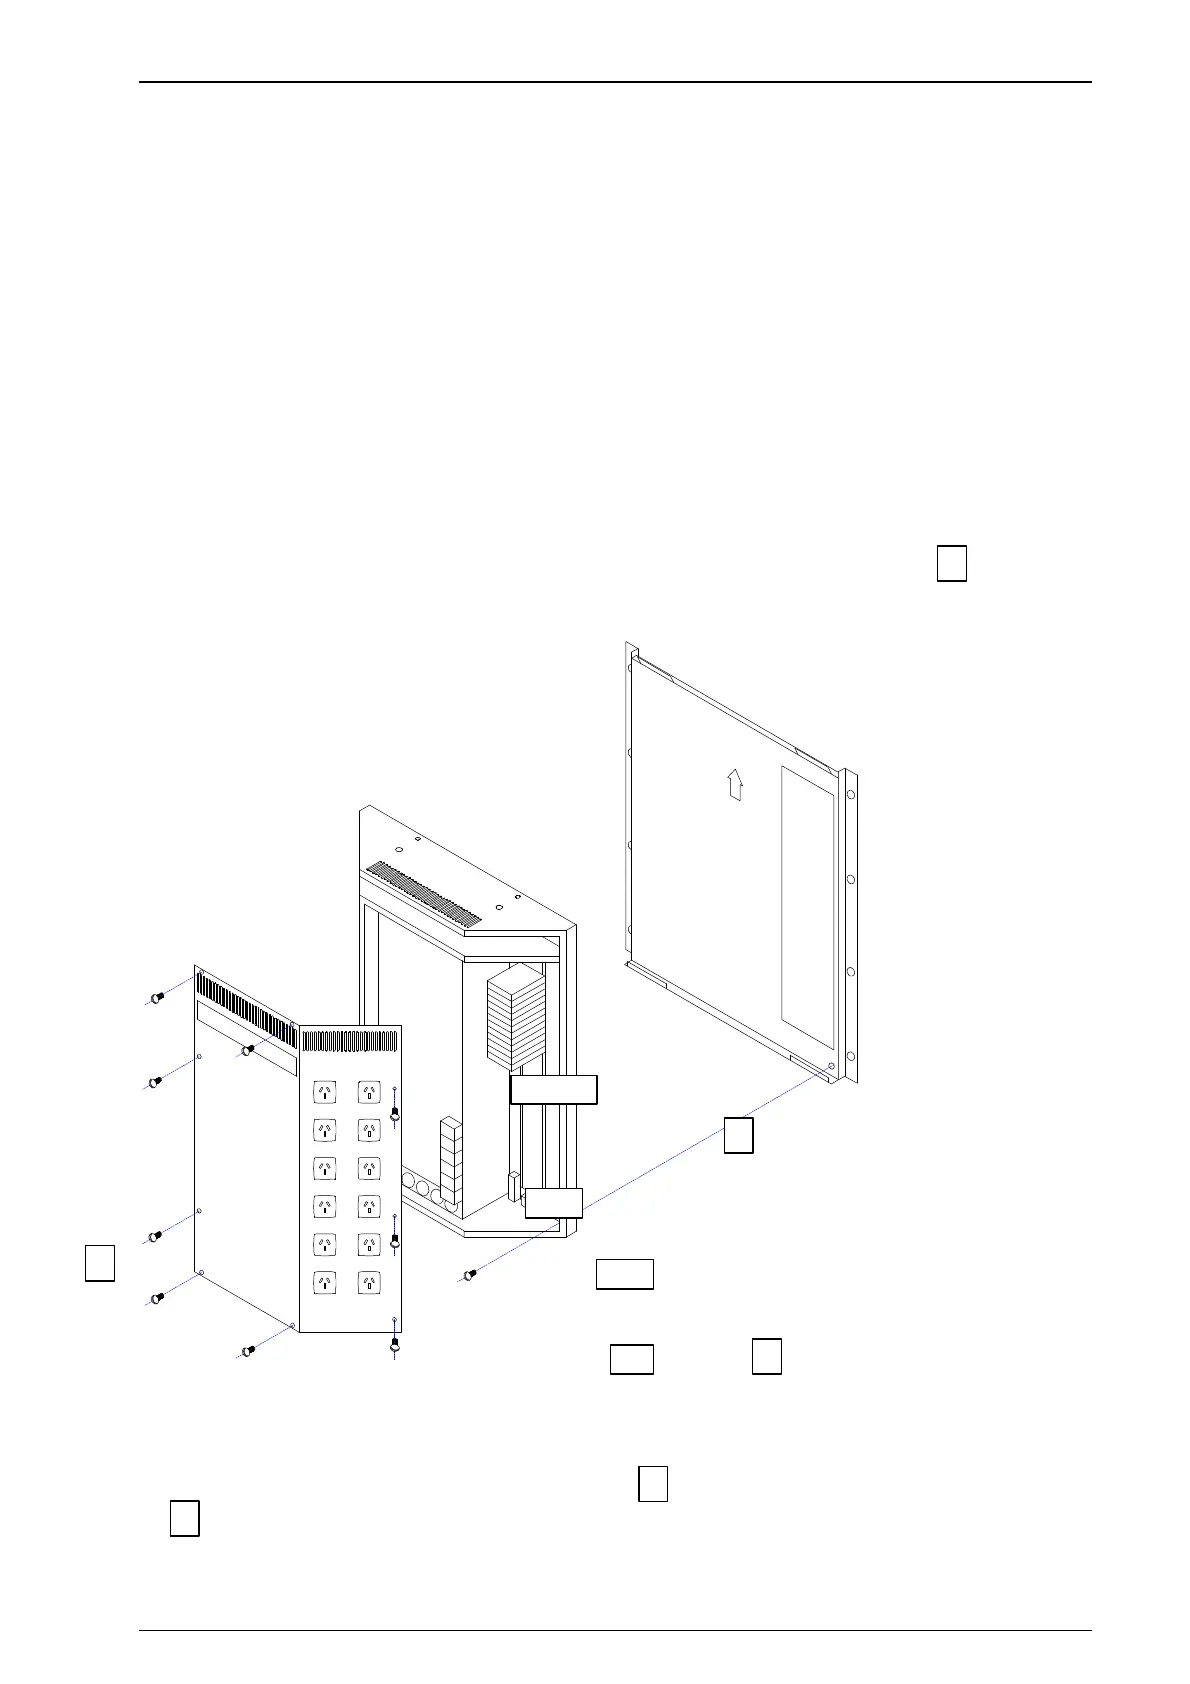
6.3 Mounting the dimmer to the bracket
Dimmers are attached to the pre-mounted brackets as follows:
1 Remove the dimmer’s right-hand front panel (eight screws).
2 Hang the top edge of the dimmer on the two bracket tabs. These support the
weight of the dimmer while allowing the bottom of the dimmer to pivot away from
the bracket.
3 Feed any cables (mains supply, output or control) into the rear of the dimmer and
terminate them as necessary. This may only be performed by a licenced
electrician.
4 Latch the dimmer onto the bracket by lifting the dimmer a few millimetres and
allowing the bottom two bracket tabs to engage.
5 Lock the dimmer in place with one M4 screw at the bottom right inside corner.
6 Re-attach the front panel.
JANDS
DANGER
HIGH VOLTAGE
HP12WM
JANDS
TOP
2
1
MAINS
EARTH
OUTPUTS
DMX
3
4
5
6