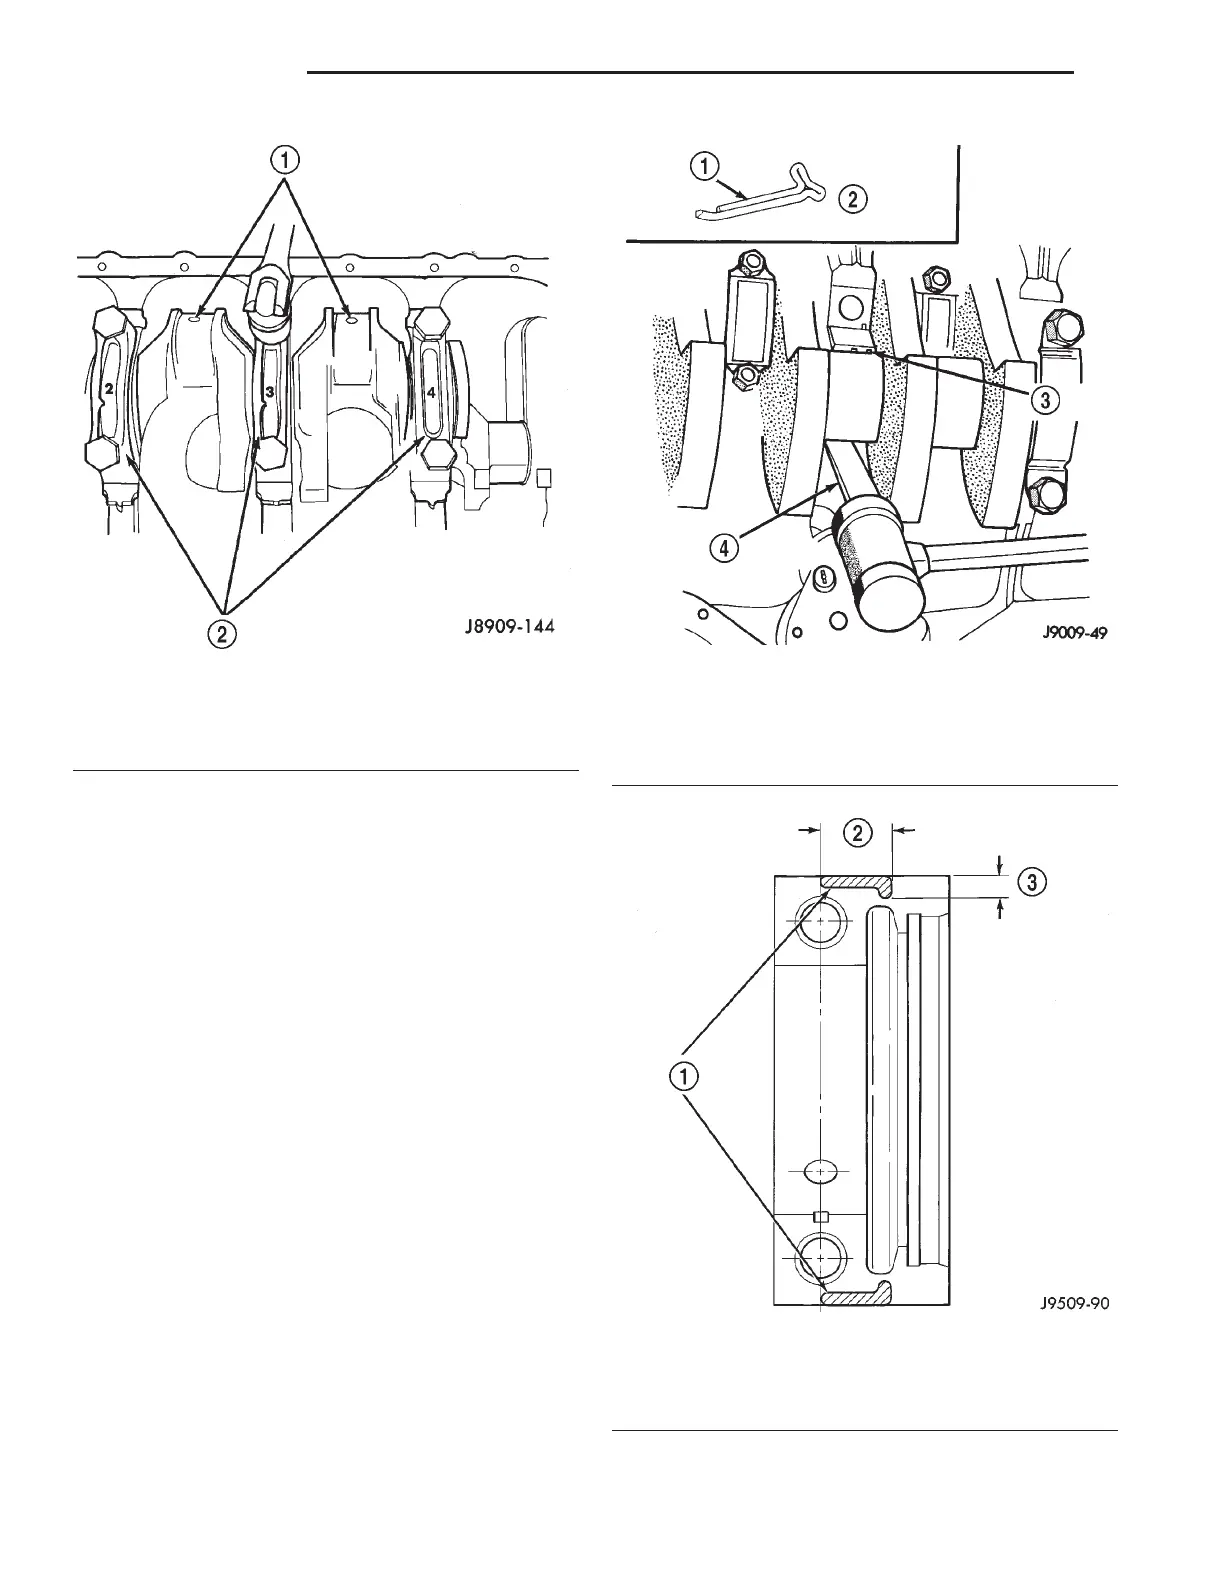
to remove the bearing insert (Fig. 77). After moving
the insert approximately 25 mm (1 inch), it can be
removed by applying pressure under the tab.
(8) Using the same procedure described above,
remove the remaining bearing inserts one at a time
for inspection.
INSTALLATION
(1) Lubricate the bearing surface of each insert
with engine oil.
(2) Loosen all the main bearing caps. Install the
main bearing upper inserts.
(3) Install the lower bearing inserts into the main
bearing caps.
(4) Install the main bearing cap(s) and lower
insert(s).
(5) Clean the rear main bearing cap (No.5) mating
surfaces.
(6) Apply Mopart Gasket Maker, or equivalent on
the rear bearing cap (Fig. 78). The bead should be 3
mm (0.125 in) thick. DO NOT apply Mopart Gasket
Maker, or equivalent to the lip of the seal.
(7) Install the rear main bearing cap. DO NOT
strike the cap more than twice for proper engage-
ment.
(8) Tighten the bolts of caps 1, 3, 4 and 5 to 54
N·m (40 ft. lbs.) torque. Now tighten these bolts to 95
N·m (70 ft. lbs.) torque. Finally, tighten these bolts to
108 N·m (80 ft. lbs.) torque.
Fig. 76 Removing Main Bearing Caps and Lower
Inserts
1 – CONNECTING ROD JOURNAL
2 – MAIN BEARING CAPS
Fig. 77 Removing Upper Inserts
1 – COTTER PIN
2 – FABRICATED TOOL
3 – BEARING INSERT
4 – TONGUE DEPRESSOR
Fig. 78 Location of Mopar
T
Gasket Maker
1 – MOPART GASKET MAKER (OR EQUIVALENT)
2 – 19 mm (.75 IN)
3 – 6 mm (0.025 IN)
9 - 48 2.5L ENGINE XJ
REMOVAL AND INSTALLATION (Continued)






 To Next Page