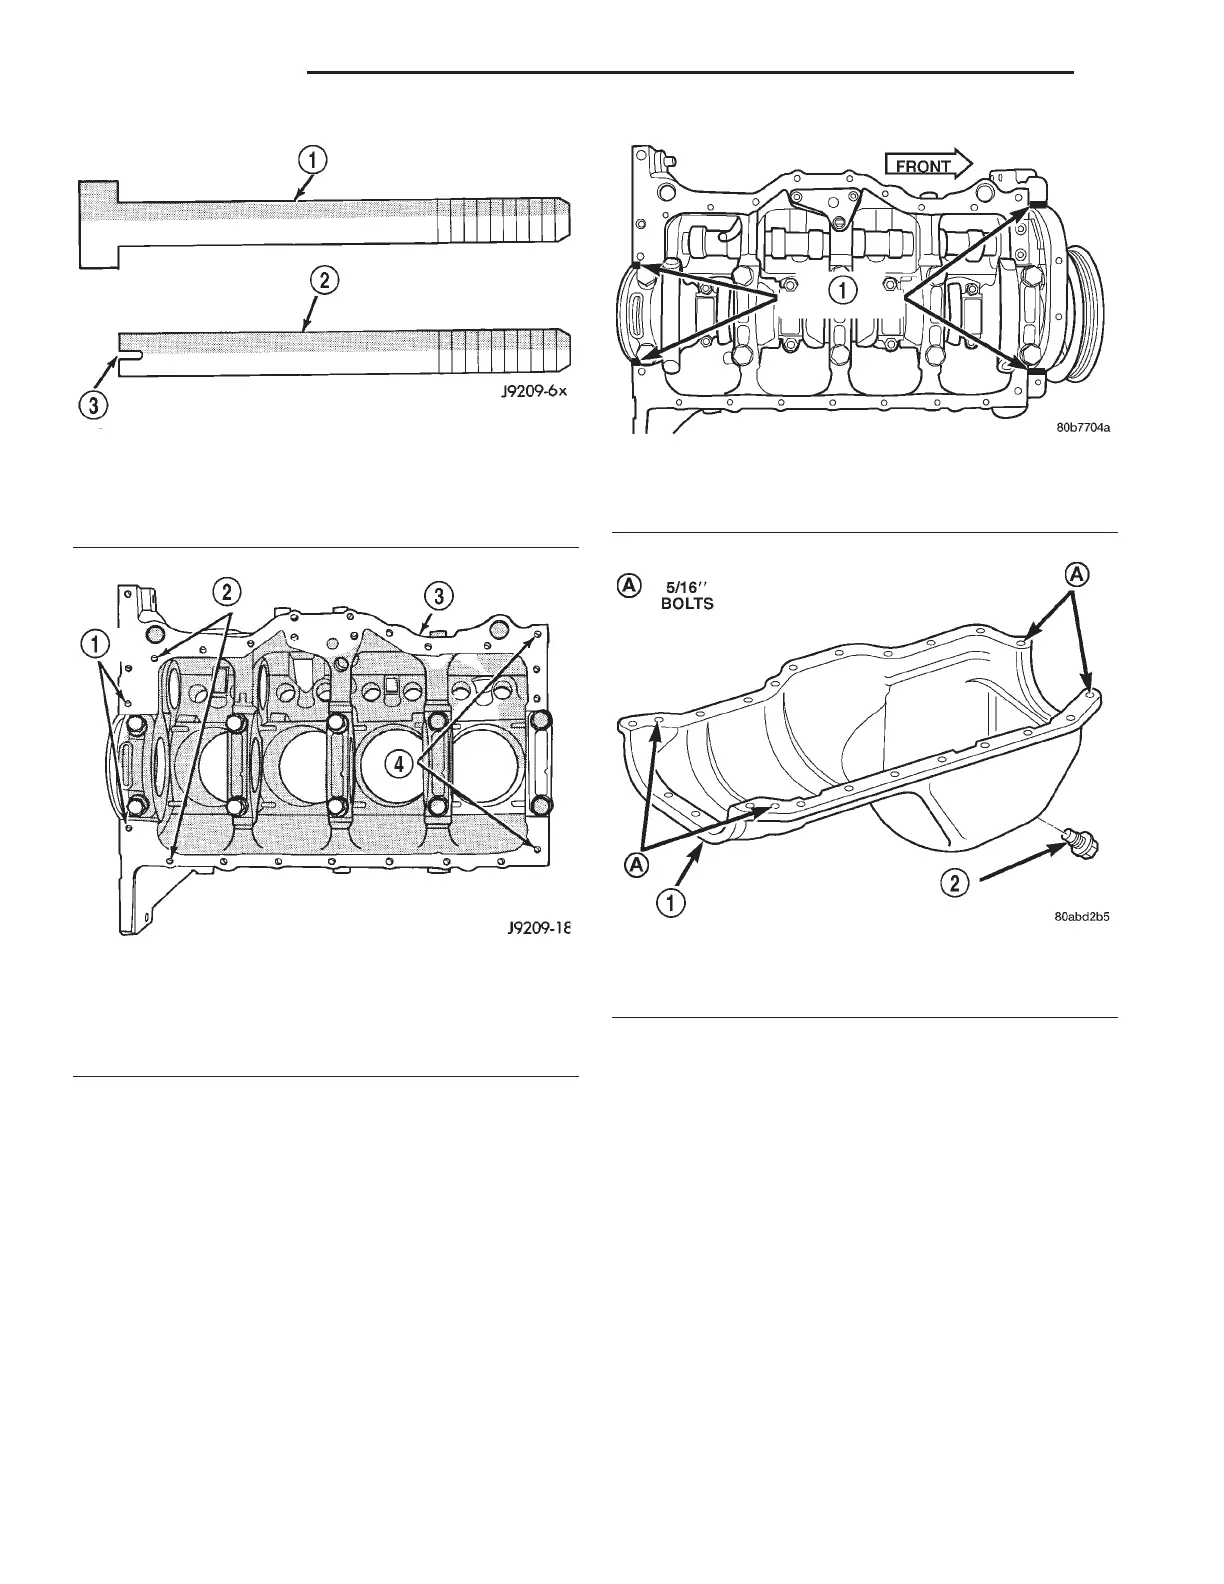
inch oil pan bolts (Fig. 83). Tighten these bolts to 15
N·m (132 in. lbs.) torque.
(8) Remove the dowels. Install the remaining 1/4
inch oil pan bolts. Tighten these bolts to 9.5 N·m (84
in. lbs.) torque.
(9) Lower the engine until it is properly located on
the engine mounts.
(10) Install the through bolts and tighten the nuts.
(11) Lower the jack stand and remove the piece of
wood.
(12) Install the flywheel and torque converter
housing access cover.
(13) Install the engine starter motor.
(14) Connect the exhaust pipe to the hanger and to
the engine exhaust manifold.
(15) Install the oil pan drain plug (Fig. 83).
Tighten the plug to 34 N·m (25 ft. lbs.) torque.
(16) Lower the vehicle.
(17) Connect negative cable to battery.
(18) Fill the oil pan with engine oil to the specified
level.
WARNING: USE EXTREME CAUTION WHEN THE
ENGINE IS OPERATING. DO NOT STAND IN A
DIRECT LINE WITH THE FAN. DO NOT PUT YOUR
HANDS NEAR THE PULLEYS, BELTS OR FAN. DO
NOT WEAR LOOSE CLOTHING.
(19) Start the engine and inspect for leaks.
OIL PUMP
The positive-displacement gear-type oil pump is
driven by the distributor shaft, which is driven by a
gear on the camshaft. Oil is siphoned into the pump
Fig. 80 Fabrication of Alignment Dowels
1 – 1/488 3 1 1/288 BOLT
2 – DOWEL
3 – SLOT
Fig. 81 Position of Dowels in Cylinder Block
1 – 5/1688 HOLES
2 – DOWEL HOLES
3 – CYLINDER BLOCK
4 – 5/1688 HOLES
Fig. 82 Location of Mopar
T
Silicone Adhesive
Sealant on Cylinder Block
1 – SEALER LOCATIONS
Fig. 83 Position of 5/16 inch Oil Pan Bolts
1 – OIL PAN
2 – OIL PAN DRAIN PLUG
9 - 50 2.5L ENGINE XJ
REMOVAL AND INSTALLATION (Continued)








 To Next Page