Do you have a question about the Jetson Bolt Pro and is the answer not in the manual?
Covers weight limits, health conditions, and age/supervision requirements for safe operation.
Details safe operating environments, conditions, and rider behaviors to avoid risks.
Warns against unauthorized disassembly, modification, or repair to avoid voiding warranty and causing malfunctions.
Details specific actions to avoid while operating the bike, like lifting with wheels spinning or jumping.
Provides contact information for maintenance and repair assistance.
Instructions for proper disposal of used batteries, emphasizing recycling and environmental safety.
States compliance with FCC rules and potential interference with radio communications.
Warns about Cadmium exposure known to cause cancer and birth defects.
Outlines the 1-year warranty against defects in materials and workmanship for new products.
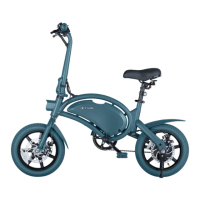
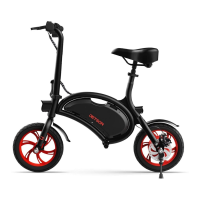
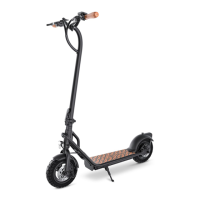
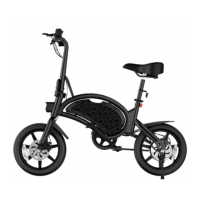
Lists major parts like wheels, frame, handlebars, seat, motor, and brakes.
Lists items like charging cable and charger, essential for operation.
Identifies the location and function of the bell and front reflector on the handlebar.
Details the power button, battery indicator lights, and cruise control/headlight button.
Describes the different tool kits (2-bit tool, spanner wrench, multi-tool) provided for assembly.
Lists and identifies the various tips included in the multi-tool for adjustments and repairs.
Lists key product dimensions, weight, battery, charger, motor, speed, range, and certifications.
Provides recommendations for rider height and leg clearance for safe and comfortable riding.
Directs users to scan a QR code for updated onboarding and support resources.
Alerts users to potential injury from non-compliance with assembly instructions, especially concerning small parts and adult supervision.
Provides essential starting notes before beginning bike assembly, including packaging removal and directional orientation.
Step-by-step instructions on how to raise and secure the handlebar to the vertical position for riding.
Details pushing the latch to the closed position to secure the unfolded handlebar.
Explains how to rotate the locking ring to secure the folding latch, ensuring it cannot be pulled open.
Provides step-by-step instructions to fold the handlebar for storage and transport.
Guides on lowering the seat post and securing it with the clamp latch and knob, ensuring minimum insertion mark is not visible.
Instructions on how to check if the seat is securely fastened by applying downward pressure.
Instructs on finding the bolt on the frame above the rear wheel for fender attachment.
Details how to remove the bolt and nut (with washer) using specific Allen keys or a wrench.
Explains how to hold the fender over the rear wheel, aligning the pre-drilled hole with the frame.
Guides on using the removed hardware to attach the fender to the frame, with or without a nut.
Instructions on tightening the bolt, avoiding over-tightening, and checking fender security and wheel clearance.
Guides on aligning the 'R' pedal with the crank arm and threading it clockwise, cautioning against angled insertion.
Details tightening pedals with a wrench and notes the reverse threading of the left pedal.
Instructions on wrapping the elastic straps of the rear light around the seat post for mounting.
Explains how to loop the elastic onto the hook and check that the rear light is securely fastened.
Guides on loosening the bell clamp, rotating the bell to a reachable position, and tightening the screw.
Instructions on rotating the clamp around the handlebar and sliding the reflector towards the center for proper positioning.
Explains how to rotate the handlebar forward or backward for optimal reach and grip angle of handbrakes.
Details pushing the latch down to secure the handlebar in its new position and troubleshooting loose clamps.
Guides on adjusting seat height to achieve a slight bend in the knee while pedaling, ensuring the minimum insertion mark is not visible.
Details how to check seat security and adjust the clamp knob if it's too tight or too loose.
Step-by-step guide on connecting the charger, plugging it in, and identifying a full charge by the indicator light.
Provides crucial notes on using the correct charger, keeping the port closed, and battery health during charging.
Explains how to add air to the tires to reach the recommended pressure of 35-45 PSI using a manual pump.
Outlines pre-ride checks for brake levers, pads, and overall functionality to ensure safe stopping.
Details how to adjust the brake caliper alignment to prevent rubbing or squeaking and ensure proper pad contact with the disc.
Instructions on how to turn the Bolt Pro on and off using the power button to preserve battery life.
Explains how to read the indicator lights on the handlebar to determine the battery's charge percentage.
Guides on turning the headlight on/off by holding the cruise control/headlight button, noting it only works when the motor is on.
Details how to turn the rear light on and cycle through its three lighting effects using quick presses.
Step-by-step instructions for removing the rear light, opening the battery compartment, and replacing the 3V battery.
Guides on sliding the light back into the casing and reattaching the rear light to the seat post securely.
Instructions on how to use the bell as an alert by flicking the tab with the left-hand thumb.
Explains how to pivot the kickstand down to stand the bike and pivot it up before riding.
Describes how the motor provides boosts to supplement pedaling, increasing speed and range with less effort.
Guides on using the twist throttle for acceleration, maintaining speed, and slowing down like a motorbike.
Explains how to set and maintain a speed using the throttle and button, and how to disengage cruise control.
Instructions on how to ride the bike using only pedal power, without the motor engaged, noting the headlight will not work.
Details how to use the handbrakes to slow down or stop, recommending gradual application to avoid abrupt movements.
Lists factors like riding surface, weight, riding style, temperature, incline, and battery maintenance that impact speed and range.
Provides a checklist of essential safety checks for brakes, pedals, frame, steering, and wheels before each ride.
Illustrates and explains the importance of proper helmet positioning, covering the forehead for maximum protection.
Provides guidelines for handling the e-bike, avoiding vibration, moisture, and snagging wires.
Advises on proper storage conditions, including keeping the e-bike indoors, dry, covered, and away from heat.
Offers instructions on cleaning the e-bike components using damp cloths and mild soap, warning against direct water spray.
| Motor | 350W |
|---|---|
| Top Speed | 15.5 mph |
| Weight Capacity | 265 lbs |
| Frame | Aluminum alloy |
| Foldable | Yes |
| Brakes | Rear Disc Brake |
| Battery | 36V 6.0Ah Lithium-Ion |
| Display | LED display |
| Lights | Front LED headlight, rear LED lights |
| Charging Time | 4 hours |