23
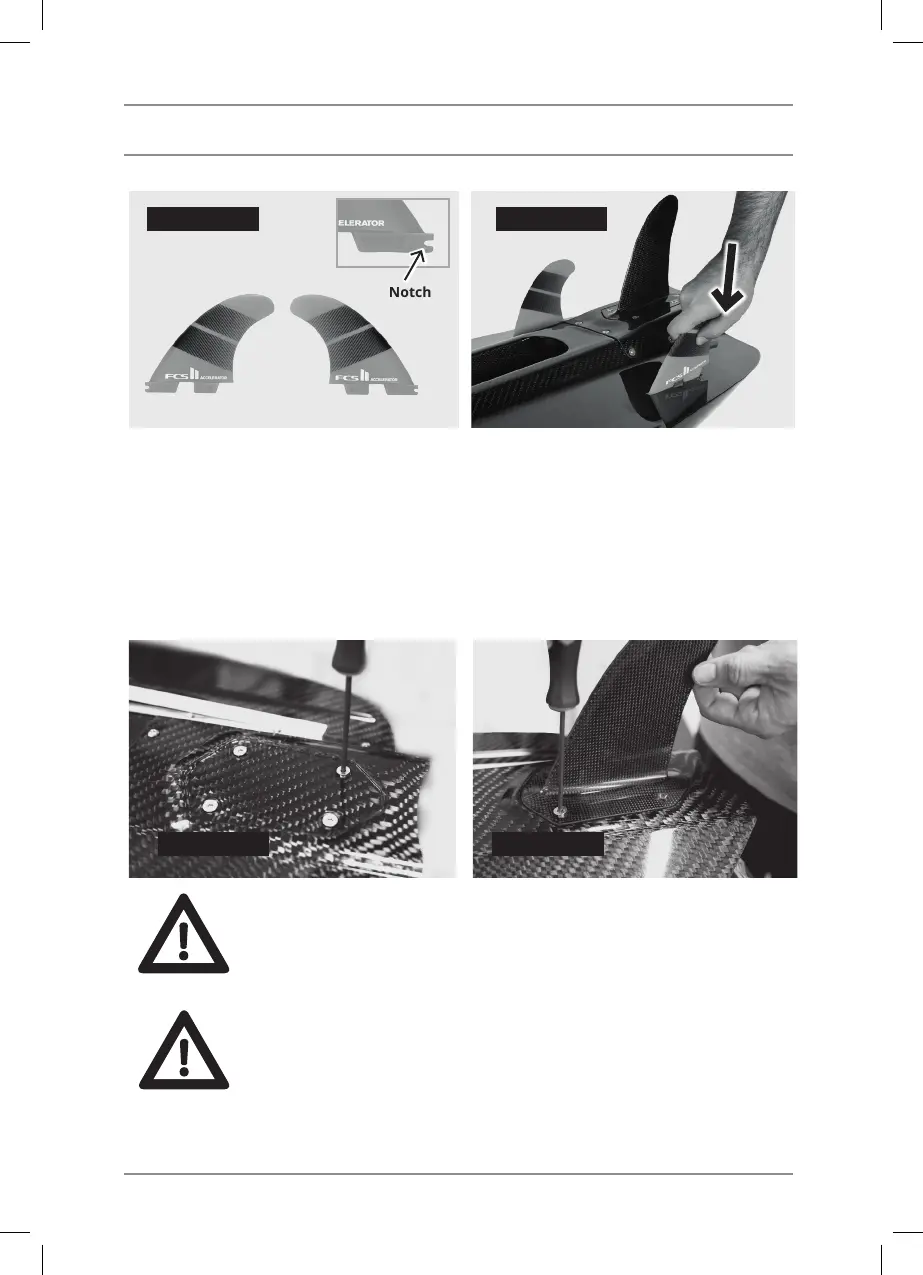
The ns are installed mechanically. Slide the front part into the cassette in the oat so that the notch is
fully inserted - FIGURE 2. Then, snap the back part into the oat with a quick motion. Check that
the n is secure. Attach the other n in the same way.
MAIN FIN FASTENING
Unscrew 4 M 6x8 Allen screws from the platform – FIGURE 3. Place the main n on the platform.
Make sure the n is oriented correctly. Insert the removed screws in the openings on the main n and
fasten the n – FIGURE 4. Check for tightness – the n should allow any movement.
Keep all the screws openings for attaching ns clean, without sand and
other impurities which might damage the thread. After several rides,
lubricate the screw openings with Vaseline to prevent their corrosion.
It is strongly recommended to use all ns under all circumstances. It ensures
the maximum control of the movement of the motorized power board.
We strongly recommend removing all ns when transporting the Jet-
Surf™ motorized power board. The ns are delicate and are not designed
to support the power board weight on hard surface. Transporting the
power board with the ns attached may result in damage to the ns
and/or power board.
FIGURE 3 FIGURE 4
RIDE
NOTICE
CAUTION
FIGURE 1 FIGURE 2
Notch
 Loading...