John Bean BFH 1000 Operators Manual
Page 29
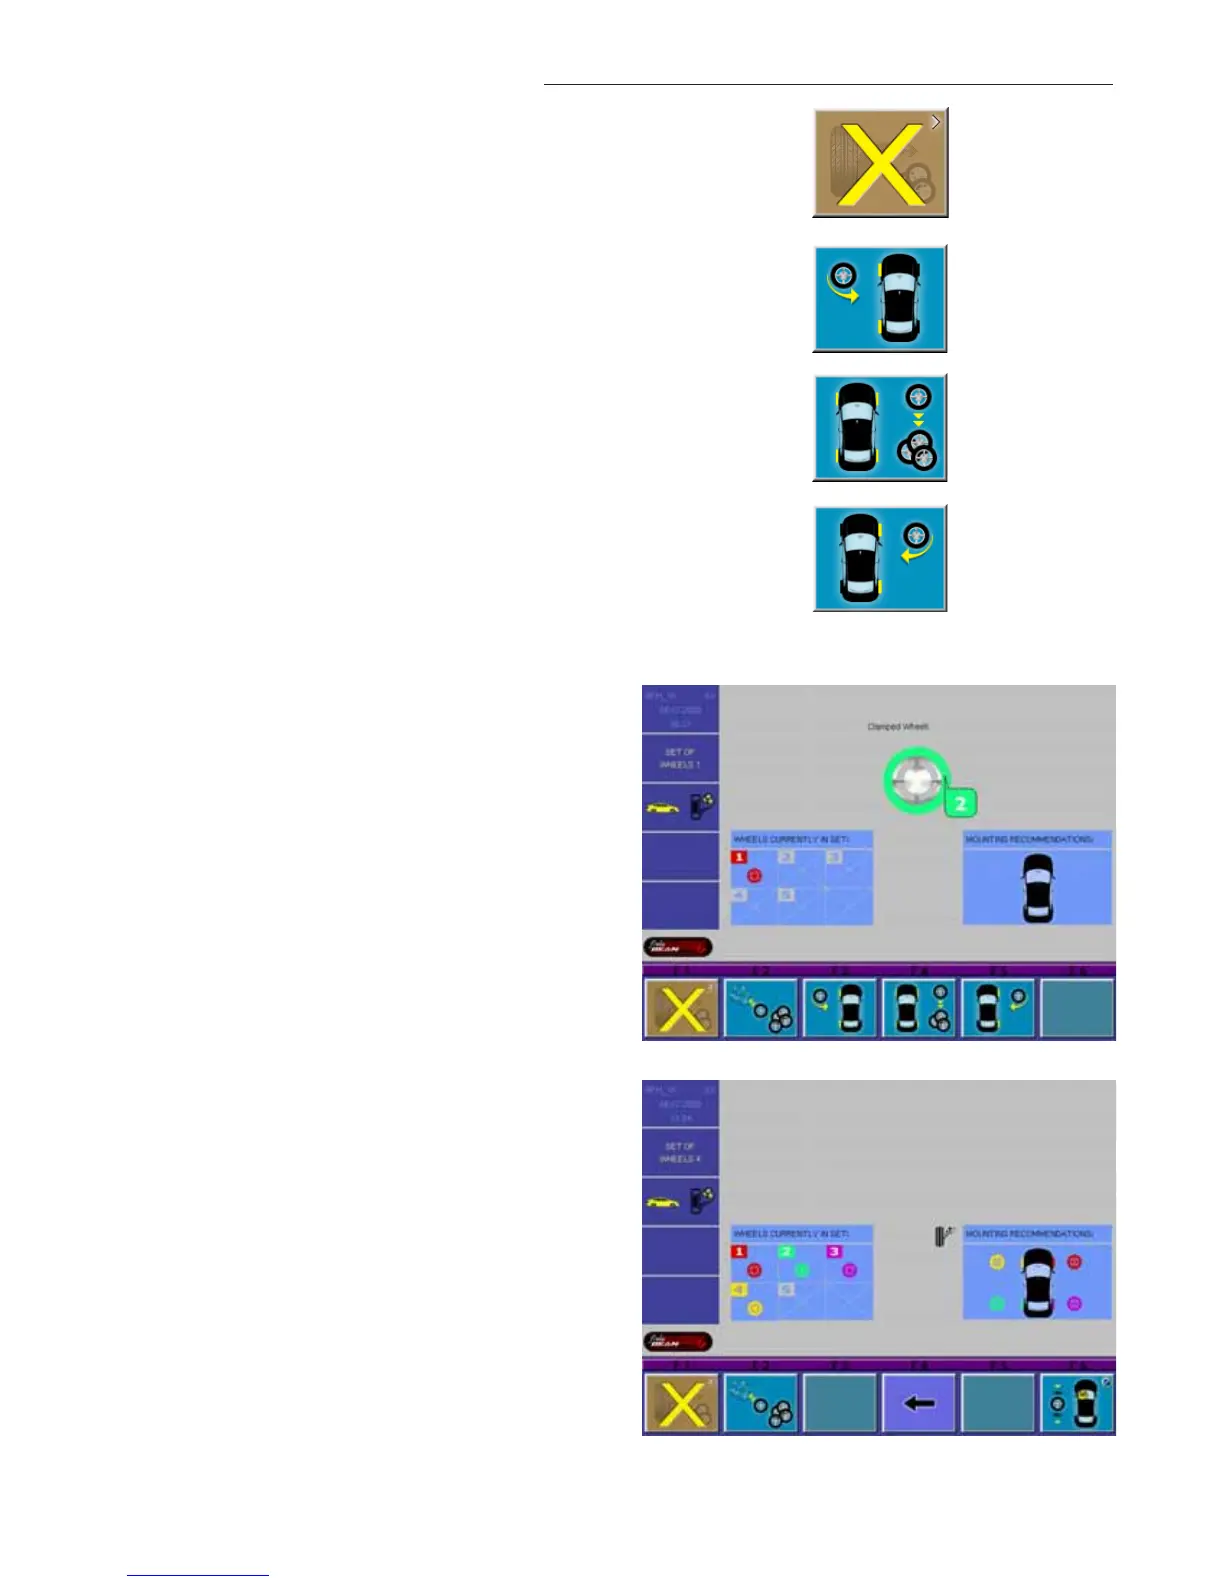
Press F1 to cancel the complete procedure
and DELETE all data that have already been
entered to the set of wheels so far. See Fig-
ure 41.
Press the F3 button for weels that can only be
mounted to the LEFT side of the car are added
to the set. See Figure 42.
Press the F4 button for wheels that can be
mounted to BOTH sides of the car are added
to the set. See Figure 43.
Press the F5 button for wheels that can only
be mounted to the RIGHT side of the car are
added to the set. See Figure 44.
Now the 2nd wheel can be clamped and the
measuring run started. Depending on the
measurements the BALANCING screen or the
BFH 1000 ENTRY screen will come up. After
the wheel has been matched and / or the im-
balance has been corrected the wheel is
unclamped from the balancer and the SET OF
WHEELS 2 screen will come up as shown in
Figure 45 with a GREEN tag.
Wheel number 2 can now be entered to the
set by pushing either F3, F4 or F5, depending
which kind of wheel is used.
When the 4th wheel has been measured the
SET OF WHEELS 4 screen will come up. As
soon as the 4th wheel has been entered to
the set the BFH 1000 wheel balancer auto-
matically shows which wheel shall be mounted
on which position of the car. See Figure 46.
The recommended placement positions are
clearly indicated on the screen showing each
wheel with a different color.
Figure 41
Figure 42
Figure 43
Figure 44
Figure 45
Figure 46