Disassembling the Controller
1. Remove power from the controller.
2. Remove the plastic cover.
3. With a Phillips head screwdriver, remove the four
screws that secure the metal shield, and set the
screws aside.
4. Remove the metal shield. Carefully pry the shield up
from the top (hole vented side) first and then push
out the other side to slip the port holes past the port
edges. Then lift the shield up and away. Set shield
aside.
Note: Be mindful of the side clips on the controller's
two Ethernet ports.
5. Use a 1/4 in. (7 mm) nut driver to unscrew the four
metal standoffs, and set them aside.
6. Carefully pry up the FX30E/FX60E module board,
noting that the two-row, 50-pin connector is on the
option card side. Keep the board level as you work it
loose from this connector.
Set the processor module board aside. Note the
jumper block on the base board behind the RS-485
port.
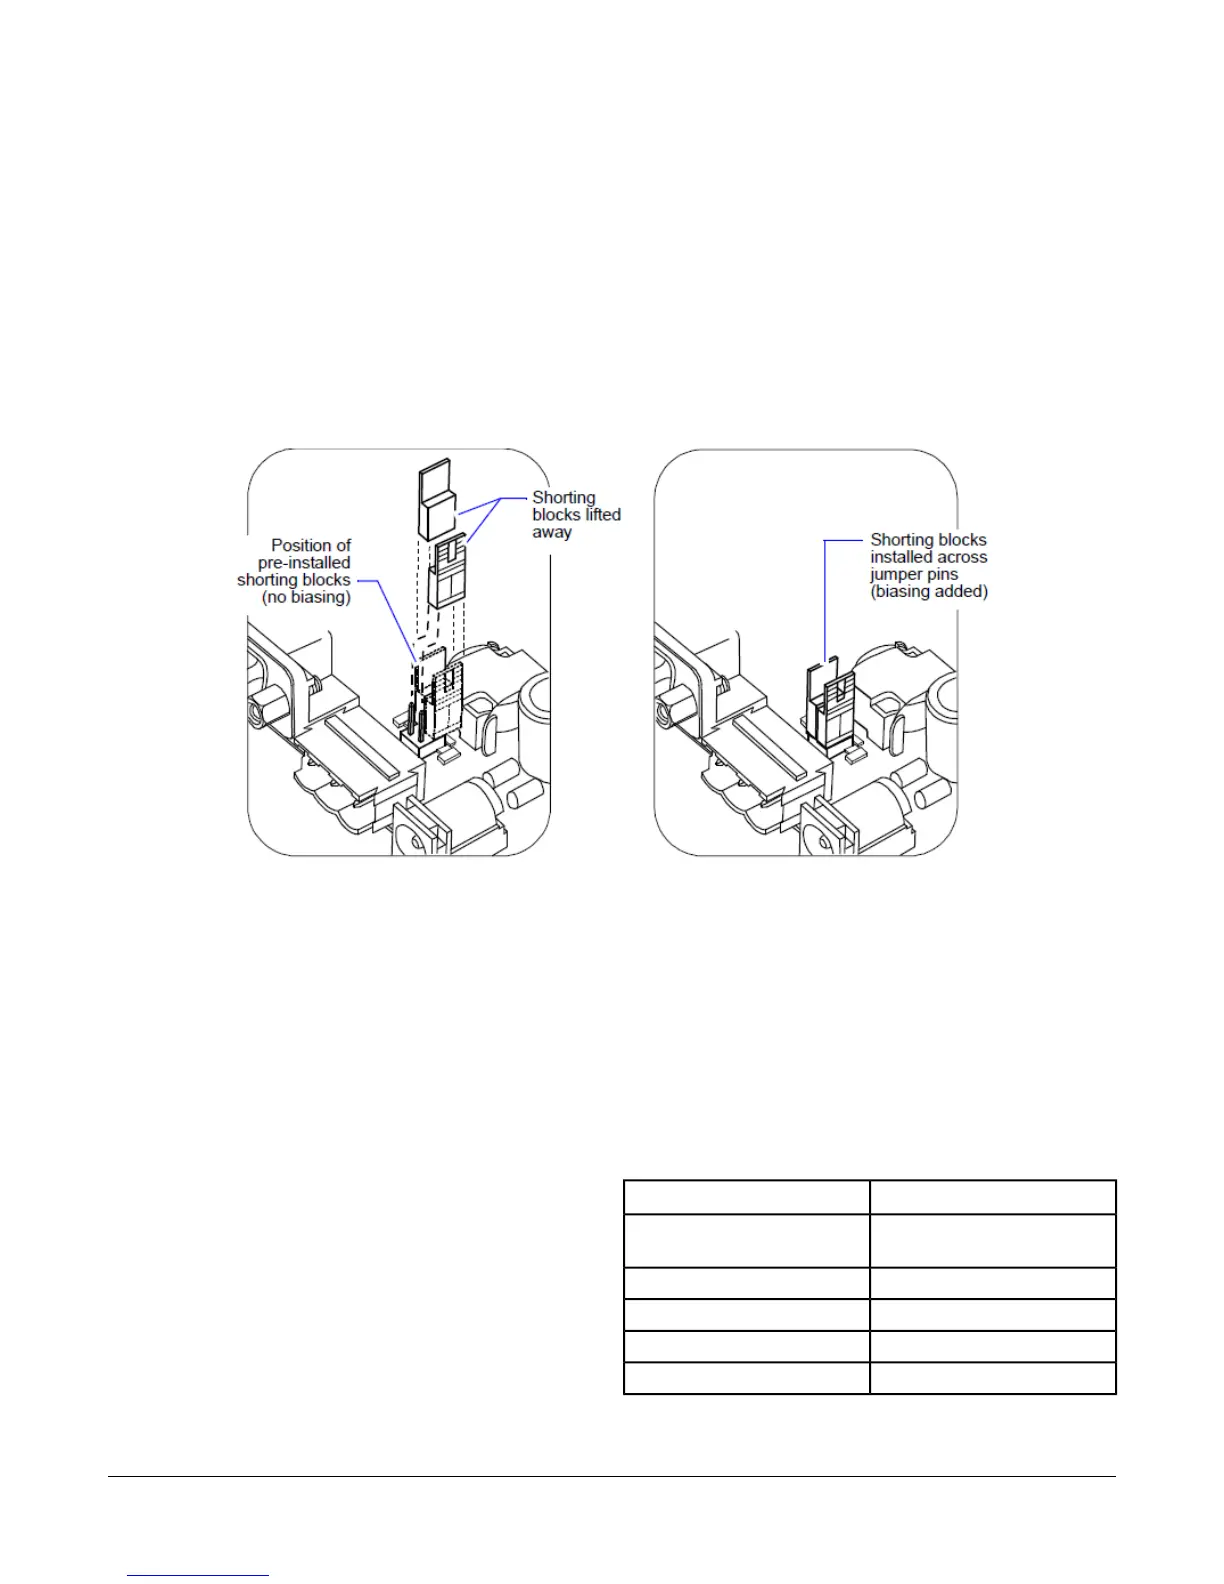
Figure 12: Installing Shorting Blocks across Both Sides of Jumper Block
Installing Shorting Blocks to Add
RS-485 Biasing
1. Locate the four jumper pins behind the RS-485 port,
with 2-pin shorting blocks installed on one pin each.
2. To add biasing, remove and replace both shorting
blocks back onto the jumper pins.
Reassembling the Controller
1. Carefully replace the processor module board onto
the 50-pin connector, with its corner mounting holes
aligned on the four lower standoffs. Press down on
the connector to fully seat the board.
2. Refasten the four metal hex standoffs by hand
tightening with a 1/4 in. (7 mm) nut driver.
3. Replace the shield back onto the unit. Carefully ease
the shield over the port side first and then spring it
down over the other side. Make sure that the shield’s
corner holes align with the metal standoffs.
4. With a Phillips head screwdriver, refasten the four
screws that secure the shield to the standoffs.
5. Replace the plastic cover onto the unit.
Setup and Adjustments
Default Communication and Login
Properties
The new FX30E/FX60E is pre-configured with default
properties as defined in Table 5.
Table 5: FX30E/FX60E Default Properties
Default PropertyName
192.168.1.149Internet Protocol (IP)
Address
255.255.255.0Subnet Mask
192.168.1.1Default Gateway
jciRemote User Name
explorerRemote Password
18FX30E/FX60E Supervisory Controllers Installation Instructions