MAINTENANCE
SM-18003
4-9
4.2.6 RemovingDrainPan
(1) RemovethedecorativepanelaccordingtoSection4.2.3“RemovingOptionalDecorativePanel.”
(2) Removethescrewthenremovethewirecover.
(3) RemovetheelectricalboxcoveraccordingtoSection4.2.2“RemovingElectricalBoxCover.”
Disconnecttheconnectorsofthegaspipethermistor,theliquidpipethermistor,theexpansionvalve
and the fan motor.
(4) Removethebell-mouthaccordingtoSection4.2.4“RemovingTurboFanandFanMotor.”
(5) DrainingWater
(a) Pullouttherubberplugfromthedrainpan,anddrainthewaterremaininginthedrainpan.
Althoughsiliconsealantisappliedovertherubberplug,therubberplugcanberemovedbypulling
thebottomside.
NOTE:
1.Donotdamagetherubberplugwithacutter.
2.Donotdamageorremovetheinsulationattachedtothebottomsideoftherubberplugwhen
removing/attachingit
(b) Checkanyclogginginthedrainhole.
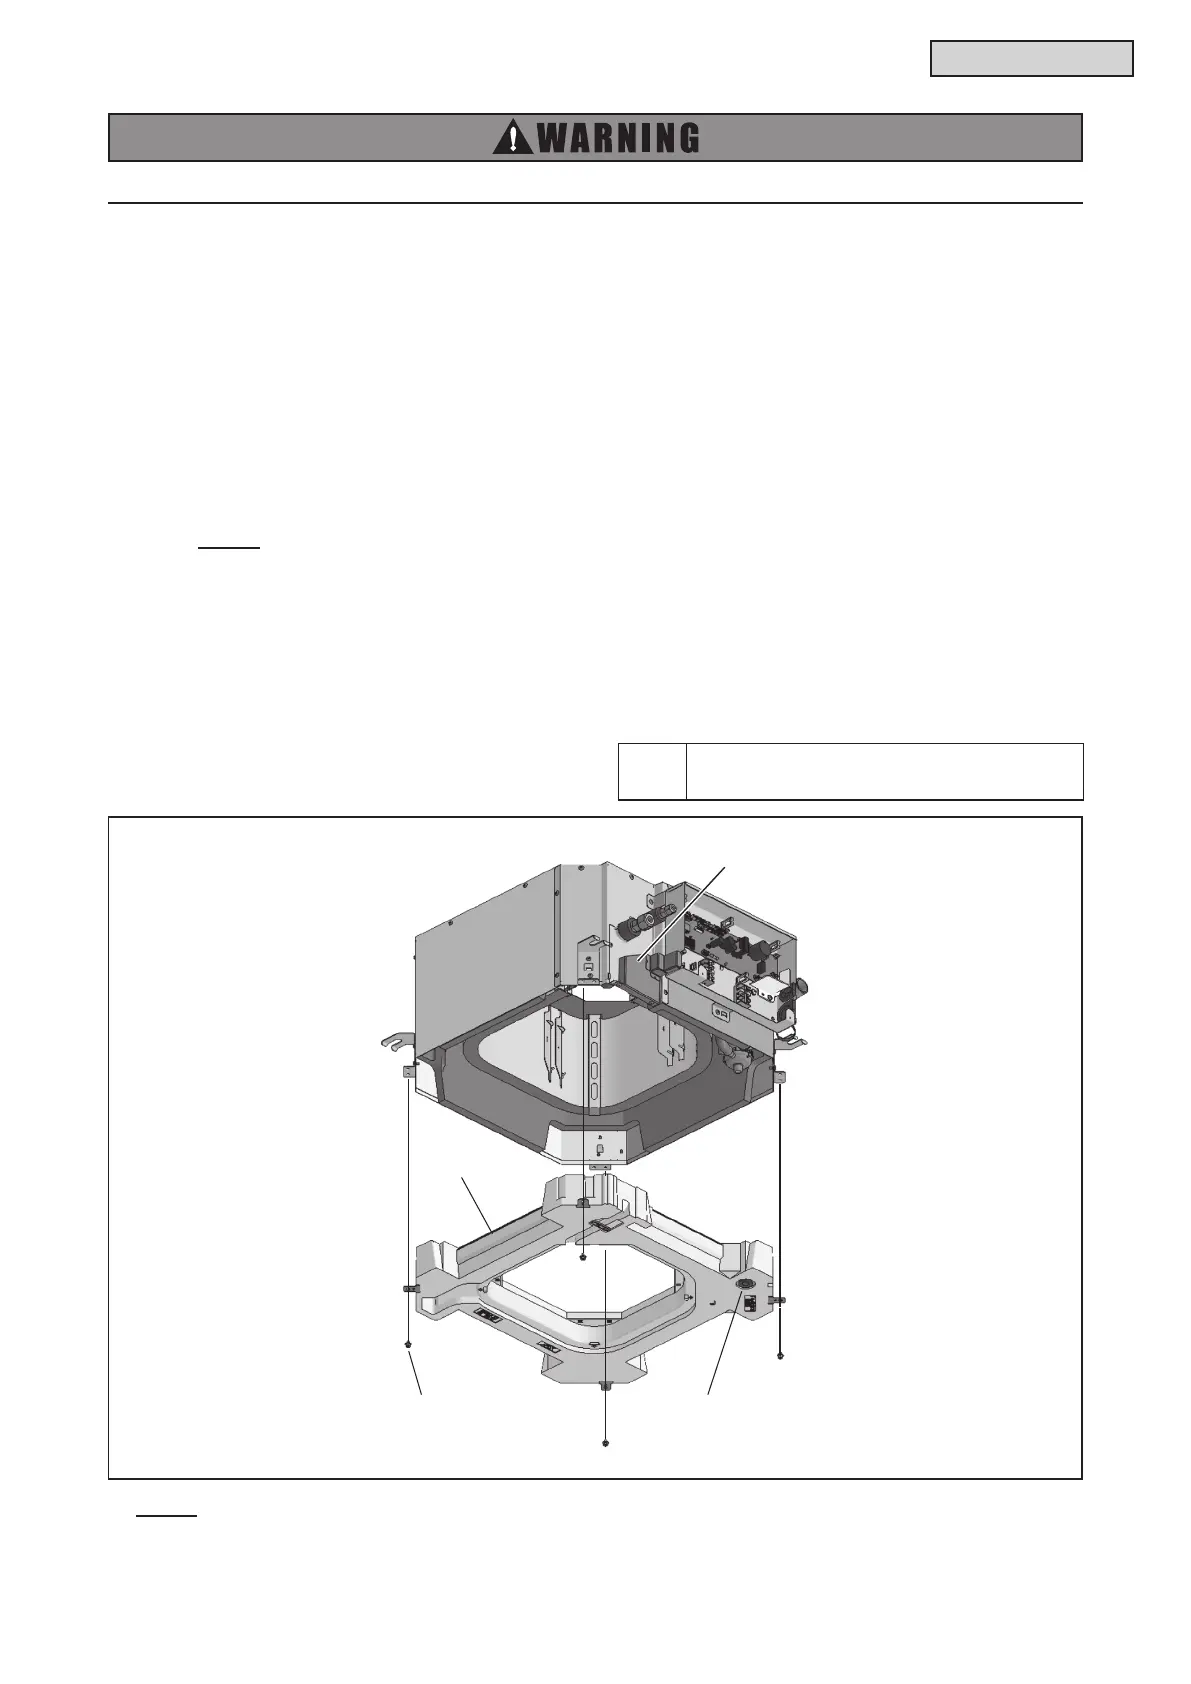
(6) RemovingDrainPan
(a) Remove4screwsxingthedrainpantotheunit.
(b) Thenliftthedrainpandowntoremoveitfromtheunit.
TURN OFF all power source switches.
NOTE:
Whenattachingtherubberplugagain,donotputitinwithaphillipsscrewdriver,etc.Aclearanceof
1/16inch(2mm)isleftbetweentherubberplugandthedrainpan.
Rubber Plug
Fixing Screw (4 pcs)
Drain Pan
Tool
PhillipsScrewdriver,
Bucket(withanapprox.5litercapacity)

 Loading...