– 28 –
8
Selection of the optional input/output function (Function setting No. 12)
Select function setting No. 12 with the operating procedure of function set-
ting procedures 1) through 3).
Select the items of "End", "in" and "ouT" with keys
5
and
6
.
[When "in" is selected]
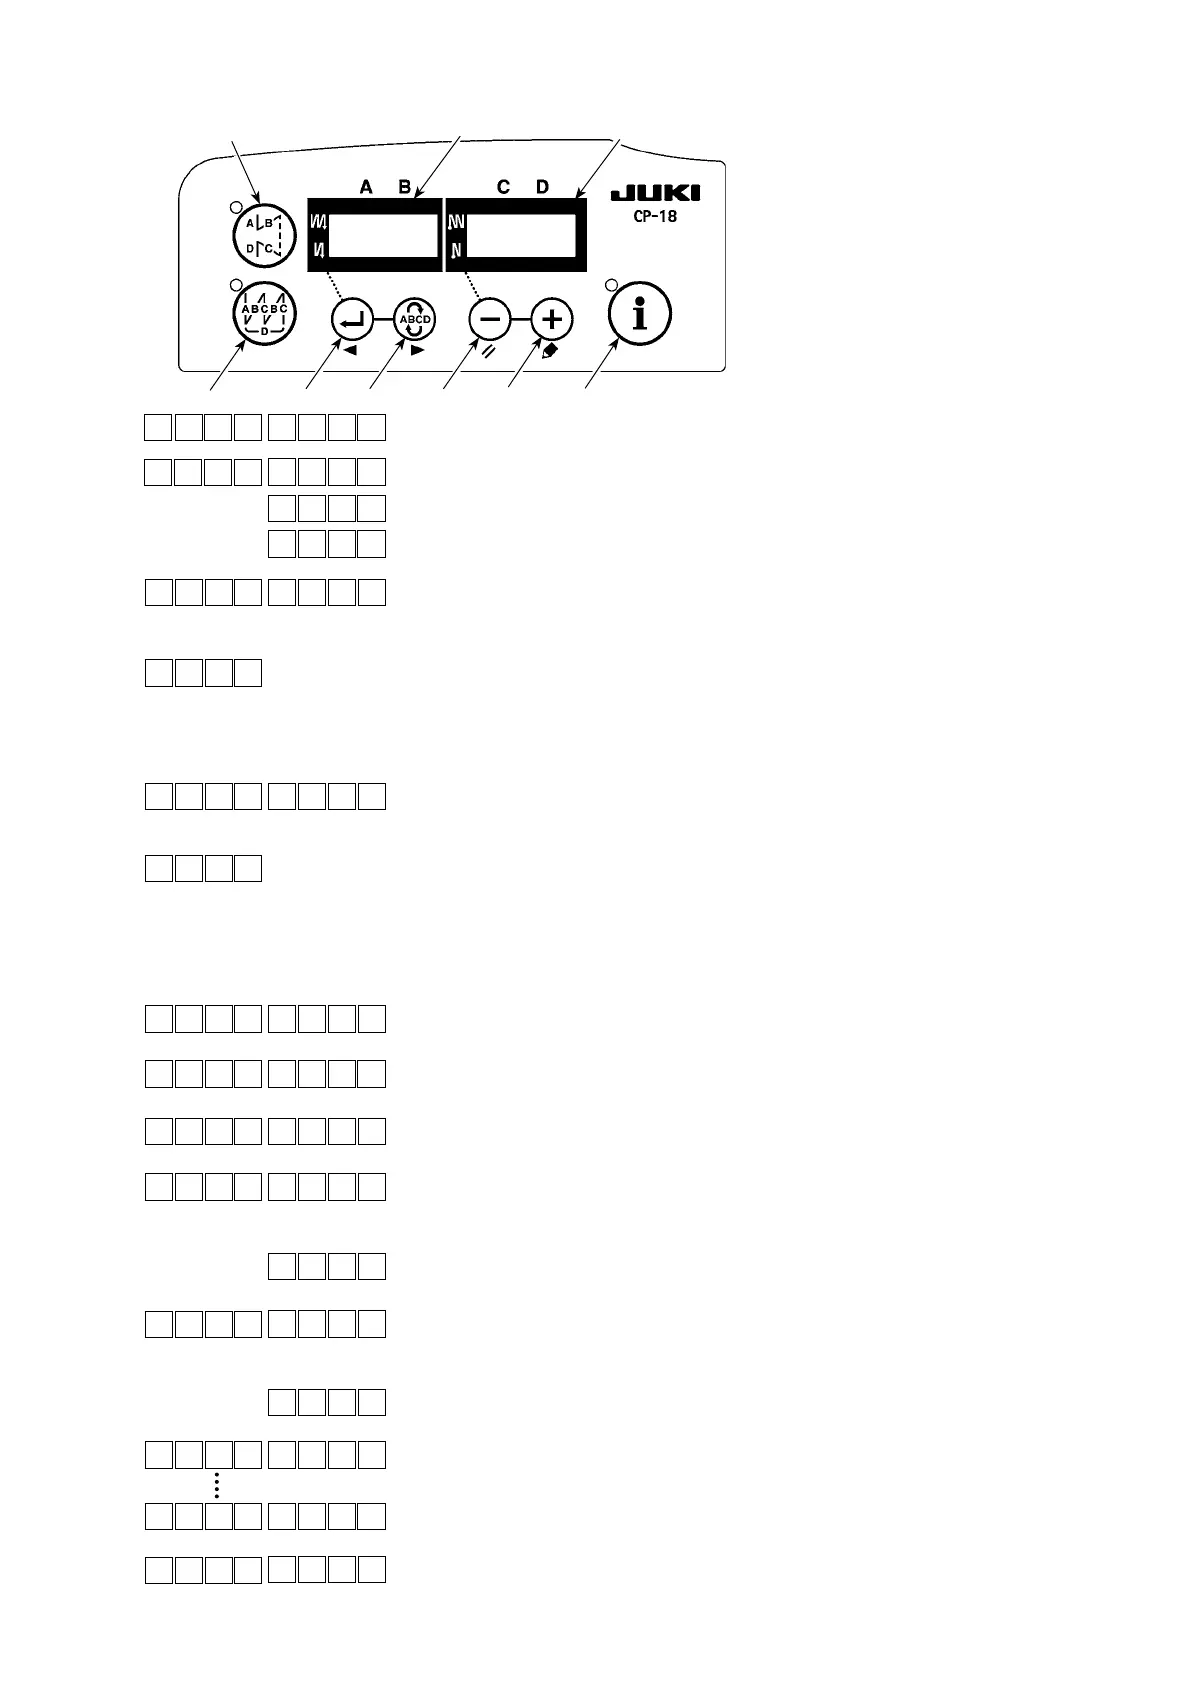
The input function setting connector indication number is shown on indicat-
ing section
A
. Designate the indication number by means of key
3
or
4
.
Specify the function of the pin of the connector corresponding to the indica-
tion number by means of key
5
or
6
.
Function code and abbreviation are displayed alternately on indicator
B
.
(For the relation between signal input No. and connector pin array, refer to
the separate list.)
[When "ouT" is selected]
The output function setting connector indication number is shown on indi-
cating section
A
. Designate the indication number by means of key
3
or
4
.
Specify the function of the pin of the connector corresponding to the indica-
tion number by means of key
5
or
6
.
Function code and abbreviation are displayed alternately on indicator
B
.
(Refer to the separate table for the relation between the signal output num-
bers and the connector pin conguration.)
*
Example) To assign the thread trimming function to the input function setting connector indication number "i01" (CN36-4)
1. Select function setting No. 12 with the operating procedure of function
setting procedures 1) through 3).
2. Select the item of "in" with keys
5
and
6
.
3. Select the port of the indication number "i01" by means of key
4
.
4. Select the thread trimming function, "TSW" with keys
5
and
6
.
5. Determine the thread trimming function, "TSW" with key
4
.
6. Set ACTIVE of the signal with keys
5
and
6
.
Set the display to "L" when the signal is "Low" and performing thread
trimming, and set the display to "H" when the signal is "High" and per-
forming thread trimming.
7. Determine the aforementioned function with key
4
.
8. Finish the optional input with key
4
.
9. Select the item of "End" with keys
5
and
6
to return to the function set-
ting mode.
Lighting alternately
6
543
1
2
7
B
A
[\
[\
<? <?
1 2 TPo _
_ni _
0i 1 ** *
1i 2
0o 1 ** *
Tuo _
0o 3
1 2 TPo _
0i 1 on P
L 4
0i 1 ST W
0i 1
L 4
H 4
0i 2 SFS W
_ni _
TP
o
_
_ni _
TP
o
_
nE_ d
TP
o
_
nE_ d
TP
o
_