• In a recessed posion inside a 19-in. four-post rack by using the recessed-mounng brackets
provided with a separately orderable four-post rack mount kit.
• On a two-post rack or on two posts of a 19-in. four-post rack by using the two-post mounng
brackets and screws provided with the switch.
• On a desk or other level surface by using the rubber feet provided with the switch.
To know the part numbers for ordering the separately orderable mounng kits, see the EX4400
Switches Datasheet.
1. Place the switch on a at, stable surface.
2. Wrap and fasten one end of the ESD wrist strap around your bare wrist, and connect the other end
of the strap to a site ESD point.
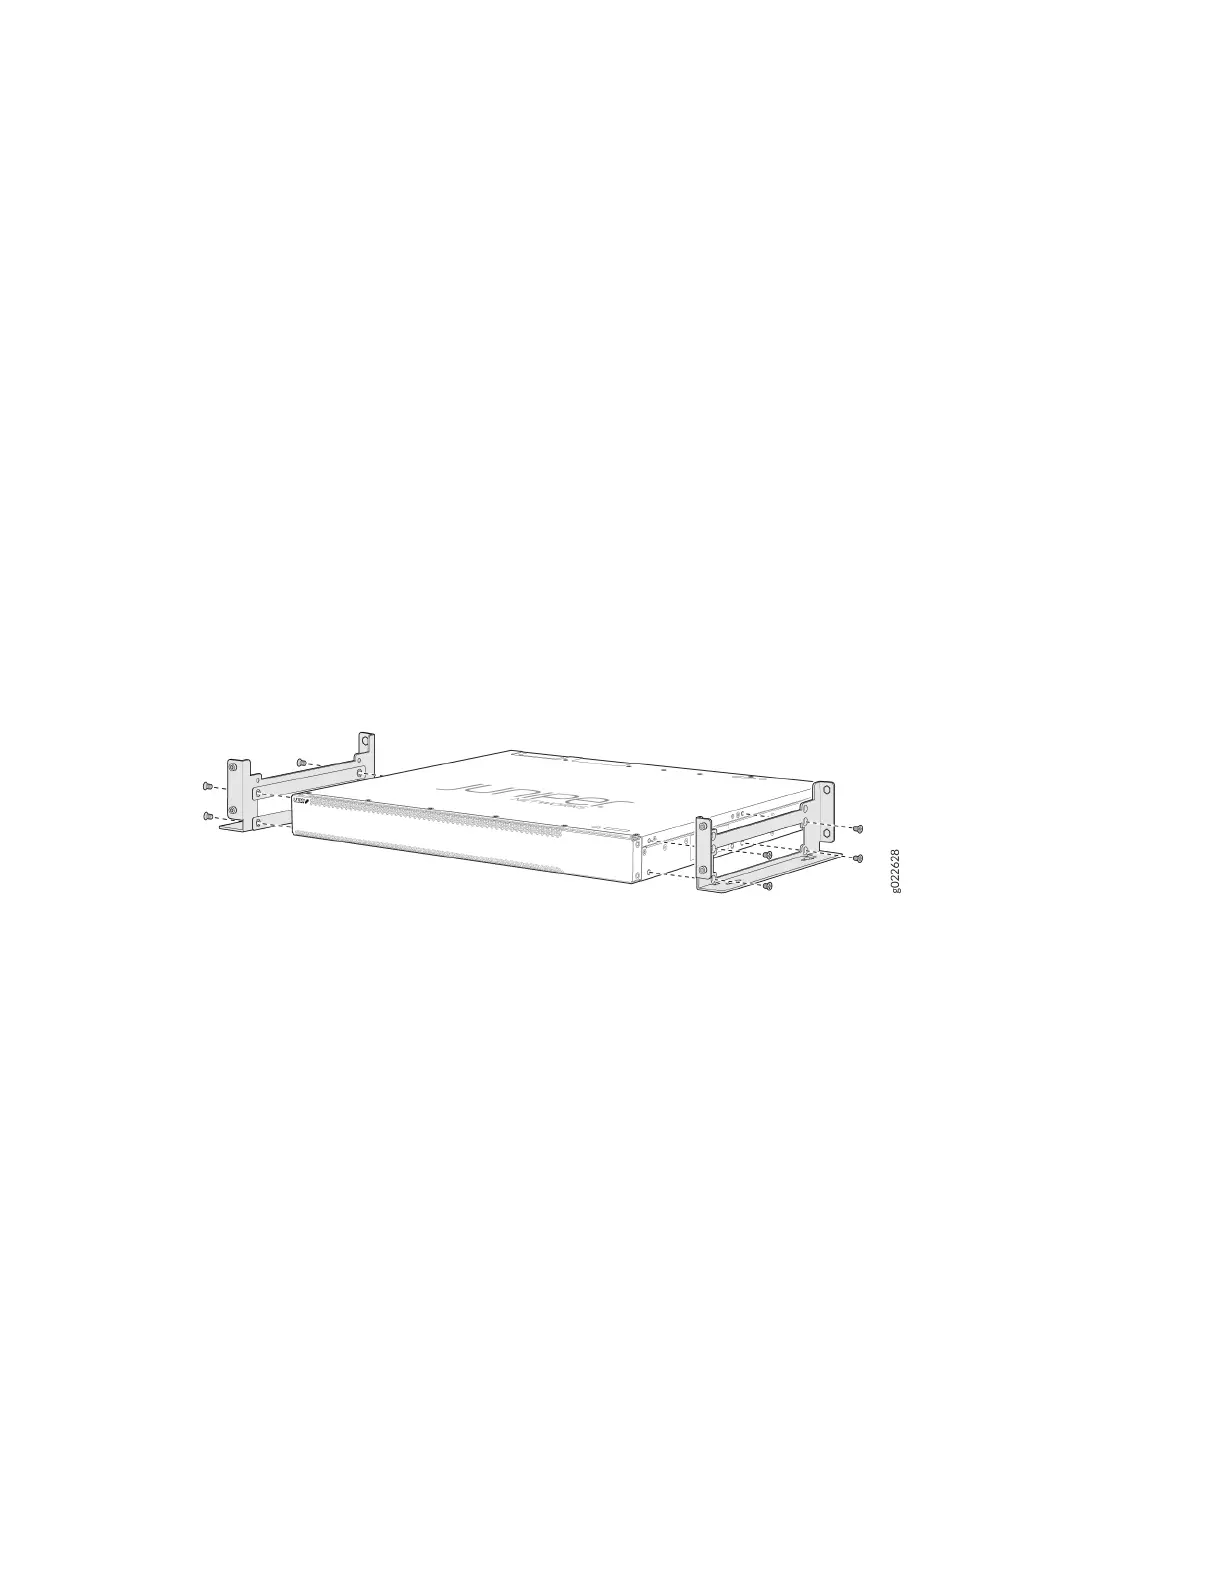
3. Aach the wall mount brackets to the sides of the chassis by using four of the wall mount bracket
screws on each side (see Figure 96 on page 159). Use the screwdriver to ghten the screws.
Figure 96: Aach Wall Mount Brackets to the Switch
4. Insert the four mounng screws in the wall. Insert the top pair of mounng screws 15.2 cm apart,
and insert the second pair of mounng screw 47.42 cm directly below the rst pair (see Figure 97 on
page 160).
159