5. Press the small tab on the retainer strip to loosen the loop. Slide the loop unl you have enough
space to insert the power cord coupler into the inlet.
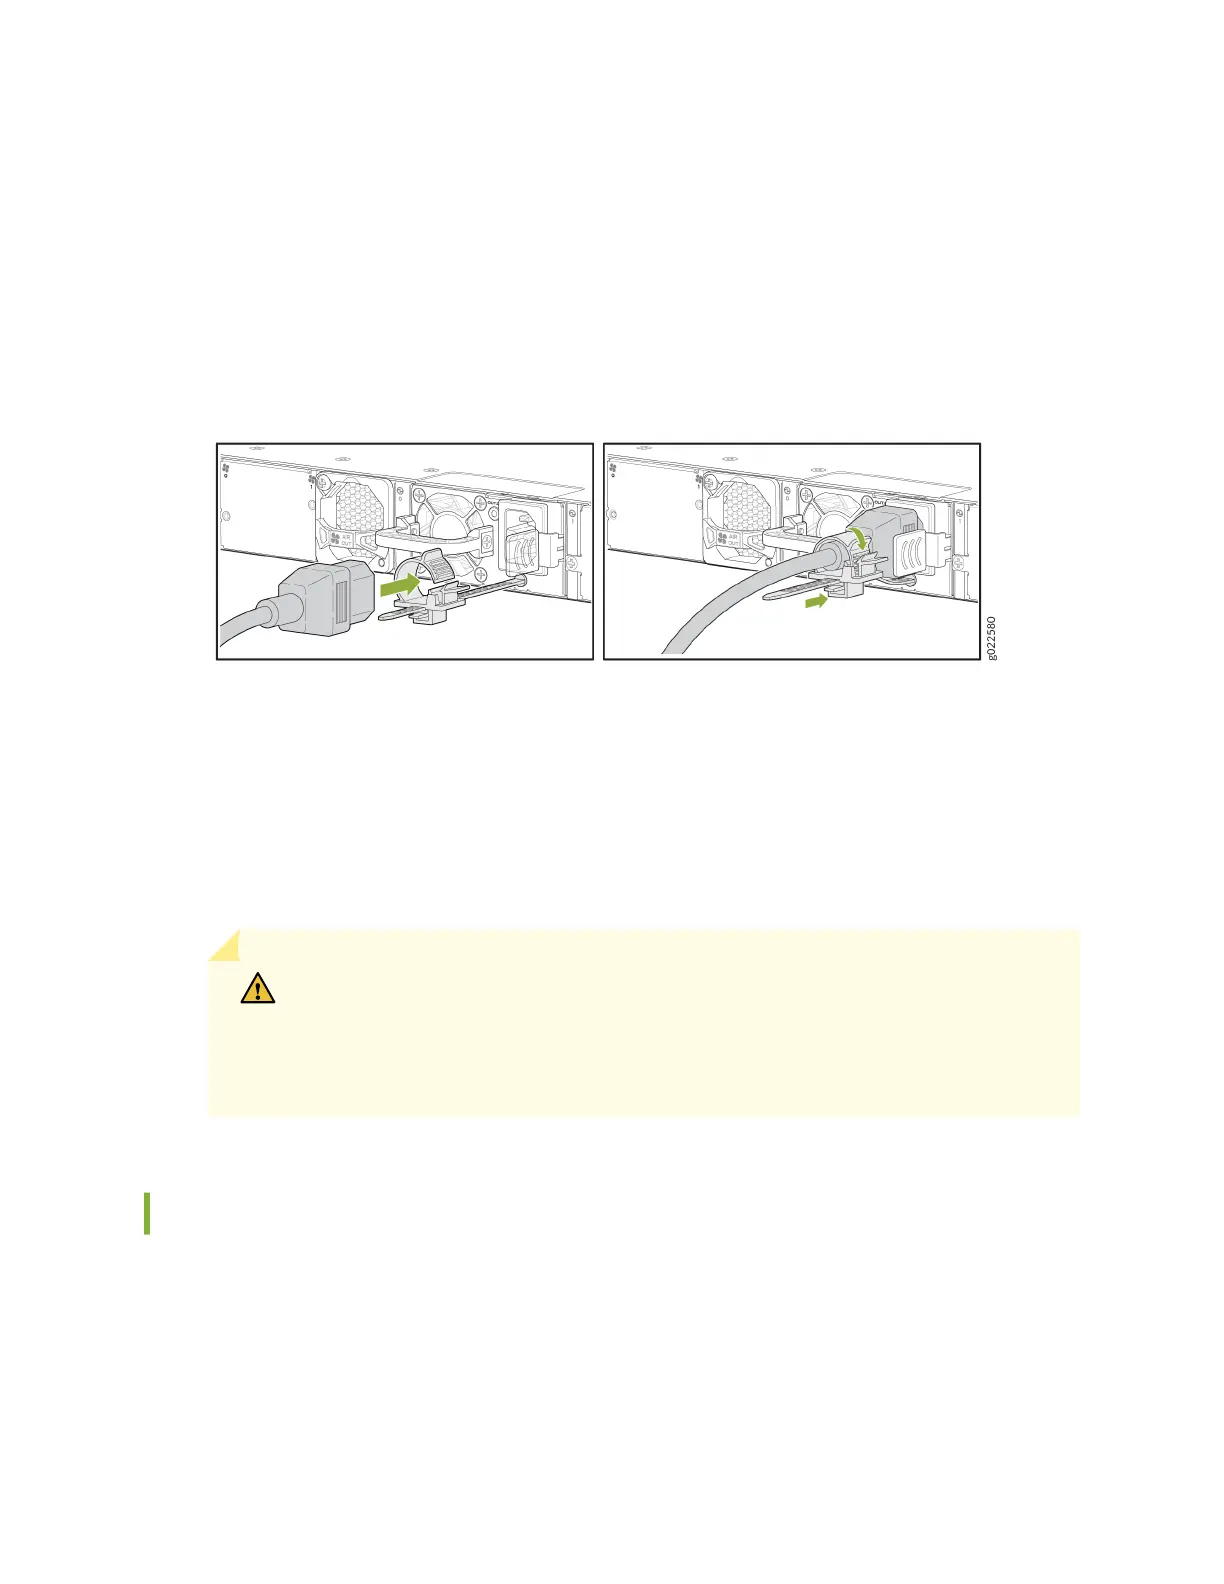
6. Insert the power cord coupler rmly into the inlet.
7. Slide the loop toward the power supply unl it is snug against the base of the coupler.
8. Press the tab on the loop and draw out the loop into a ght circle (see Figure 101 on page 165).
Figure 101: Connect Power to an EX4400 Switch with an AC Power Supply
9. If the AC power source outlet has a power switch, set it to the o posion.
10. Insert the power cord plug into the AC power source outlet. The EX4400 switch powers on as soon
as power is provided to the power supply. There is no power switch on the EX4400.
11. If the AC power source outlet has a power switch, set it to the on posion.
12. Verify that the OUT.OK LED on the power supply is lit steadily green. If it is not, disconnect the
power supply from the power source, and replace the power supply (see "Maintain the EX4400
Power System" on page 200).
CAUTION: Do not remove the power supply unl you have a replacement power
supply ready: you must install the replacement power supply within one minute
aer removing the failed power supply to ensure proper airow and prevent chassis
overheang.
Connect DC Power to an EX4400 Switch
Before you connect DC power to the switch:
• Ensure that you have taken the necessary precauons to prevent electrostac discharge (ESD)
damage (see
Prevenon of Electrostac Discharge Damage
).
• Ensure that you have connected the switch chassis to earth ground.
165