To install a JNP10K-PWR-AC2 power supply in an MX10008 or an MX10016:
1. Attach the electrostatic discharge (ESD) grounding strap to your bare wrist, and connect the strap to
the ESD point on the chassis. There is an ESD point located next to the protective earthing terminal
and below PSU5 on the MX10008 rear panel (see Figure 104 on page 210) or below PSU9 on the
MX10016 (see Figure 105 on page 210).
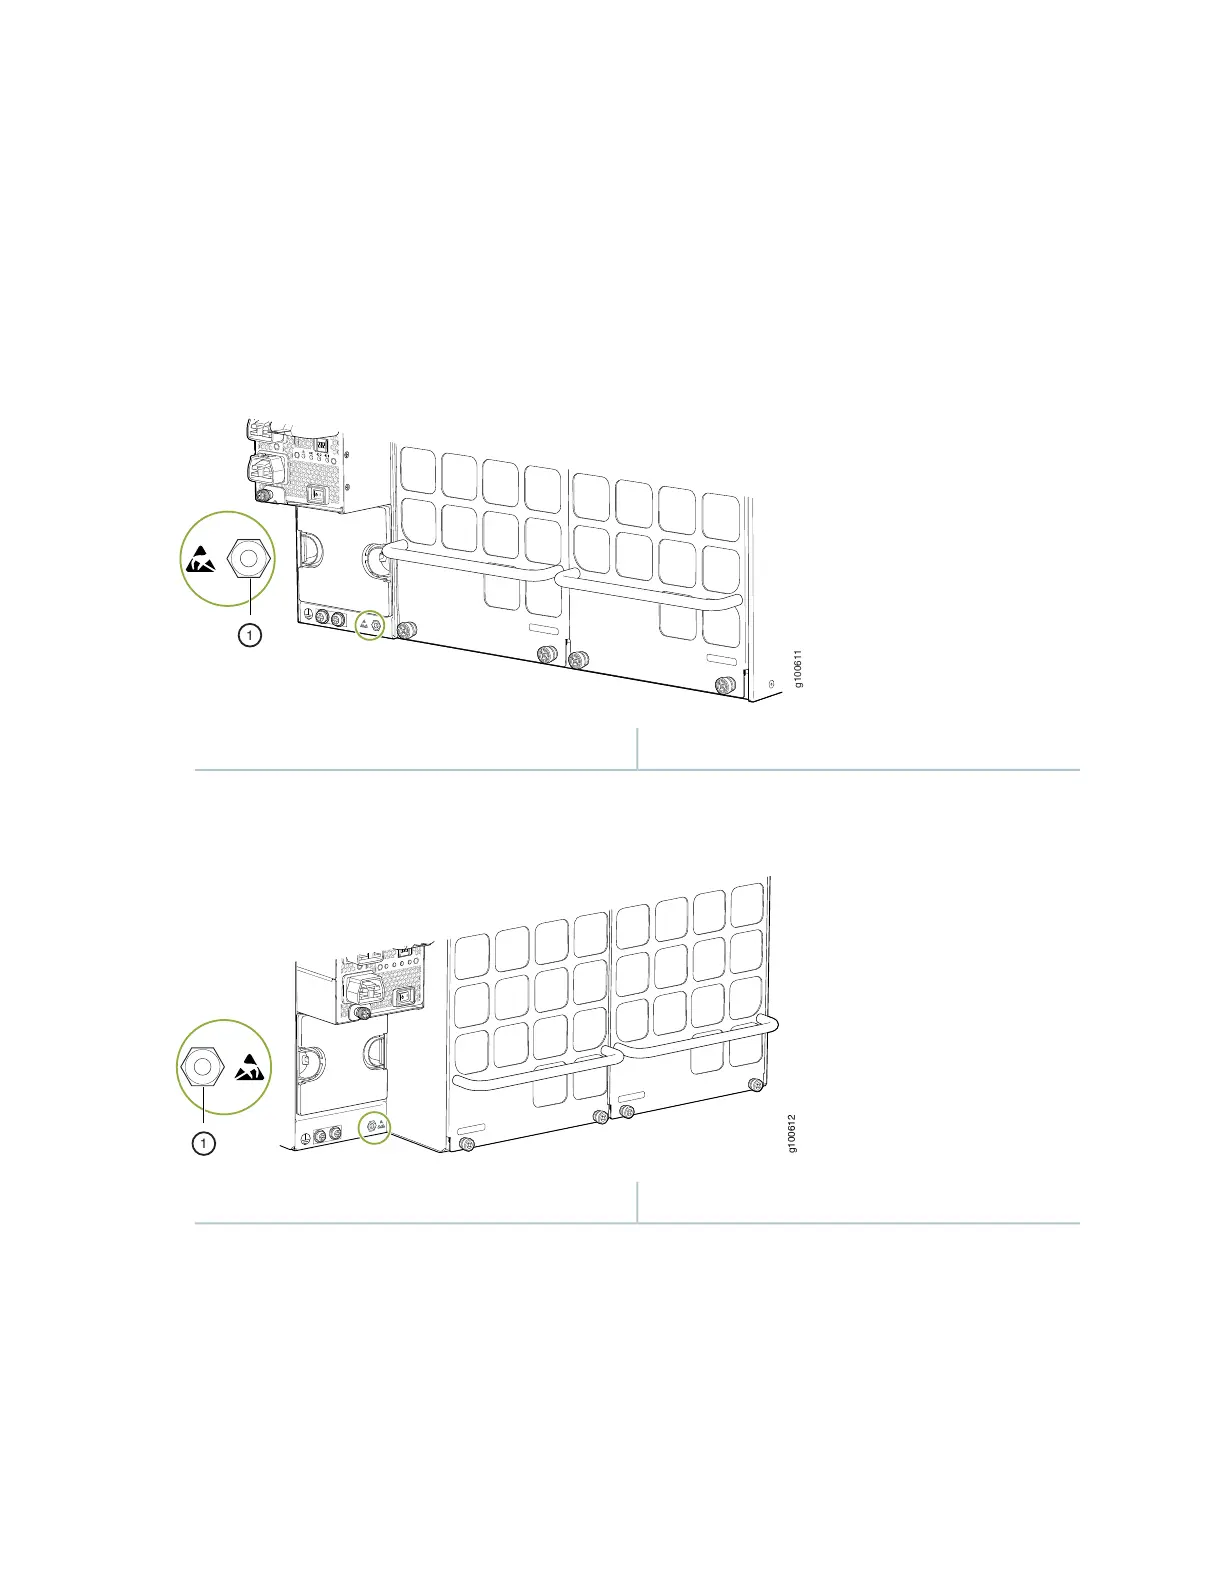
Figure 104: ESD Point on the MX10008 Chassis Rear
1—ESD point
Figure 105: ESD Point on MX10016 Chassis Rear
1—ESD point
2. If the power supply slot has a cover panel on it, insert your thumb and forefinger into the finger holes,
squeeze, and pull the cover out of the slot. Save the cover panel for later use. See Figure 106 on page 211
for removal on a MX10008 and Figure 107 on page 211 for the MX10016.
210