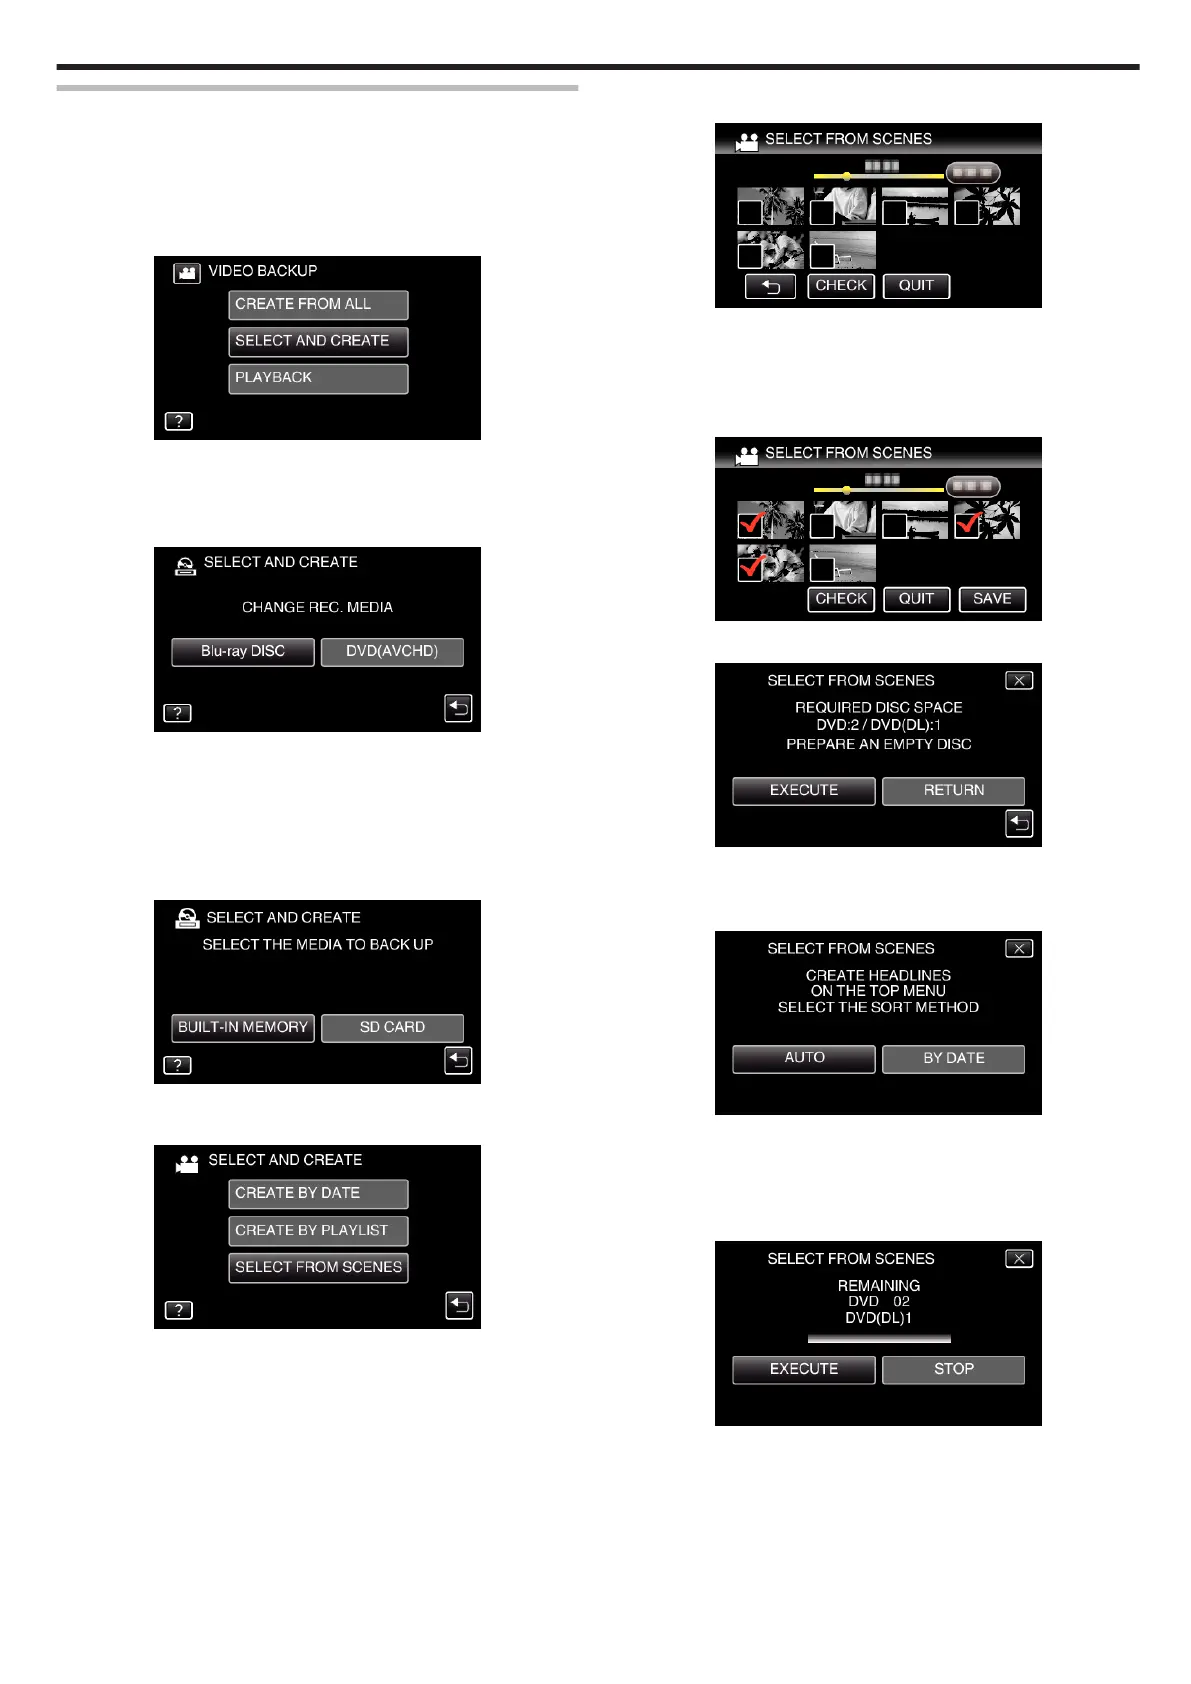
Copying Selected Files
Select and copy the desired videos or still images individually.
0
*The following is a screen of the model with the built-in memory.
1
Select video or still image mode.
2
Tap “SELECT AND CREATE” (video) or “SELECT AND SAVE” (still
image).
.
0
While the video mode is shown in the image, the same operations
apply for the still image mode.
0
Tap A to switch between the video and still image modes.
3
Tap “Blu-ray DISC” or “DVD(AVCHD)”.
.
0
The media changes to the tapped item. Select the appropriate setting
according to the disc.
0
Selecting “Blu-ray DISC” enables you to save videos in a Blu-ray disc
in the high definition quality.
0
Selecting “DVD(AVCHD)” enables you to save videos in a DVD in the
high definition quality.
4
Tap the media you would like to make a backup.
.
5
Tap “SELECT FROM SCENES” (video) or “SELECT FROM IMAGES”
(still image).
.
0
While the video mode is shown in the image, the same operations
apply for the still image mode.
6
Tap on the videos or still images to copy.
.
0
P appears on the selected files.
To remove P from a file, tap on the file again.
0
Tap “CHECK” to check the file.
After checking, tap J.
7
After selecting all the files, tap “SAVE”.
.
8
Tap “EXECUTE”.
.
0
The number of discs required to copy the files is displayed.
Prepare the discs accordingly.
9
Tap “AUTO” or “BY DATE”. (A mode only)
.
0
When “AUTO” is selected, videos with similar recording dates are
displayed in groups.
0
When “BY DATE” is selected, videos are displayed according to
recording dates.
10
Tap “EXECUTE”.
.
0
When “INSERT THE NEXT DISC TO CREATE OR PRESS STOP TO
EXIT” appears, change the disc.
Copying
101