EasyManua.ls Logo

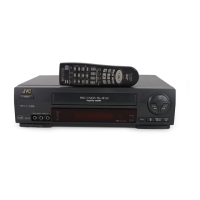
JVC HM-DT100U User Manual

JVC HM-DT100U
100 pages
To Next Page IconTo Next Page
Page #1 background imageLoading...
Page #1 background image
MTP
NTSC
START STOP DATE
PLAY
R
EW
R
E
C
STOP
P
A
US
E
F
F
TV/VCR CH
C. RESET
CANCEL
DBS
DAILY
EPG SUB CH +
DTV MENU SUB CH -
- DIGITAL CH
WEEKLY
ENTER
REC
LINK
REC
SPEED
SKIP
SEARCH
SUBTITLE
VCR
PROGRAM PROG.CHECK
TIMER
A/B/C/D
TV
TV/VCR
CABLE
/DBS
POWER
REMOTE
CODE
. , ?
ABC DEF
GHI
JKL MNO
PQRS TUV WXYZ
AUX
TV
VOL
A
.
M
O
N
I
T
O
R
D
I
S
PL
A
Y
O
S
D
E
N
T
E
R
B
A
C
K
C
LE
A
R
MENU
NAVI
Integrated
HDTV
Filename [HM-100U_Eng_02Cov1.fm]
LPT0960-001B
HM-DT100U
For Customer Use:
Enter below the Model No. and
Serial No. which are located on the
rear of cabinet. Retain this
information for future reference.
Model No.
Serial No.
D-VHS DIGITAL RECORDER
INSTRUCTIONS
HM-DH100U_Eng.book Page 1 Thursday, August 5, 2004 1:54 PM
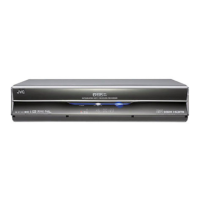
Table of Contents

Questions and Answers:

JVC HM-DT100U Specifications

General IconGeneral
BrandJVC
ModelHM-DT100U
CategoryVCR
LanguageEnglish

Summary

INSTALLATION

Grounding or Polarization

Explains polarized and grounding plug safety features.

Power Sources

Details operating the product from the correct power source.

Overloading

Warns against overloading outlets and extension cords.

Power Cord Protection

Instructions on routing power cords safely to prevent damage.

Ventilation

Importance of keeping ventilation openings clear for product operation.

Wall or Ceiling Mounting

Manufacturer's recommendation for mounting the product.

ANTENNA INSTALLATION INSTRUCTIONS

Outdoor Antenna Grounding

Guidelines for grounding outdoor antennas for surge protection.

Lightning Protection

Steps to take during a lightning storm to protect the product.

Power Line Safety

Instructions to avoid locating antennas near power lines.

USE

Accessories and Product Handling

Guidance on safe use of accessories and product combinations.

Water, Liquid, and Cleaning Precautions

Warnings about water, liquid entry, and proper cleaning methods.

Heat and Attachment Safety

Advice on product placement away from heat and using recommended attachments.

SERVICING AND MAINTENANCE

Product Servicing Guidelines

Instructions for when and how to get the product serviced.

Damage Requiring Service

Conditions that necessitate professional service for the VCR.

Replacement Parts and Safety Checks

Importance of using specified parts and performing safety checks.

Front Panel Overview

Front Panel Controls

Identifies primary buttons for playback, recording, and menu navigation.

Front Panel Indicators

Explains the meaning of various LEDs on the front display.

Front Panel Slots and Connectors

Locates the cassette slot and i.LINK connector.

Rear Panel Connections

Power, Cooling, and Output Connectors

Details power cord, cooling fan, and audio/video outputs.

Input Connectors

Identifies input terminals for antenna, video, audio, and other signals.

Control and Digital Interface Connectors

Locates terminals for remote control, cable box, i.LINK, HDMI, and antenna.

Front Display Panel Indicators

Recording and Playback Indicators

Explains indicators for timer, recording, playback, and tape status.

Signal and Mode Indicators

Details indicators for progressive mode, channel, DTV, and cassette type.

Input and Channel Information

Shows channel numbers and auxiliary input status.

On-Screen Display Information

Tape and Time Status Indicators

Explains cassette status, index, time counter, and remaining tape time.

Operation and Signal Indicators

Details VCR operation modes, clock, recording speed, and image format.

Connected Device and Icon Information

Identifies connected device names and icons used in the display.

Remote Control Functions

Basic Operation Buttons

Identifies primary playback, recording, and menu navigation buttons.

AV and Input Selection Buttons

Explains buttons for TV/VCR, channel, and input selection.

Special Function and Navigation Buttons

Describes buttons for special effects, EPG, and menu navigation.

Video and Audio Connections

Antenna and RF Connections

How to connect antenna and RF sources for signal input.

Digital Interface Connections

Guide for connecting via HDMI and i.LINK for digital signals.

Analog Video and Audio Connections

Instructions for connecting analog video and audio sources.

Basic VCR Setup and Connection

Initial Setup Steps

Steps for checking contents, situating, powering, and final preparation.

TV Connection Methods

Explains HDMI, Component Video, and S-Video/Video connection options.

Plug & Play Setup

Automatic Clock and Tuner Set

Details the Plug & Play automatic clock and channel setting process.

Plug & Play Troubleshooting

Addresses issues if Plug & Play fails and provides solutions.

Clock Setting Procedures

Accessing Clock Setup Menus

Steps to navigate to the clock setting menus via Main Menu.

Clock Setting Preparation

Initial steps required before configuring clock settings.

Semiauto Clock Set

Access Auto Clock Set Screen

Steps to access the semiauto clock setup screen.

Selecting Host Channel and Time Zone

How to choose the host channel, DST, and time zone.

Returning to Normal Screen

Final step to exit the clock setting menus.

Manual Clock Set

Accessing Manual Clock Setup

Steps to access the manual clock setting interface.

Setting Time and Date Information

Procedure for manually entering time, date, and year.

Setting Time Zone and DST

Configuring time zone and Daylight Saving Time settings.

Finalizing Clock Settings

Steps to start the clock after manual configuration.

Analog Tuner Setup

Auto Channel Set Procedure

Steps to automatically scan and set analog channels.

Auto Channel Set Information

Notes and information regarding the auto channel scan process.

Manual Analog Channel Setup

Accessing Manual Channel Setup

Steps to access the manual channel setup interface.

Managing Analog Channels

How to add or skip specific analog channels.

Returning to Normal Screen

Final step to exit the channel setup menus.

Digital Tuner Setup

Auto Channel Set Procedure (Digital)

Steps to automatically scan and set digital channels.

Auto Channel Set Information

Notes and information regarding the digital auto channel scan.

Manual Digital Channel Setup

Accessing Manual Channel Setup (Digital)

Steps to access the manual digital channel setup interface.

Managing Digital Channels

How to add or skip specific digital channels.

Returning to Normal Screen

Final step to exit the channel setup menus.

Cable Box Control Setup

Installing the Controller

Steps to install the VCR's controller for cable box operation.

Controlling the Cable Box

Explains how the VCR controls the cable box for timer recording.

Cable Box Channel and Brand Setup

Initial Setup Steps

Steps to turn on the cable box and access VCR setup menus.

Selecting Cable Box Input Channel

Guide for selecting the correct input channel based on connection.

Cable Box Brand and Test Mode

Setting Cable Box Brand

Procedure to enter the cable box brand code from a list.

Engaging Test Mode

How to test the controller's functionality with the cable box.

Returning to Normal Screen

Final step to exit the setup menus.

DBS Receiver Control Setup

Installing the Controller

Steps to install the VCR's controller for DBS receiver operation.

Controlling the DBS Receiver

Explains how the VCR controls the DBS receiver for timer recording.

DBS Receiver Channel and Brand Setup

Initial Setup Steps

Steps to turn on the DBS receiver and access VCR setup menus.

Selecting DBS Receiver Input Channel

Guide for selecting the correct input channel based on connection.

DBS Receiver Brand and Test Mode

Setting DBS Receiver Brand

Procedure to enter the DBS receiver brand code from a list.

Engaging Test Mode

How to test the controller's functionality with the DBS receiver.

Returning to Normal Screen

Final step to exit the setup menus.

Basic Playback Operations

Loading and Starting Playback

Instructions for inserting a tape and starting playback.

Playback Control Functions

How to stop, rewind, fast-forward, eject, and turn off the VCR.

Advanced Playback Features

Checking Tape Position

Explains the tape position indicator and how to reset the time counter.

Repeating Tape Playback

Describes the Repeat Playback function for playing tapes multiple times.

Tracking Adjustment

Automatic Tracking Adjustment

Explains the VCR's automatic tracking feature for optimal picture quality.

Manual Tracking Adjustment

Steps for manually adjusting tracking to eliminate picture noise.

Playback Control and Navigation

Automatic Operations After Rewinding

Setting VCR actions after tape rewinding (playback, power off, standby).

Index Search for Recordings

How to find and play back recorded programs using index codes.

Skipping Unwanted Portions

Using Skip Search to fast-forward through tape sections.

Multi-Program and Subtitle Playback

Program and Angle Selection

How to select programs and viewing angles from D-Theater/D-VHS tapes.

Sound and Subtitle Selection

How to select audio tracks and subtitles for enhanced playback.

Special Effect Playback

Locating Scenes Rapidly

Using High-Speed and Variable-Speed Picture Search to find scenes.

Picture Search Notes

Important notes regarding picture search functionality and limitations.

Still and Slow Motion Playback

Still Picture Playback

How to freeze the picture and advance frame by frame.

Slow Motion Playback

Instructions for viewing playback at variable slow speeds.

D-VHS Recording Procedure

Preparing for D-VHS Recording

Steps for loading cassette, selecting channel, and setting recording speed.

Starting D-VHS Recording

How to initiate the D-VHS recording process.

S-VHS/VHS Recording Procedure

Recording Setup Steps

Steps for loading cassette, selecting channel, speed, and starting recording.

Recording Control and Compatibility

Details on pausing, stopping, cassette compatibility, and modes.

Recording Features

Displaying Recording Information

How to cycle through display information like clock time and remaining time.

Specifying Recording Length

Using Instant Timer Recording (ITR) to set recording duration.

Simultaneous Recording and Viewing

Switching to TV Viewing Mode

Steps to switch the VCR to TV mode for viewing while recording.

Displaying On-Screen Status

How to display VCR status information on the TV screen.

Additional Recording Functions

Recording Enhancements

Using V. CALIBRATION and Second Audio Recording features.

Recording Modes

Explains S-VHS Recording Mode and S-VHS ET functionality.

Accidental Erasure Prevention

Method to prevent accidental overwriting of recorded tapes.

VCR Plus+ Timer Programming

Loading Cassette and Accessing Screen

Steps to load a tape and access the VCR Plus+ programming screen.

Entering Program Information

How to input the PlusCode number to program timer recordings.

Completing VCR Plus+ Timer Setup

Inputting Channel and Checking Data

Entering receiving channel numbers and verifying program data.

Setting Speed and Returning to Normal

Configuring recording speed and exiting the setup menus.

Engaging Timer Standby Mode

Activating the VCR's timer standby mode for automatic recording.

VCR Plus+ Guide Channel Matching

Accessing Guide Channel Setup

Steps to access and input guide channel information.

Inputting Channel Numbers

How to set VCR/Cable channel numbers for VCR Plus+ programming.

Returning to Normal Screen

Final step to exit the guide channel setup menus.

Express Timer Programming

Initial Programming Steps

Steps to load cassette and access the program setup screen.

Setting Program Details

How to set start time, stop time, date, and channel for recording.

Completing Express Timer Setup

Setting Speed and Returning to Normal

Configuring recording speed and exiting the setup menus.

Engaging Timer Standby Mode

Activating timer standby mode for automatic recording.

DBS Receiver User Attention

Specific instructions for users with DBS receivers.

Managing Timer Programs

Completing Digital Timer Recording Setup

Steps to return to normal screen and engage timer standby mode.

Viewing Timer Programs

How to set and view timer recording schedules.

Checking Timer Settings

Procedure to access and view the list of programmed timers.

Canceling or Changing Timer Settings

Steps to cancel or modify existing timer recording schedules.

Electronic Program Guide (EPG)

Accessing the EPG

How to access the EPG screen and its requirements.

Selecting Program Details

How to select time zone and channel to view program details.

Setting Easy Record Timer

Procedure to set a recording timer directly from the EPG.

Returning to Normal Screen

Final step to exit the EPG menus.

EPG Timer Management

Changing or Deleting Easy Record Timers

How to modify or remove Easy Record Timer entries.

Setting or Deleting Easy View Timers

How to set or remove Easy View Timer entries.

Video Navigation Playback

Accessing Video Navigation

Steps to access the Video Navigation system screen.

Selecting and Playing Programs

How to select a program from the list and start playback.

Video Navigation Notes

Important notes regarding Video Navigation functionality and limitations.

Managing Video Navigation Function

Accessing Navigation Setup

Steps to access the Video Navigation setup screen.

Deactivating Video Navigation

How to turn off the Video Navigation function.

Returning to Normal Screen

Final step to exit the navigation setup menus.

Finding Tapes by Number

Accessing Tape Lists

Steps to access library and tape number lists via Video Navigation.

Confirming Tape Lists and Playback

How to confirm tape lists and play back selected programs.

Returning to Normal Screen

Final step to exit the tape finding menus.

Finding Tapes by Program Title

Accessing Title List Screen

Steps to access and view the list of programs by title.

Confirming Titles and Returning to Normal

How to confirm titles and exit the title search function.

Finding Tapes by Category

Accessing Category List Screen

Steps to access and view the list of programs by category.

Confirming Categories and Returning to Normal

How to confirm categories and exit the category search function.

Finding Tapes by Recording Date

Accessing Date List Screen

Steps to access and view the list of programs sorted by recording date.

Confirming Dates and Returning to Normal

How to confirm dates and exit the date search function.

Finding Blank Tape Space

Accessing Blank Space Lists

Steps to access lists of blank tape space.

Setting Conditions and Selecting Tape

How to set recording conditions and select tape number for blank space.

Preparing for Recording

Final steps to prepare for recording after finding blank space.

Editing Tape Titles

Accessing Tape and Library Lists

Steps to access Video Navigation, Library, and Tape Number lists.

Selecting Tape Number for Editing

How to select a tape number and prepare for title editing.

Editing Tape Title Details

Accessing Edit Screen and Entering Title

Steps to access the edit screen and enter new tape titles.

Entering Characters and Returning to Normal

How to input characters using the remote and exit the editing process.

Editing Program Titles

Accessing Program Lists and Edit Screen

Steps to select a program and access the edit screen.

Entering Program Title and Returning to Normal

How to enter a new program title and exit the editing process.

Editing Program Categories

Accessing and Selecting Categories

Steps to access category lists and select a program category.

Returning to Normal Screen

Final step to exit the category editing menus.

Deleting Tape Information

Accessing and Confirming Deletion

Steps to access the delete function and confirm tape information deletion.

Returning to Normal Screen

Final step to exit the tape deletion menus.

Deleting Program Information

Accessing Delete Function

Steps to access Video Navigation, select program, and access delete screen.

Deleting Program Info and Returning to Normal

How to delete program information and exit the process.

Checking VCR Memory

Accessing and Checking Memory Status

Steps to access Navigation Setup and check memory usage.

Returning to Normal Screen

Final step to exit the memory check.

Navigating Function Settings

Accessing the Function Setup Menu

Steps to access the main menu and function setup screens.

Selecting and Changing Settings

How to select a function and change its settings.

Returning to Normal Screen

Final step to exit the function settings menus.

Video Function Settings

V. Calibration Function

Explains V. CALIBRATION for tape condition and picture quality optimization.

Picture Control Function

Details PICTURE CONTROL options for adjusting playback picture quality.

Video Stabilizer Function

Explains VIDEO STABILIZER for correcting vertical vibrations in playback.

Audio Function Settings

Standard Audio Recording Modes

Selecting audio formats like STANDARD and PCM&STANDARD for recording.

DV Audio Recording Options

Choosing audio channels from a DV camcorder input.

Digital Audio Output Settings

Configuring Dolby Digital, PCM, or STREAM output via optical connector.

Secondary Audio Recording

Recording SAP audio tracks alongside normal audio.

Input/Output Function Settings

TV Output Settings

Configuring TV output modes like WIDE 16:9 and NORMAL 4:3.

HDMI and Digital Output Settings

Settings for HDMI output, color intensity, and DVI compatibility.

Front Auxiliary Input Selection

Choosing between VIDEO or S-VIDEO for front auxiliary input.

Additional Function Settings

Automatic Recording Speed Switching

AUTO SP → EP TIMER function for complete recording.

Automatic Timer Standby

AUTO TIMER feature for automatic standby mode engagement.

On-Screen Display Settings

SUPERIMPOSE and GRAY BACK settings for display options.

Advanced System Settings

Power Saving and Mode Settings

POWER SAVE and S-VHS MODE settings for power consumption and recording quality.

AV COMPU-LINK Functionality

Using AV COMPU-LINK for integrated component control.

Recording Mode Enhancements

S-VHS ET Recording Function

Using S-VHS ET for recording VHS tapes with S-VHS quality.

Display and Lighting Settings

Controlling front panel display indicators and lighting.

Parental Lock and V-Chip Setup

Enabling the V-Chip System

Introduction and notes on the V-Chip technology for content blocking.

Configuring V-Chip Settings

Steps to enable V-Chip, set lock code, and configure ratings.

Configuring V-Chip Ratings

US TV Rating Setup and Configuration

How to set US TV ratings and block programs based on content.

MPAA Movie Rating Setup and Configuration

How to set movie ratings and block content.

Canadian V-Chip Rating Setup

How to set Canadian ratings for content blocking.

Canadian Rating Setup and Unrated Programs

Setting Canadian Ratings

Procedure for setting Canadian ratings and blocking features.

Blocking Unrated Programs

How to block programs that do not have a rating signal.

Lock Code and Blocked Channel Viewing

Setting and Managing the Lock Code

Procedure for setting, changing, and resetting the parental lock code.

Viewing Blocked Channels

What happens when a viewer tries to access a blocked channel.

Understanding Rating Systems

US V-Chip Ratings Explained

Definitions of US V-Chip rating categories.

Content Ratings Explained

Definitions of content rating descriptors like Violence and Language.

Movie Ratings Explained

Definitions of MPAA movie rating categories.

Canadian V-Chip Ratings Explained

Definitions of Canadian V-Chip rating categories.

Closed Caption Settings

Digital Auto Closed Caption Setup

Steps to set up closed captions automatically for digital broadcasts.

Displaying Closed Captions

How to display closed captions and important notes on usage.

Digital Manual Closed Caption Settings

Manual CC Mode and Font/Type Setup

Setting manual mode, font size, style, and type for captions.

Manual CC Color and Opacity Setup

Configuring caption text and background color and opacity.

Returning to Normal Screen

Final step to exit the closed caption settings menus.

JLIP ID Number Configuration

Accessing JLIP ID Setup

Steps to access the JLIP ID setup menu.

Setting the JLIP ID Number

Procedure to change the JLIP ID number for PC connection.

Returning to Normal Screen

Final step to exit the JLIP ID setup menus.

i.LINK Setup for Connected Devices

Accessing i.LINK Setup and Confirming LINC

Steps to access i.LINK setup and confirm LINC settings.

Resetting Number and Returning to Normal Screen

How to reset device numbers and exit the setup.

Setting Device Number Again

Procedure to assign numbers to connected i.LINK devices.

Understanding i.LINK Connections

What is i.LINK?

Explanation of i.LINK as a digital serial interface for device communication.

i.LINK Connection Examples

Diagrams illustrating good and bad i.LINK connection configurations.

i.LINK Branched Connections

Explanation of how to branch i.LINK connections for multiple devices.

i.LINK and DV Connections

Camcorder to VCR Connection

How to connect a camcorder to the VCR using i.LINK/DV for recording.

VCR to VCR Connection

How to connect two VCRs using i.LINK for dubbing or editing.

DTLA Copy Protection Information

Notes on DTLA copy protection technologies affecting connections.

Connecting and Recording via i.LINK/DV

Making i.LINK/DV Connections

Detailed steps for connecting camcorders and VCRs via i.LINK.

Loading Cassette and Starting Playback/Recording

Instructions for loading tapes and initiating playback or recording.

Recording Speed and Notes

Setting recording speed and important notes for i.LINK/DV recording.

S-Video and Video Connections for Editing

Editing Tape Connection Methods

Explains VHS to S-VHS, S-VHS to VHS, and S-VHS to S-VHS editing connections.

Camcorder and VCR Connections

Diagrams showing connections for camcorder playback and VCR to VCR editing.

Making S-Video/Video Connections

Step-by-step guide for making analog video connections.

S-Video/Video Editing and Recording

VCR Connection and Input Selection

Connecting the VCR and selecting the correct input terminals for editing.

Playback and Recording Setup

Steps for selecting video input, picture control, playback, and recording.

Camcorder Master Edit Control Use

Instructions for using Master Edit Control with compatible camcorders.

Multi-Brand Remote Control - TV Setup

Turning On and Setting Remote Mode

Steps to turn on the TV and set the remote to TV mode.

Setting TV Brand Code

Procedure to enter the TV's brand code using the remote.

Operating the TV with the Remote

Basic operations for controlling the TV using the remote.

Multi-Brand Remote Control - Cable Box/DBS Setup

Turning On and Setting Remote Mode

Steps to turn on the cable box/DBS and set the remote to CABLE/DBS mode.

Entering Brand Code and Operating Device

How to enter the device's brand code and operate it with the remote.

Remote Control Code Management

Setting Remote Operation and Control Codes

Steps to set the remote's operation mode and control codes.

Checking and Applying Remote Codes

How to check the current code and apply it to the VCR.

Controlling Multiple VCRs

Instructions for operating multiple JVC VCRs with the same remote.

Troubleshooting Common Issues

Power and Remote Problems

Solutions for issues related to power, clock, and remote control.

Tape Transport Issues

Troubleshooting common problems with cassette loading and ejection.

Playback Problems

Solutions for common playback issues like no picture, breaks, or noise.

Troubleshooting Recording and Timer Issues

Playback Sound Issues

Solutions for problems with sound output during playback.

Recording and Editing Problems

Troubleshooting issues with recording start, broadcast recording, and editing.

Timer Recording and Programming Issues

Solutions for problems with timer recording and programming setup.

Advanced Timer and Video Navigation Troubleshooting

Timer Recording Specific Issues

Troubleshooting for timer blinking, channel switching, and VCR Plus+ system errors.

Video Navigation Information Issues

Solutions for problems with tape information display and program search.

Video Navigation and Other System Troubleshooting

Video Navigation Search and Memory Issues

Troubleshooting program search errors and memory full conditions.

General System and Display Problems

Solutions for skipped channels, display overlaps, and subtitle issues.

Product Features vs. Mechanical Issues

D-VHS Playback and Image Characteristics

Explains playback features like mosaic noise and image sync issues.

Other Operational Notes and Precautions

Information on moisture condensation, head cleaning, and general cautions.

Error Codes and Messages Reference

Recording Error Codes

List of error codes related to recording and input signals.

Playback Error Codes

List of error codes related to playback and copy protection.

Additional Error Codes and Messages

Signal and Input Error Codes

Error codes related to incompatible signals and too many i.LINK devices.

HDMI Output Error Code

Error code related to HDMI output without HDCP compliance.

Troubleshooting Q&A

Playback Questions and Answers

Common questions and answers regarding playback behavior and features.

Recording and Timer Questions

Common questions and answers about recording and timer functions.

Glossary of Technical Terms

Digital Broadcast and VHS Terms

Definitions of terms related to digital broadcasting and VHS evolution.

Digital Interface and Video Terms

Definitions for interfaces like HDMI, i.LINK, and related technologies.

Audio and Compression Terms

Definitions for audio formats and video compression methods.

Product Specifications

General and Tuner Specifications

Details on power, dimensions, weight, and tuner system.

Connector Details

Lists all input/output connectors and their specifications.

Video and Audio Recording Specs

Information on video formats, audio formats, and recording speeds.

Accessories Included

List of accessories provided with the product.

Limited Warranty Information

Warranty Terms and Service

Details on warranty period, what JVC will do, and user responsibilities.

Warranty Exclusions and Limitations

Lists items and conditions not covered by the limited warranty.

Customer Information Section

Section for the customer to record product details for future reference.

Service and Support Information

JVC Customer Support Contact

Contact information for help, service centers, and accessories.

Important Service Cautions

Warnings against self-servicing and referring to qualified personnel.

Product Usage Attention Notice

Disclaimer regarding the use of the product with other non-conforming devices.

Related product manuals