30
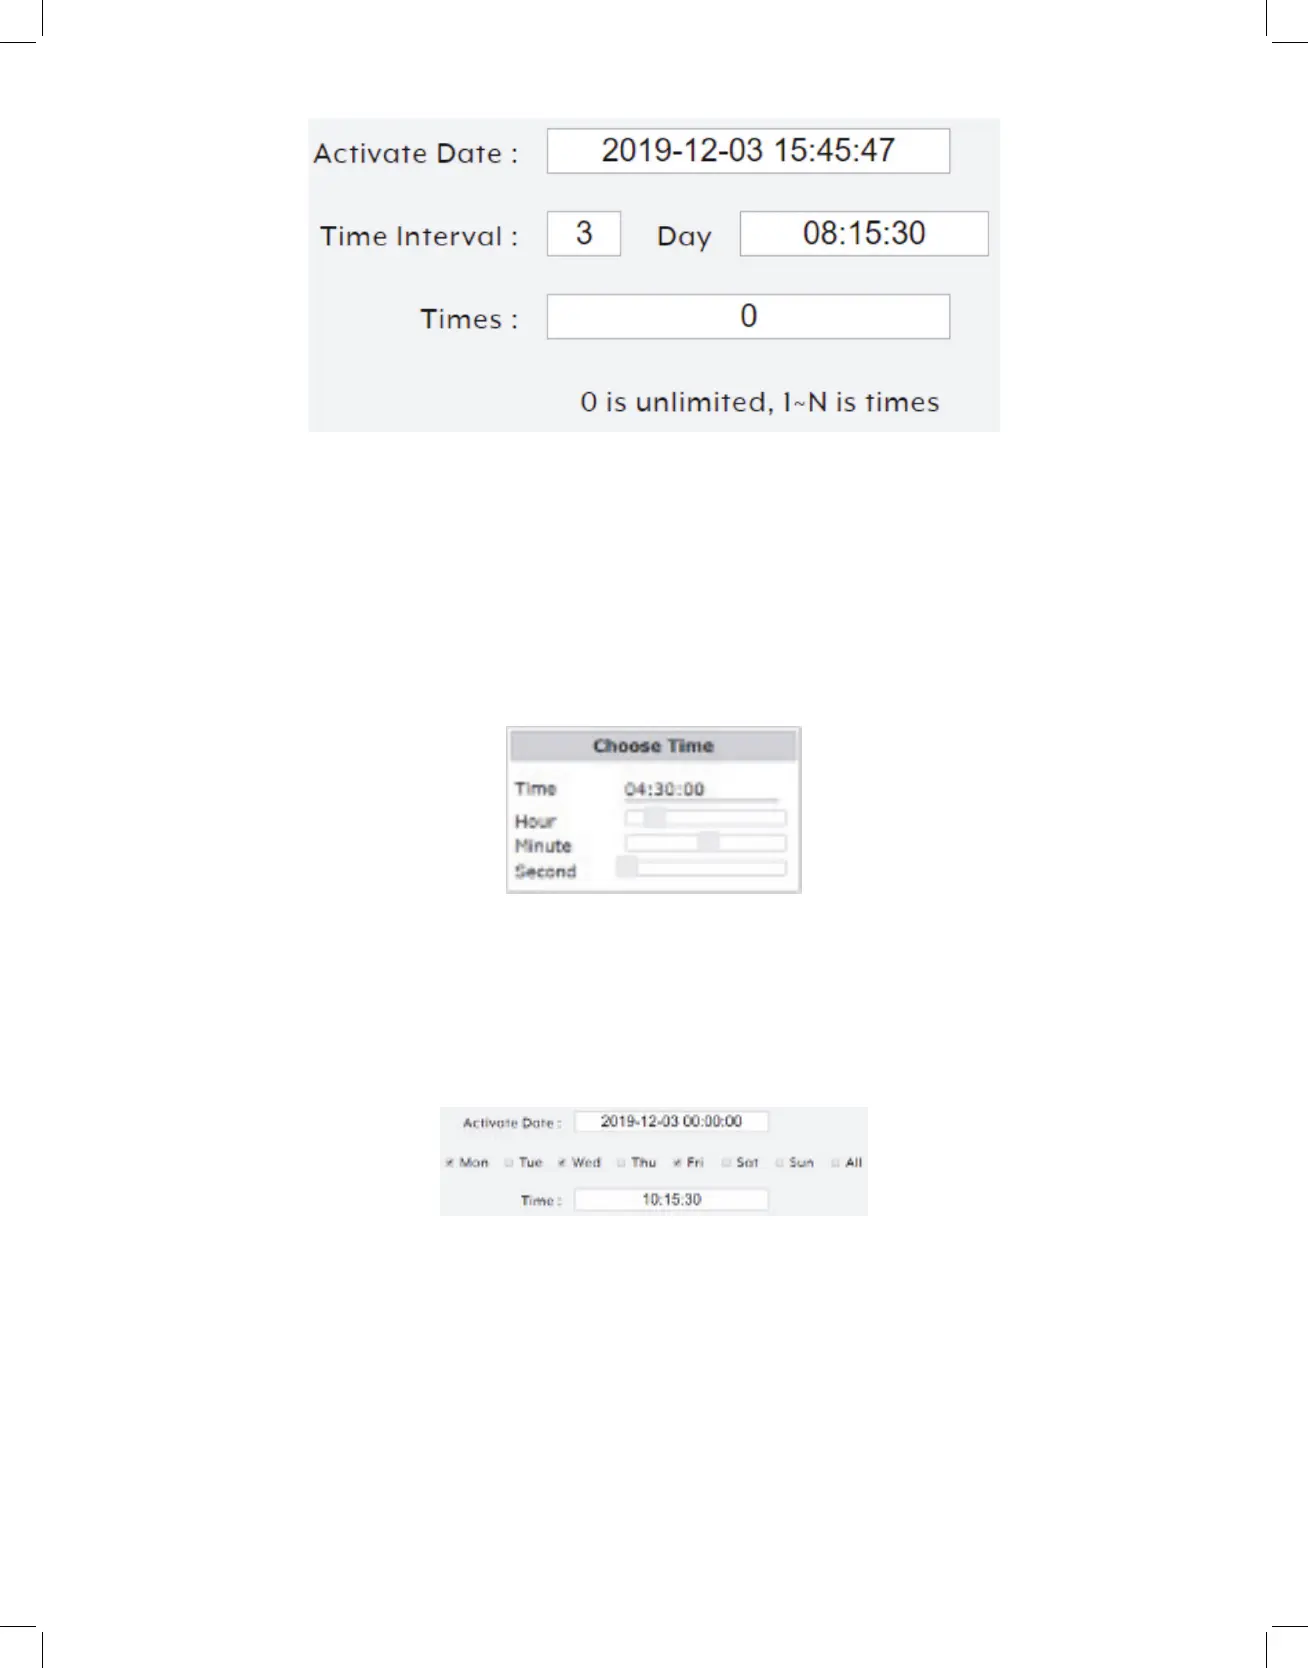
Activate Date: The activate date is the date and time of the first execution of the macro.
Clicking on the date field will open the calendar entry window. Select the preferred day
and time and then click “Done”. Clicking the “Now” button will jump the entry field to
the current time.
Time Interval: Enter the length of time to wait between executions of the macro in
days, hours, minutes and seconds. Clicking on the time field will open the “Choose Time”
window to make setting a time easier.
Times: Enter the number of times the schedule event should repeat. Entering “0” will
make the event continually repeat.
- Weekly: Select “Weekly” to execute the selected macro at a specific time on set days
of the week. After the configuration is complete, click on the “Save Schedule” button at
the bottom of the page to store the schedule event.
Activate Date: The activate date is the date and time of the first execution of the macro.
Clicking on the date field will open the calendar entry window. Select the preferred day
and time and then click “Done”. Clicking the “Now” button will jump the entry field to
the current time.
Day Selection: Select which days of the week the macro should execute on.