38
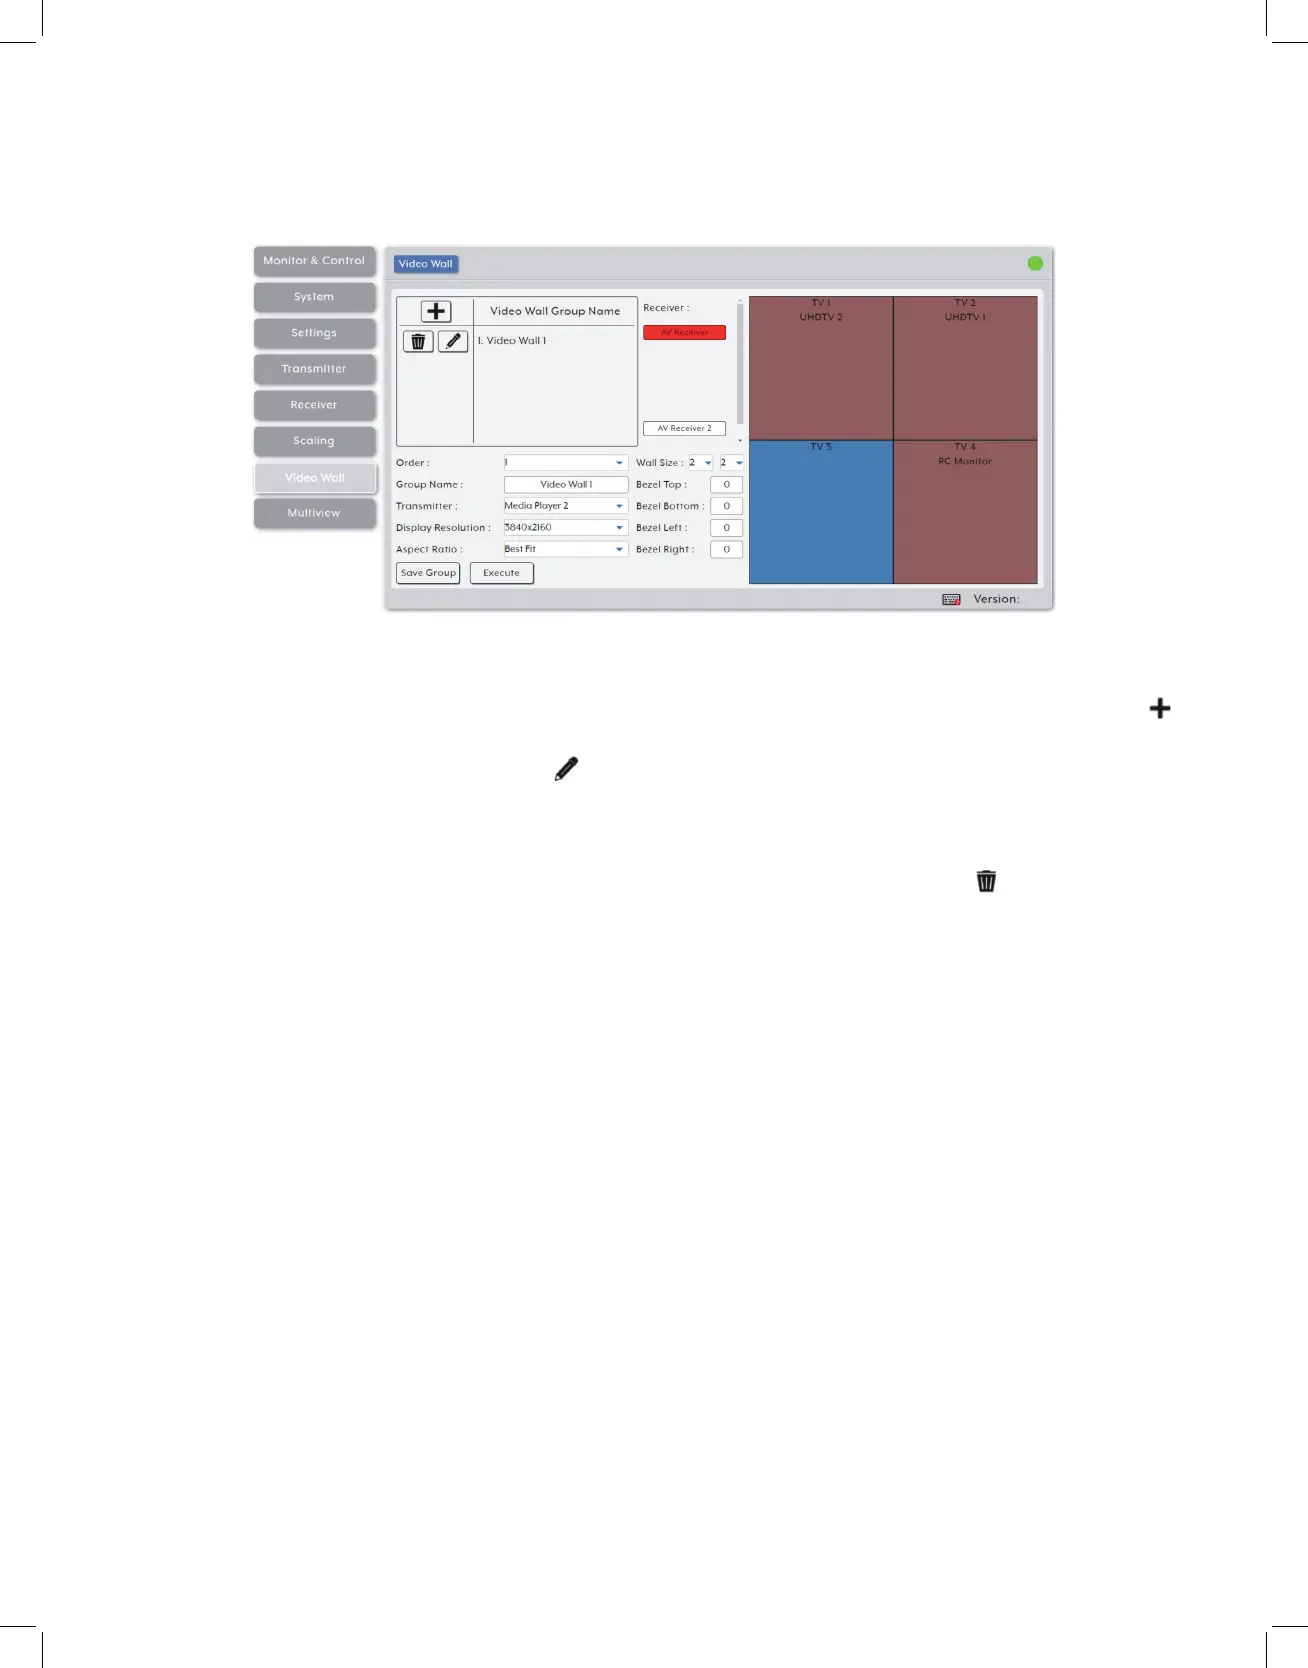
6.6.7 Video Wall Tab
This tab provides a way to configure or modify video walls using multiple receivers in a
group. All aspects of the video wall group can be configured here including dimensions
(up to 8x8 displays), bezel compensation, display output resolution, and source.
1. Video Wall List: The upper left section of this tab contains a list of all currently
defined video wall groups in the system and provides a way to create new video
walls, edit them, or delete them. To add a new video wall, click on the “Add” icon ( )
and then select the preferred options and receivers. To edit an existing video wall
group, click on the “Edit” icon ( ) and then make whatever changes are required.
Once a new or edited video wall group has been configured, click on the “Save
Group” button at the bottom of the page to store the group’s configuration. To save
and immediately activate the current video wall group, click on the “Execute” button.
To delete an existing video wall group, click on the “Delete” icon ( ) next to the
appropriate group’s name.
Note: Deleting a video wall preset will not disable the video wall it described if it is currently active.
To completely remove a video wall, new sources need to be routed to those displays, or the output
needs to be disabled from the Monitor & Control Tab.
• Order: Use the dropdown to reorder the video wall groups in the list. Changing the
order here will also change the order the groups are listed in other tabs.
• Group Name: Set the name of the video wall group here.
• Transmitter: Select the transmitter to use as the video source for the video wall when
the “Execute” button is used.
• Display Resolution: Select the resolution for all receivers in the video wall to output
to their connected displays.
• Aspect Ratio: Select the aspect ratio logic to use when presenting a source across
the video wall. Selecting “Best Fit” will maintain the aspect ratio of the original
source while filling the video wall as much as possible and adding black bars where