49
(looking at pins/sockets or looking at the wiring side, where the wires are actually
connected).
Hint: Make notes of which wires (colors, cables) you use for each connection, so you
will be able to keep track of which connection is which.
To construct your transceiver cable assembly, proceed as follows:
Hint: You may find it easier to wire the male DSUB-9 connector if you first connect it to
the KPC-3 Plus and use the KPC-3 Plus as a ―jig.‖ This may also keep the male pins
straight if you apply too much heat and soften the plastic in the male connector.
A shielded cable must be used with the shield properly terminated 360 to the
connector.
Instructions for making a cable assembly using the supplied foil shielded cable and
metalized plastic back shell follow:
1. Strip cable outer covering back enough to expose enough metalized plastic foil.
Do not cut or rip foil.
2. Carefully loosen the drain wire and foil from around the insulated wires.
3. You will need to build up the diameter of the cable, where it enters the back shell,
with any type of tape or sleeve, so that when the metalized plastic shell halves
are screwed together they will hold the cable as strain relief and press against
the metal foil.
4. Discard the metal strain relief pieces and screws that go with them—they are of
no use.
5. Connect wires as needed to terminals of connector. Keep track of which wire is
connected to which terminal.
6. Carefully fold the metalized foil back over the cable and Z-fold it so the metal side
of the foil is exposed to the connector back shell at the entrance area. Spread the
foil over the cable so you get as much coverage as possible (you will not get
360 coverage, but do the best you can).
7. Place the drain wire in the gap where you can not get foil coverage.
8. Place one of the shaped washers on each of the long, half-threaded screws, so
they are next to the head of the screw (with the bent ends of the washers facing
away from the heads of the screws).
9. Now place the metalized plastic shell halves together over the connector and
cable, with the (2) two long half-threaded screws and two shaped washers, to
attach the whole assembly to the KPC-3 Plus.
10. When you screw the two halves together there should be enough compression to
hold the cable in place and there should be solid contact between the metal side
of the foil and the metalized back shell. See figure below.
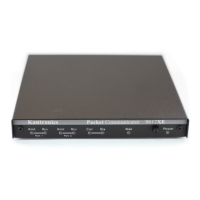
11. If your radio is equipped with a single metal connector, such as the Kantronics
dvr 2-2, then this same cable with connector attachment technique should be
used. Otherwise follow the wiring directions that follow.