50
Wiring between your Transceiver Microphone and the KPC-3 Plus:
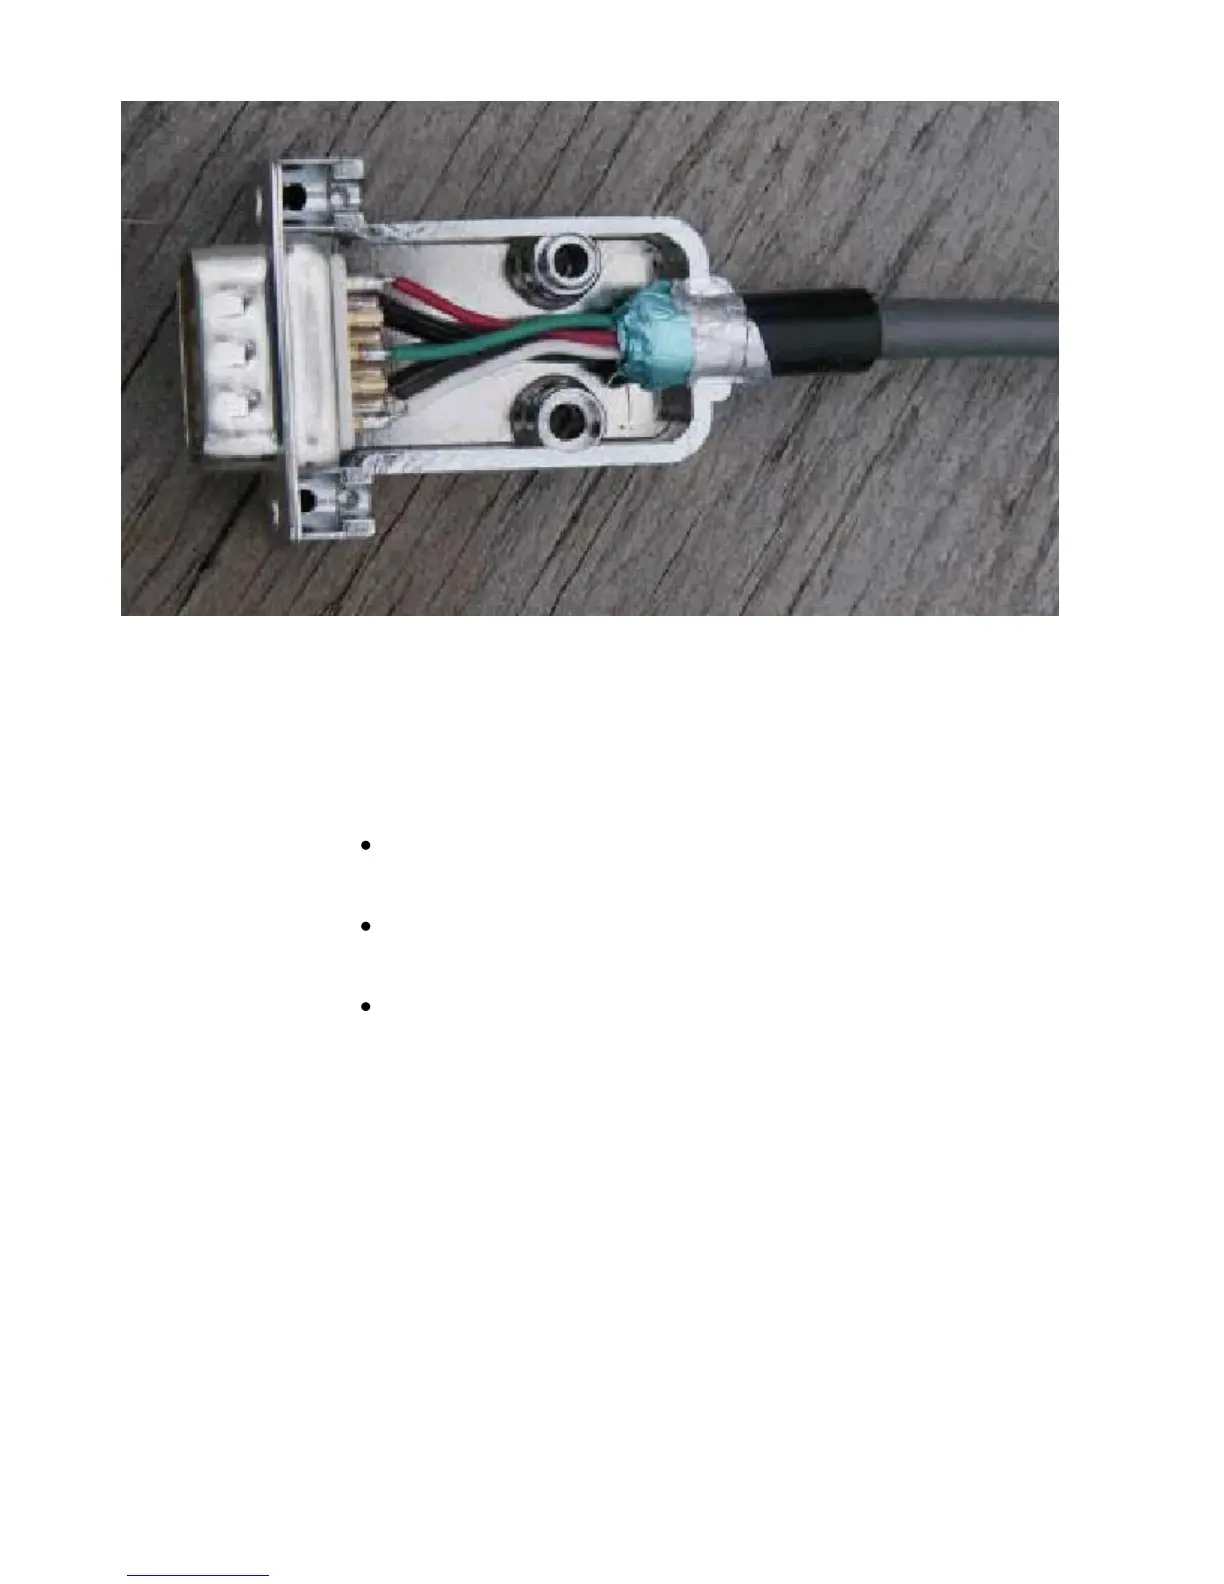
Follow the notes taken above and wire the cable assembly in the following order:
Step 1. Using a user-supplied microphone connector appropriate for your transceiver
and the notes taken above, attach wires as follows:
Attach the wire from pin 1 (transmit audio) on the DSUB-9 to the
microphone connector‘s input pin,
Attach the wire from pin 3 (push-to-talk) on the DSUB-9 to the
microphone connector‘s PTT or STBY pin,
(Optional) for base or mobile units, attach the wire from pin 9 (one path
to ground) on the DSUB-9 to the ground pin on the microphone
connector.
Connecting your Transceiver’s Speaker Plug to the KPC-3 Plus
Use an appropriate third party speaker plug and the notes taken earlier to do the
following wiring to the DSUB-9 cable assembly:
Step 1. Locate the wire that connects to the audio of the external speaker plug and
attach it to the wire from pin 5 on the DSUB-9 (Receive Audio)
Step 2. Locate the wire that connects to the ground of the external speaker jack and
attach it to the wire from pin 6 on the DSUB-9 (Ground)
This is all you need to do to wire the speaker plug part of the assembly.