51
Important: Keep your wiring notes for future reference.
This completes the construction of your transceiver cable assembly. Now it needs to be
connected.
Connecting the Transceiver Cable Assembly
Now you are ready to use this cable assembly to finish assembling your packet radio
station.
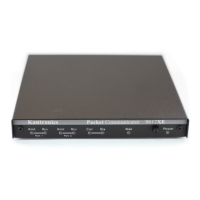
Step 1. Check to be sure all the parts of your completed cable assembly are properly
fastened and ready for connection to your transceiver and your KPC-3 Plus.
Step 2. Turn OFF all power.
Step 3. Plug the male DSUB-9 connector on the cable into the female DSUB-9
connector on the KPC-3 Plus‘ ―Radio‖ port,
Step 4. Secure the male DSUB-9 connector on the cable to the female DSUB-9
connector on the KPC-3 Plus‘ ―Radio‖ port, by screwing the two long, half-
threaded screws into the threaded nuts on each side of the KPC-3 Plus‘
―Radio‖ port,
Step 5. Plug both the microphone connector and the external speaker jack into your
transceiver.
Adjusting the Receive Volume of Your Transceiver
To adjust the receive volume of your transceiver to the proper level (or to confirm that it
is already set at the proper level), do the following:
Step 1. Turn ON your computer (with your transceiver OFF),
Step 2. Start your terminal program,
Step 3. Turn ON your KPC-3 Plus,
Step 4. If not already done, set the KPC-3 Plus‘ baud (ABAUD) and CALLSIGN,
Step 5. Turn ON your transceiver and open the squelch control (turn it fully counter-
clockwise),
Step 6. Slowly turn the transceiver‘s receive volume up until the RCV LED (receive
indicator) on the KPC-3 Plus lights up (turns ON),
Step 7. Increase the transceiver‘s receive volume control slightly above the point at
which the KPC-3 Plus‘ RCV LED lit up (turned ON),
Step 8. Slowly turn the transceiver‘s squelch control clockwise until the KPC-3 Plus‘
RCV LED goes OUT (turns OFF),