安裝方法
HOW TO INSTALL
2 Main body installation
Method 3 Ceiling board has not been installed
1
12
出風 口接 頭定 位槽
懸吊 支架 螺絲 孔
自攻 螺絲
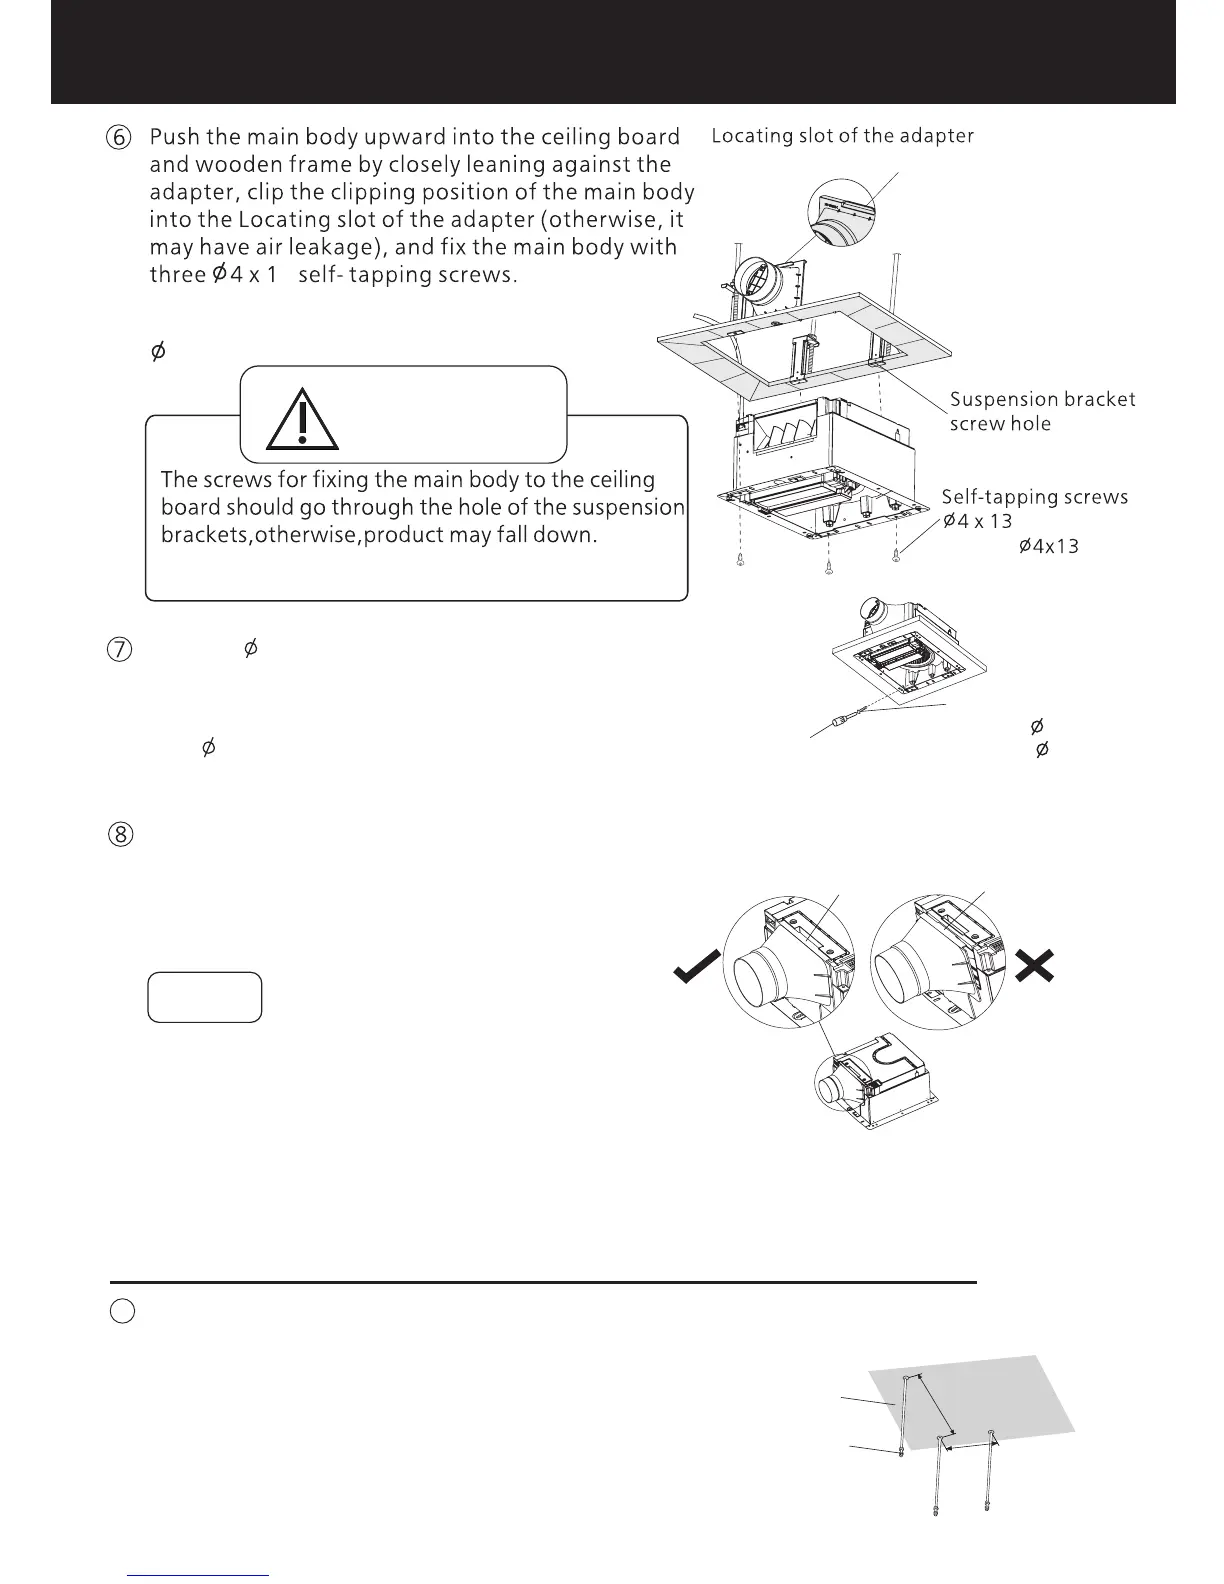
將機體緊靠出風口接頭往上推入天花板與木框,並使
機體上卡位卡入出風口接頭槽中(否則漏風),使用3顆
4x13自攻螺絲將機體牢固地固定。
注意
CAUTION
固定機體的螺絲,必須通過懸吊支架螺絲孔將機體固定
於懸吊支架和天花板,否則產品有掉落的危險。
3
Use one 4 x 20 self-tapping screw to fix the
adapter. Be sure to fix this screw because it
can prevent the main body from falling off the
ceiling board.
用 顆 的自 攻螺絲將 機體牢固 地固定1 4x20 ,
。此螺絲能起到防止機體脫落的作用,請務必安裝
After completion of the installation work, be
sure the condition between the main body and
the adapter is proper. It can be checked from
the inspection hole.
If adapter fails to cling to the main body, it
may cause air leakage.
提示事項
Notice
如機體與出風口接頭未貼緊,會導致漏風。
安裝完成後,請務必從點檢口確認機體與出風口接頭
的安裝是否到位。
機體的安裝
方法三 未裝天花板吊裝
根據右圖尺寸將吊桿(另購M8或M10)安裝於天花。
Fix the suspenders (M8 or M10, need to be purchased)
on the ceiling according to dimensions on right.
Ceiling
天花
Suspender
吊桿
333
185
Unit: mm
單位:mm
Self-tapping
screws 4 x20
Cross screwdriver
(not longer than 150 mm)
十字螺絲刀
(長度不大於150 mm)
自攻螺絲
4x20
(3 pcs)
( )3顆
卡到位
未卡到位
No buckled
Buckled