2: Performance verification Model DMM7510 7½ Digit Graphical Sampling Multimeter
2-54 DMM7510-905-01 Rev. A / April 2015
Digitize DC current verification 1 mA to 3 A ranges
To verify digitize DC current accuracy:
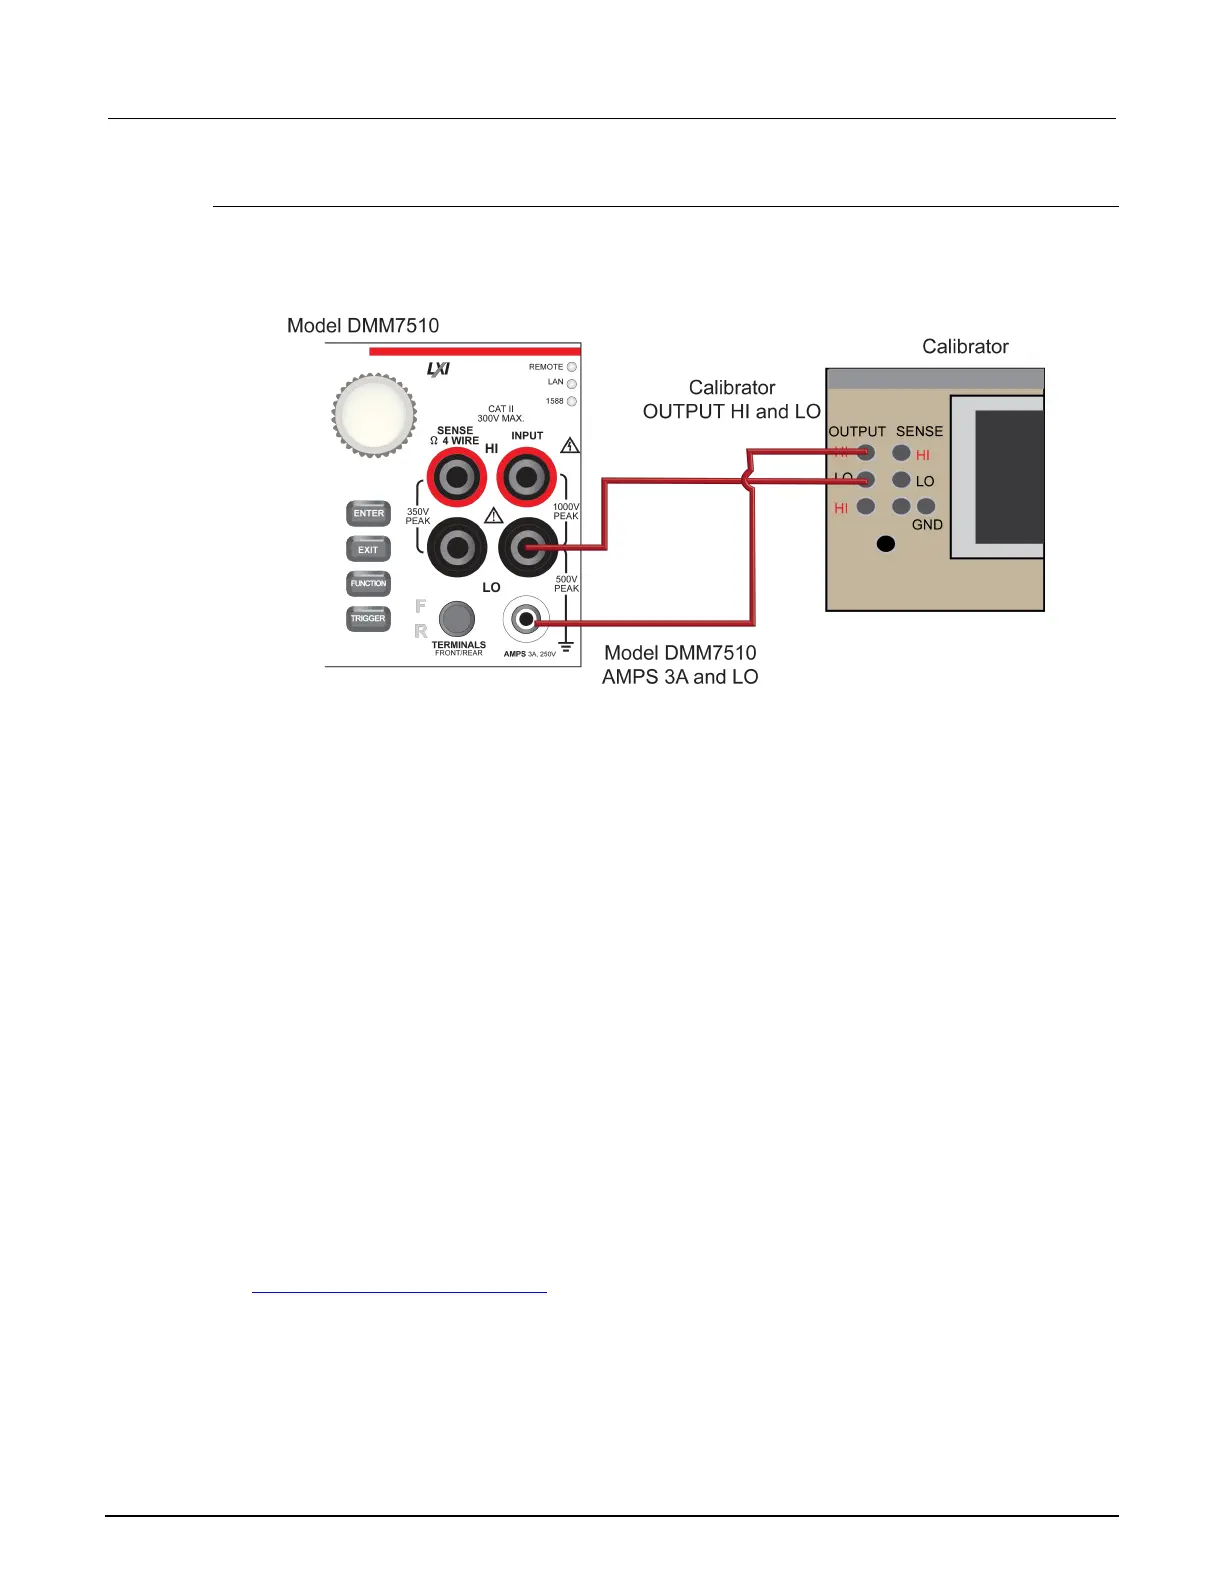
1. Connect the Model DMM7510 and calibrator as shown in the following figure.
Figure 11: 100 mA to 3 A range verification
2. On the Model DMM7510, press the FUNCTION key, select the Digitize Functions tab, and
select Digitize Current.
3. Press the HOME key.
4. Set the Range to 1 mA.
5. Press the MENU key.
6. Select Settings.
7. Set the Sample Rate to 1000.
8. Set the Aperture to Auto or 1 ms.
9. Set the Count to 100.
Zero verify the Model DMM7510:
1. On the calibrator, select the OPR/STBY key. Ensure that the front panel displays STANDBY.
2. Verify the Model DMM7510 Zero reading for each range.
Rel the system:
1. On the calibrator, select the OPR/STBY key. Ensure that the front panel displays OPERATE.
2. Se thte calibration current output to NORMAL.
3. Set the calibrator output to 0 A and allow the reading to settle.
4. On the Model DMM7510, press the MENU key.
5. Select Calculations.
6. Select Rel Acquire.
7. Source positive and negative full-scale and half-scale currents, as listed in
Verify digitize current 1 mA range (on page 2-55
).
8. Repeat these steps for the 10 mA to 3 A range settings listed in the tables below. For each
current setting, verify that the STATISTICS swipe screen reading for Average is within low and
high limits.
 Loading...