7½ Digit Graphical Sampling Multimeter Calibration Manual Section 2:
DMM7510-905-01 Rev. A / April 2015 2-53
4. Set up the Model DMM7510 to the Digitize DC current function.
5. Press the HOME key.
6. Set the Range to 10 µA.
7. Press the MENU key.
8. Select Settings.
9. Set the Sample Rate to 1000.
10. Set the Aperture to Auto.
11. Set the Count to 100.
Zero verify the Model 7510:
1. On the calibrator, select the OPR/STBY key. Ensure that the front panel displays STANDBY.
2. Verify the Model DMM7510 Zero reading for each range.
Rel the system:
1. On the calibrator, select the OPR/STBY key. Ensure that the front panel displays OPERATE.
2. Set the reference DMM to DC Voltage, 2 V range.
3. Set the calibrator to 0 V.
4. Rel the Model DMM7510.
5. Zero Range the reference DMM system offset.
6. Set the calibrator to source the voltage identified in the following "10 µA and 100 µA range
verification" table, verifying the Model DMM7510 accuracy from the calculated reference DMM
Voltage/Characterized shunt. For each setting, verify that the STATISTICS swipe screen reading
for Average is within low and high limits.
7. For 100 µA verification, set the reference DMM to the 20 V range.
8. Repeat steps 3 to 6 for 100 µA verification.
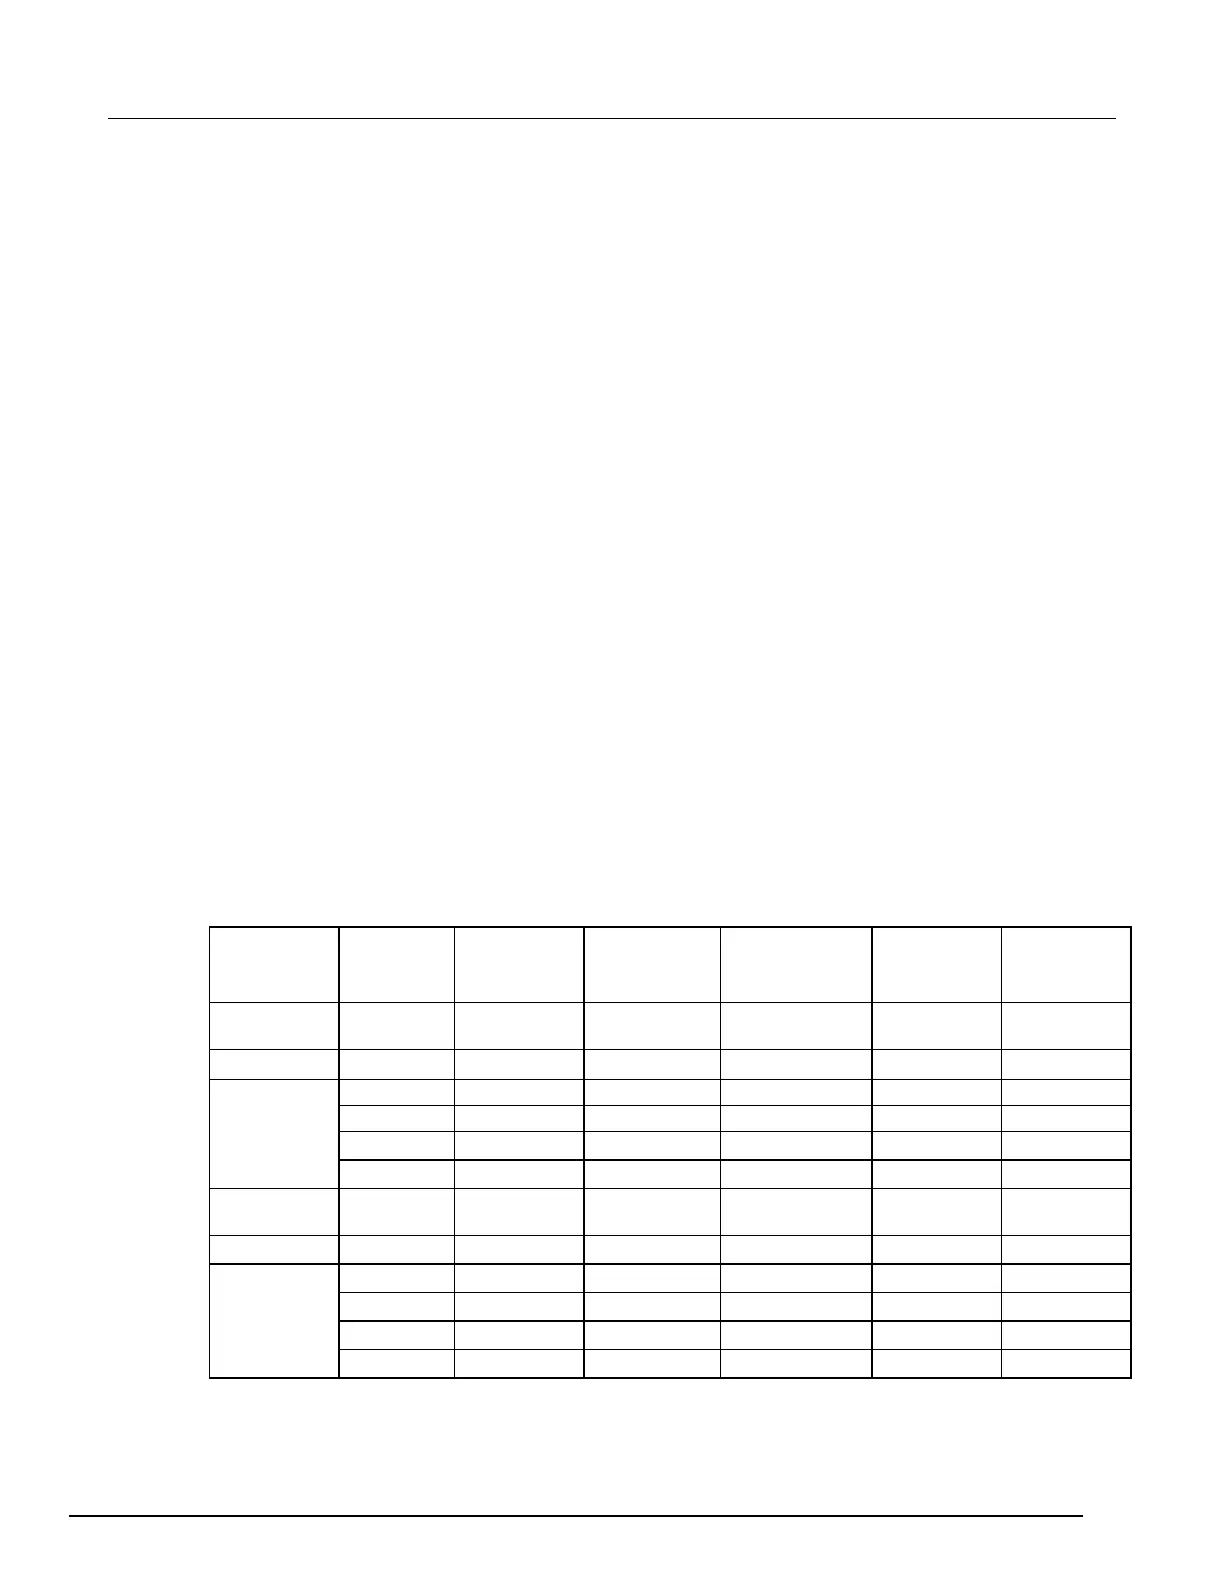
10 µA and 100 µA verification table
Characterized shunt (Ω): 1.9607843E+05
Range Nominal
input
Calibrator
setpoint
(V)
Shunt
measurement
(V)
Calculated
input
(A)
Lower limit
(A)
Upper limit
(A)
Ref DMM
0.00E+00 0 8.00E-07 0 n/a n/a
Ref DMM
0.00E+00 0 V 8.00E-07 0 n/a n/a
-0.00005 -9.8089216 -9.8039216 -5.0000001E-05 -5.00155E-05 -4.99845E-05
 Loading...