7½ Digit Graphical Sampling Multimeter Calibration Manual Section 3:
DMM7510-905-01 Rev. A / April 2015 3-9
Rear AC adjustment step 2: ACI 10 A Full-scale adjustment
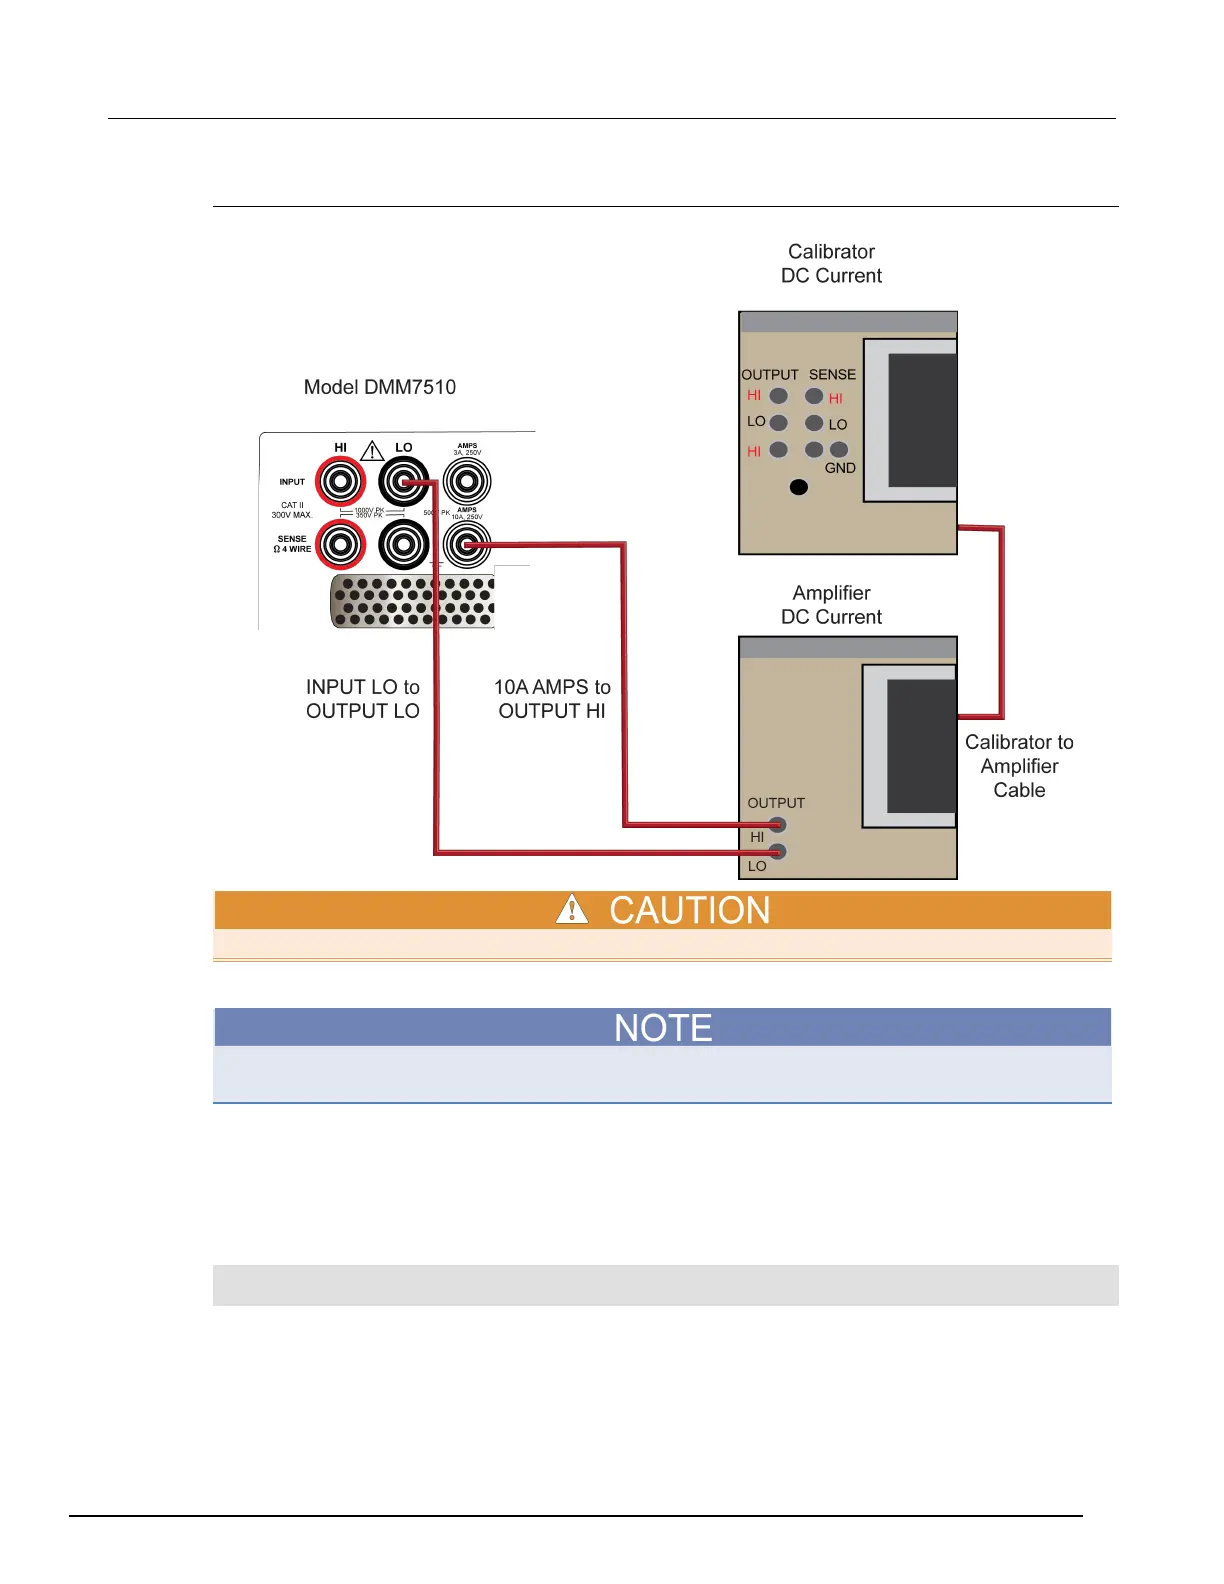
1. Connect the calibrator, amplifier, and Model 7510 as shown in the following figure.
Ensure that the gauge of the cabling is sufficient to handle 10 A.
2. On the calibrator, set the level to 7 A at 1 kHz.
The Calibration adjust step 2 allows 2 A through 10 A; ±10 % for the source level. It is best to use
7 A for lowest full-scale uncertainty and minimize internal thermal settling.
3. Enable the calibrator amplifier and select the BOOST key.
4. On the calibrator, set the amplifier range lock ON.
5. On the calibrator, select OPR/STBY key. Ensure that the front panel displays OPERATE.
6. Allow the calibrator and amplifier to properly settle.
7. Send the following command.
cal.adjust.rear.ac(2, 7.0) -- Requires Fluke Model 5720/5725 to source 7.0A ac at
1KHz into 10A and Lo rear terminals.
 Loading...