3: Calibration Model DMM7510 7½ Digit Graphical Sampling Multimeter
3-8 DMM7510-905-01 Rev. A / April 2015
Rear DC adjustment step 3: DCI 10 A full-scale adjustment
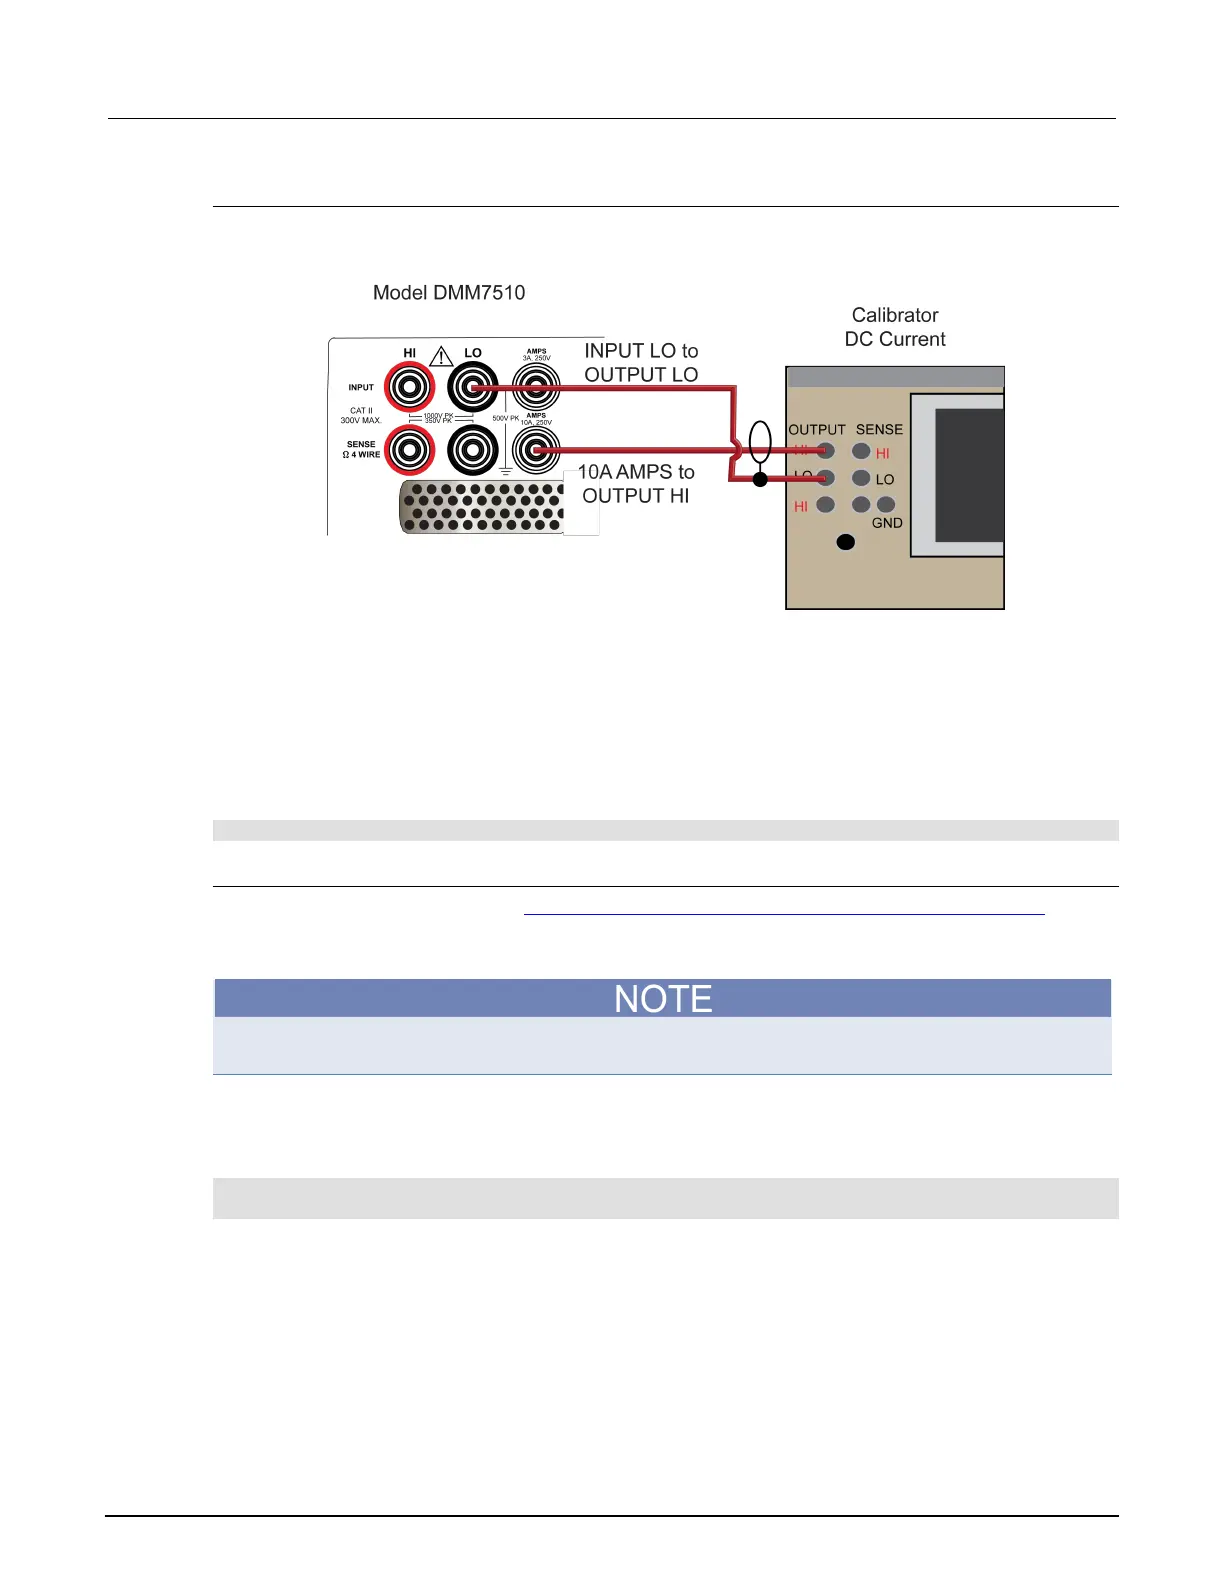
1. Connect the calibrator and Model DMM7510 as shown in the following figure.
Figure 17: Rear DC step 3 and rear AC step 1 calibrator and Model DMM7510 connections
Rel the system:
1. Ensure that the calibrator Current Output is set to Normal.
2. On the calibrator, set the source to 2.0 A. Note that Calibration adjust step 3 allows 2 A ±10 % for
the source level.
3. Allow the calibrator to properly settle.
4. Enter the actual calibrator output value during Step 3.
Send the command:
cal.adjust.rear.dc(3, 2.0) -- Requires calibrator to source 2A.
Rear AC adjustment step 1: ACI 10 A Zero adjustment
1. Maintain the connections from Rear DC adjustment step 3: DCI 10 A full-scale adjustment (on
page 3-8)
2. On the calibrator, set the level to 0.5 A at 1 kHz.
The 0.5 A source value is required. If an alternate value is used, incorrect accuracies will occur and
possibly out of tolerance warning messages.
3. On the calibrator, select OPR/STBY key. Ensure that the front panel displays OPERATE.
4. Allow the calibrator to properly settle.
5. Send the following command.
cal.adjust.rear.ac(1) -- Requires calibrator to source 0.5 A ac at 1KHz into 10A
and Lo rear terminals.
 Loading...