7½ Digit Graphical Sampling Multimeter Calibration Manual Section 3:
DMM7510-905-01 Rev. A / April 2015 3-13
DC voltage adjustment step 5: 10 kΩ
To run DC adjustment step 5:
1. Retain the connections made in DC voltage adjustment steps 3 and 4: +10 V and -10 V (on page
3-12).
2. Allow the instruments and cables to settle for 5 minutes.
3. On the calibrator, enable the OPR key and the EX SNS key.
4. Ensure that the OPERATE display and EX SNS keys are illuminated.
5. Source 10 kΩ and allow the calibrator and Model DMM7510 to properly settle.
DC adjust step 5 supports an allowed range of source values from 9.0 kΩ to 11.0 kΩ. The Fluke
5720 calibrator supports only approximately 10 kΩ. As a valid alternative, you can use an external
stable and low-drift characterizer reference resistor.
Ensure cal.adjust.dc(5, 10.0e3) uses the calibrator actual source or the external stable and
low-drift characterizer reference resistor value.
6. Send the following command.
cal.adjust.dc(5, 9.999938e3) -- 10K Require HI and LO and 4W SHI and SLO Ft
terminals. Enter the actual calibrator source value.
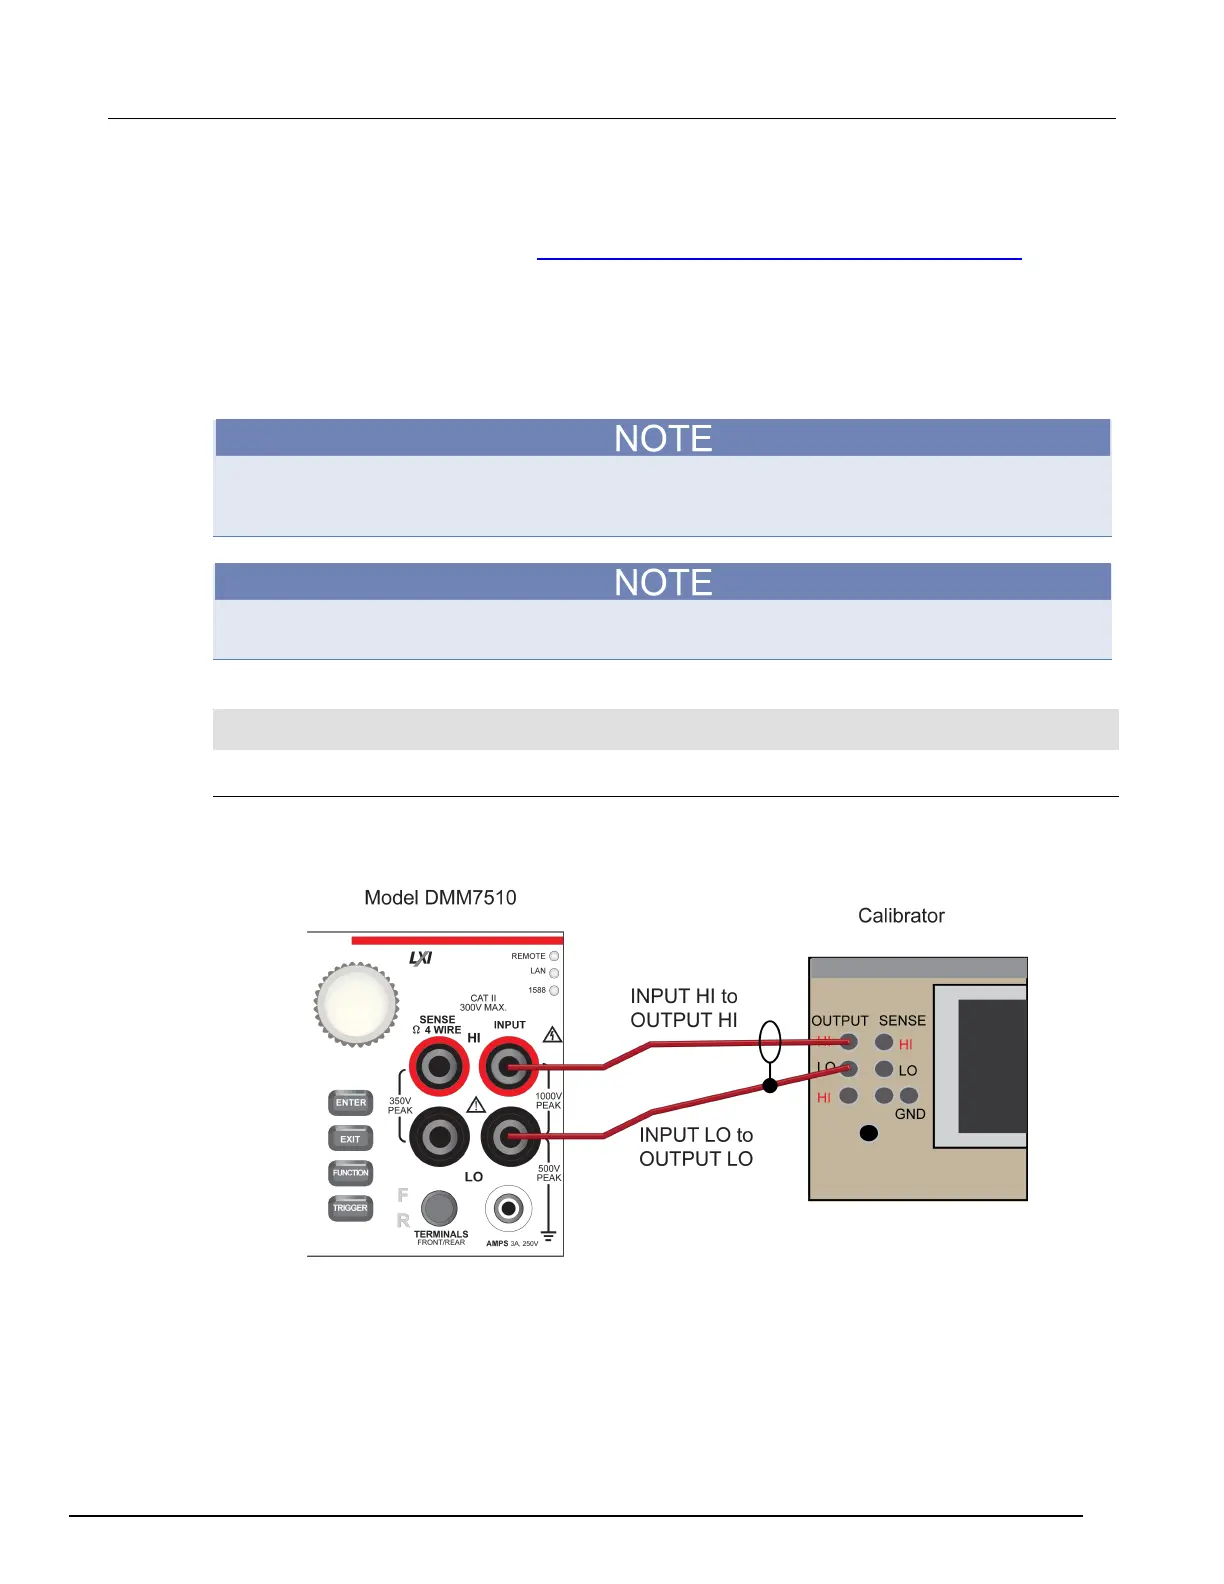
AC voltage adjustment steps 1 to 10
To set up the equipment for AC adjustment steps 1 to 10:
1. Connect a cable between the calibrator and the Model DMM7510 as shown in the figure below.
 Loading...