3: Calibration Model DMM7510 7½ Digit Graphical Sampling Multimeter
3-12 DMM7510-905-01 Rev. A / April 2015
DC voltage adjustment steps 3 and 4: +10 V and -10 V
To prepare to run DC adjustment steps 3, 4, and 5:
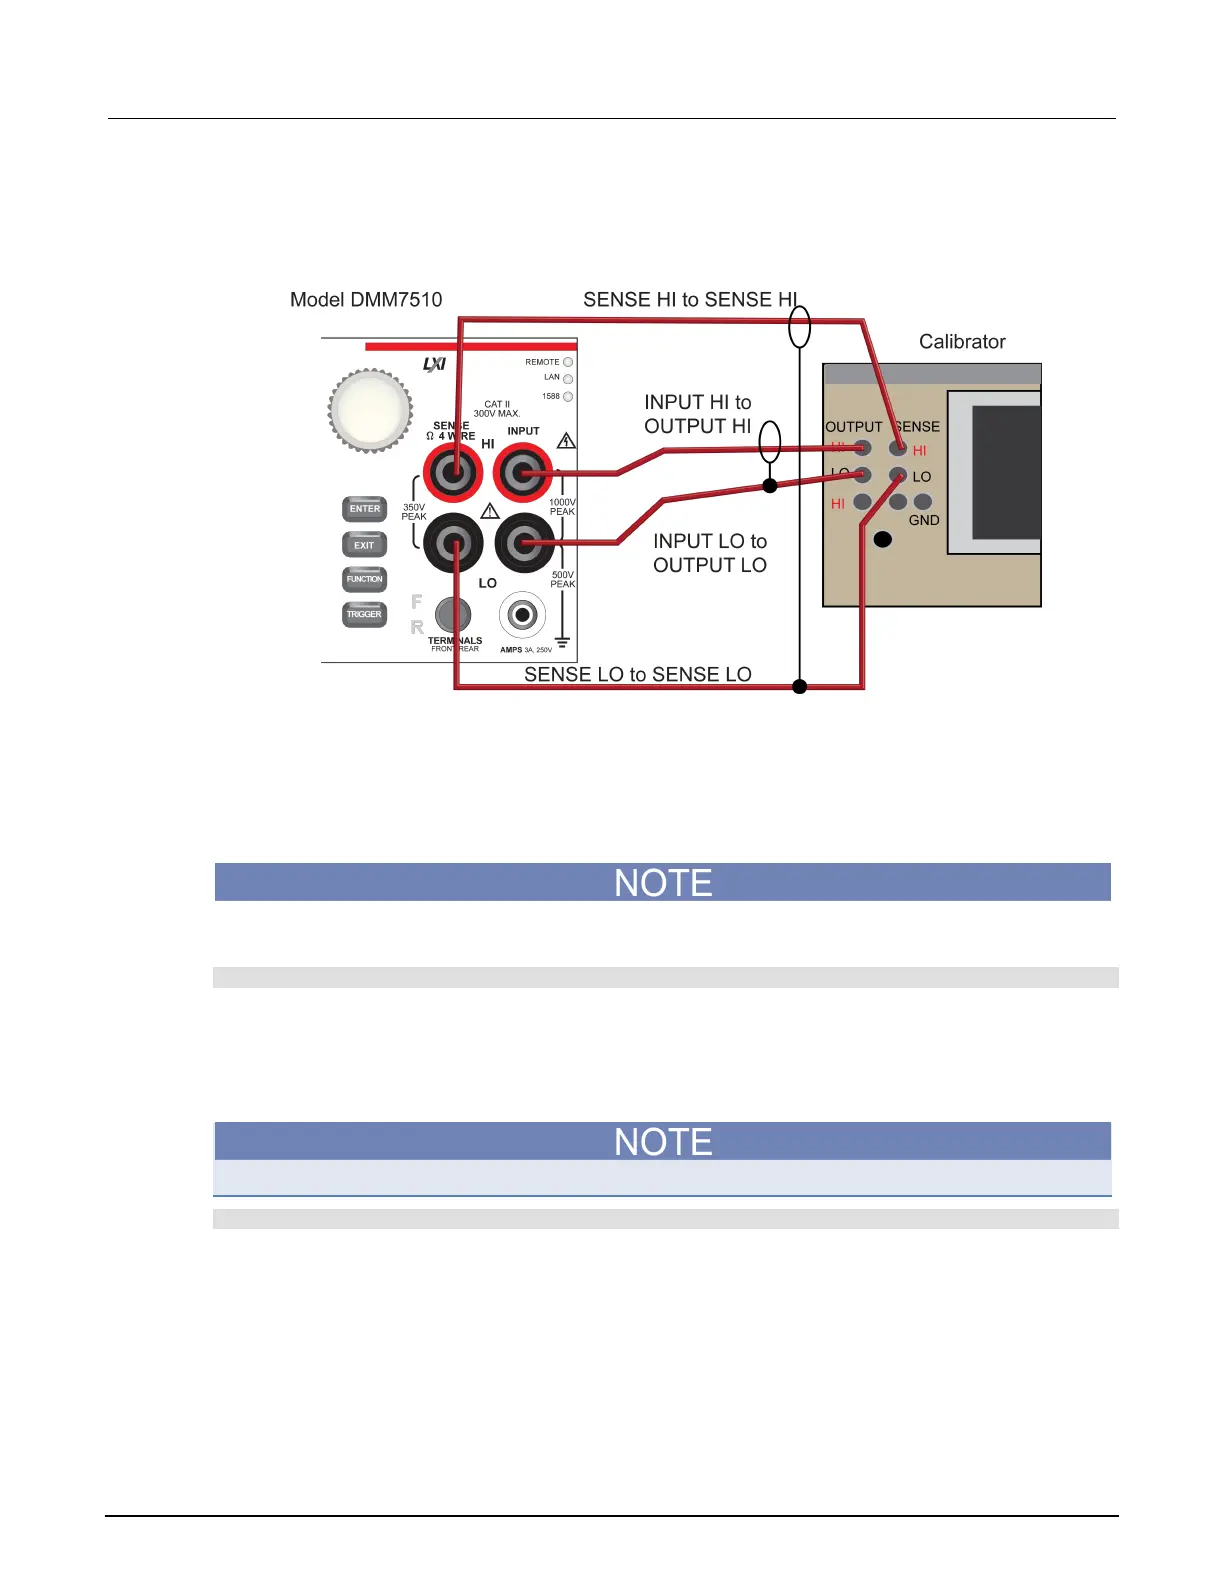
1. Connect a cable between the calibrator and the Model DMM7510, as shown in the figure below.
2. Allow the instrument and cable to settle for 5 minutes.
To run DC adjustment step 3:
1. Source +10 V and allow the calibrator to properly settle.
2. Ensure that the calibrator output is enabled.
3. Send the following command.
Ensure cal.adjust.dc(3, 10.0). The 10 V value may be ±10 % depending on the actual output
of the calibrator.
cal.adjust.dc(3, 10.0) -- 10V Require HI and LO Ft terminals.
To run DC adjustment step 4:
1. Source -10 V and allow the calibrator to properly settle.
2. Ensure that the calibrator output is enabled.
3. Send the following command.
Ensure cal.adjust.dc(4, -10.0) uses the actual output value of the calibrator.
cal.adjust.dc(4, -10.0) -- '-10V Require HI /LO Ft terminals.
 Loading...