3: Calibration Model DMM7510 7½ Digit Graphical Sampling Multimeter
3-16 DMM7510-905-01 Rev. A / April 2015
AC current adjustment steps 11 to 16
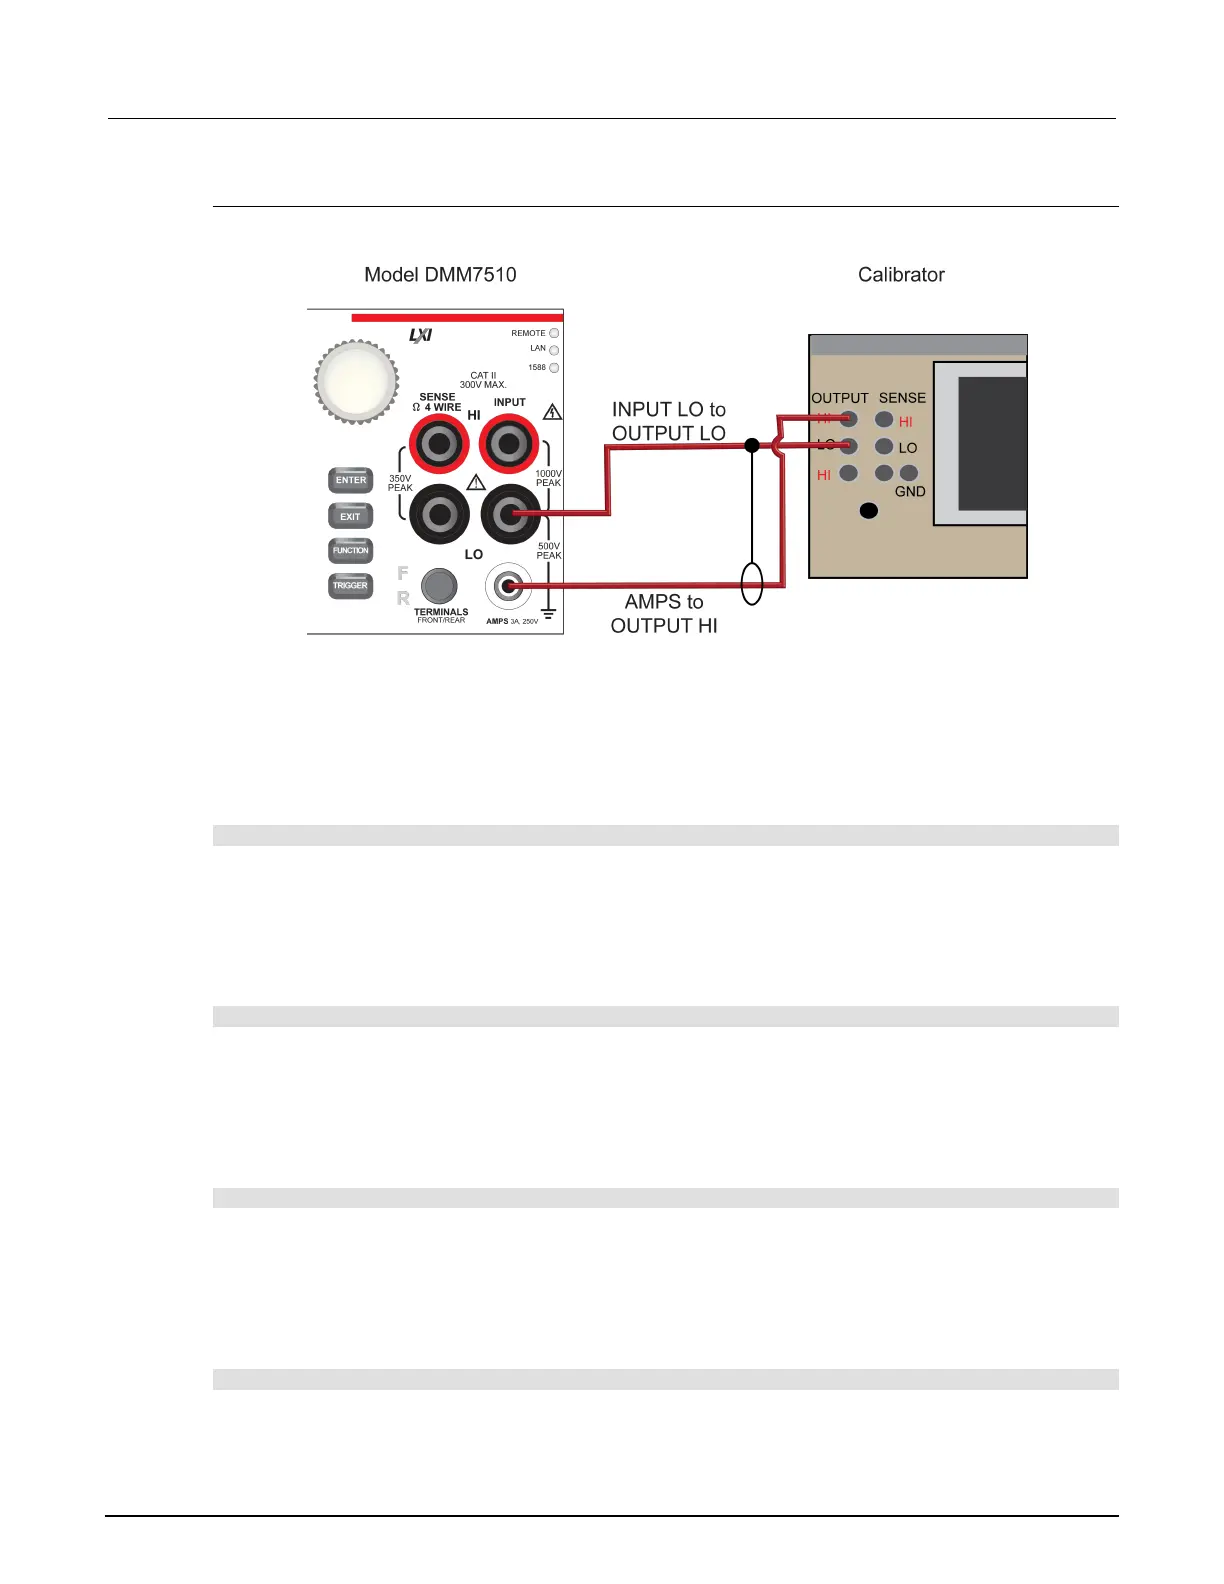
1. Connect the Model DMM7510 to the calibrator as shown in the following figure.
AC current adjustment step 11: 100 µA at 1 kHz
1. Ensure that the calibrator Current Output is set to Normal.
2. On the calibrator, source 100 µA at 1 kHz.
3. Enable the OPR key.
4. Allow the calibrator and cable to properly settle.
5. Send the following command:
cal.adjust.ac(11) -- 100uA, 1KHz 3A and LO Ft terminals.
AC current adjustment step 12: 1 mA at 1 kHz
1. On the calibrator, source 1 mA at 1 kHz.
2. Enable the OPR key.
3. Allow the calibrator and cable to properly settle.
4. Send the following command:
cal.adjust.ac(12) -- 1mA, 1KHz 3A and LO Ft terminals.
AC current adjustment step 13: 10 mA at 1 kHz
1. On the calibrator, source 10 mA at 1 kHz.
2. Enable the OPR key.
3. Allow the calibrator and cable to properly settle.
4. Send the following command:
cal.adjust.ac(13) -- 10mA, 1KHz 3A and LO Ft terminals.
AC current adjustment step 14: 100 mA at 1 kHz
1. On the calibrator, source 100 mA at 1 kHz.
2. Enable the OPR key.
3. Allow the calibrator and cable to properly settle.
4. Send the following command:
cal.adjust.ac(14) -- 100mA, 1KHz 3A and LO Ft terminals.
 Loading...