1-30 (No.RA018<Rev.002>)
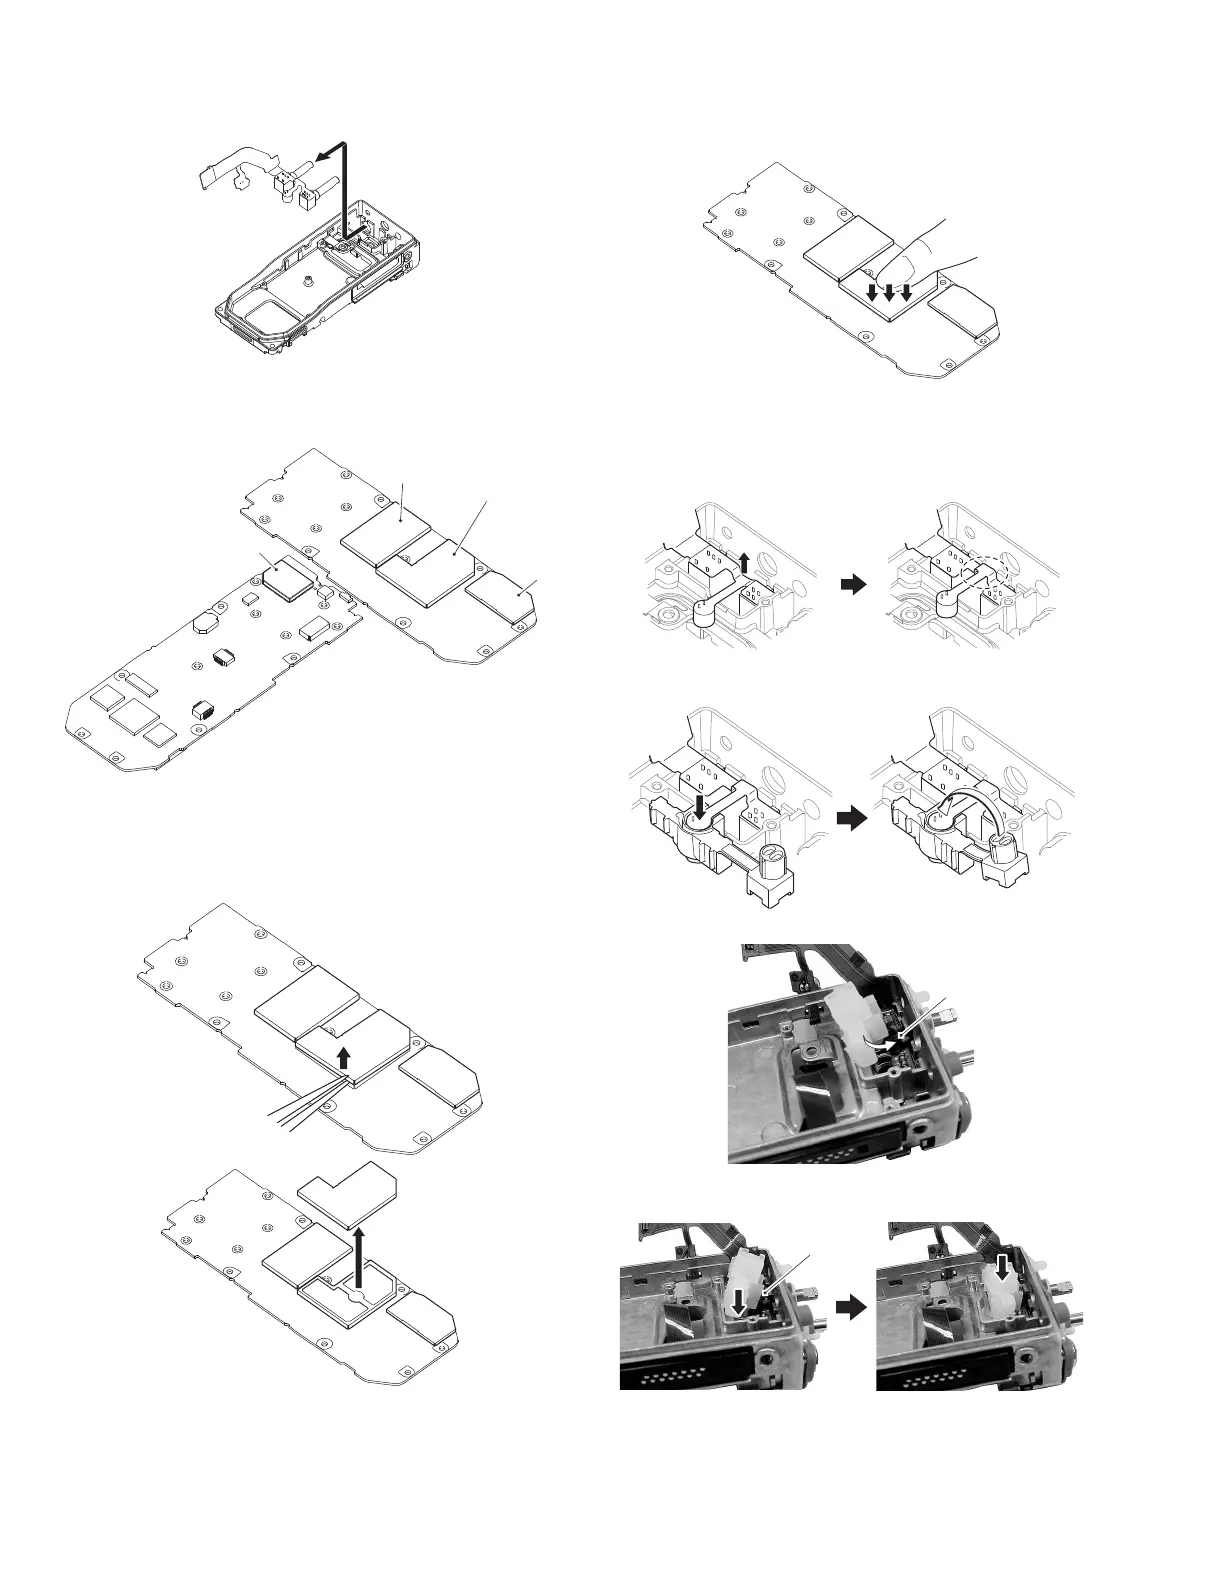
(4) Move the selector and volume switches and then remove
them both from the holes in the chassis.
3.2.11 Remove the top cover from the shield cover
(1) There are four shield covers (GPS, IF, VCO RX, and VCO
TX) on the main unit, the top covers can be removed.
(2) Use tweezers to slightly lift the edge of the top cover. <1>
(3) As you do step 2 above, vary the position you hold the top
cover as you lift it, and remove the top cover <2>.
Note:
Once the top cover is removed, it cannot be used again.
Note:
Push evenly on the top cover and be careful that you do
not bend it as you install it on the shield cover.
3.3 Precautions for Reassembly
3.3.1 Install the packing in the chassis
(1) Lift up the VOL/SEL/MIC FPC as shown by the arrow in the
figure so it is in the shape shown inside the dotted line.
(2) Insert the microphone into the packing. <1>
(3) Insert the cover into the packing. <2>
(4) Tuck the packing under the A part of the FPC. <3>
(5) Keep the packing tucked under A as you insert it into the
chassis. <4>
<1>
<2>
A
<3>
<4>
A
 Loading...