3.5. Configure the alarms
This part allows to activate and define the alarms conditions on one or several channels.
One channel must be configured at least (see chapter 3.3).
If no channel has been configured, the transmitter will indicate that the alarms configuration is
impossible.
➢ Press OK.
➢ Enter the security code then press OK.
➢ Go to “Alarms” line then press OK.
The transmitter displays the 4 alarms : “Alarm 1”, “Alarm 2”, “Alarm 3” or “Alarm 4”.
3.5.1 Select the alarm mode
➢ Go to the line of the alarm to configure then press OK.
➢ Press OK on “Mode” line.
The transmitter displays the different available modes :
• None
• Rising edge
• Falling edge
• Monitoring
• Transmitter state
➢ Go to the required mode with Up and Down arrows then press OK.
Details of the available alarms modes :
• Rising edge (1 threshold) : the alarm goes off when the measurement exceeds the threshold and stops when it is
below the threshold
• Falling edge (1 threshold) : the alarm goes off when the measurement is below the threshold and stops when it
exceeds the threshold.
• Monitoring (2 thresholds) : the alarm goes off when the measurement is outside the defined low and high
thresholds.
• Transmitter state : the alarm goes off according to defined conditions (high ambient temperature*, memory error...)
*only with the pressure board
15
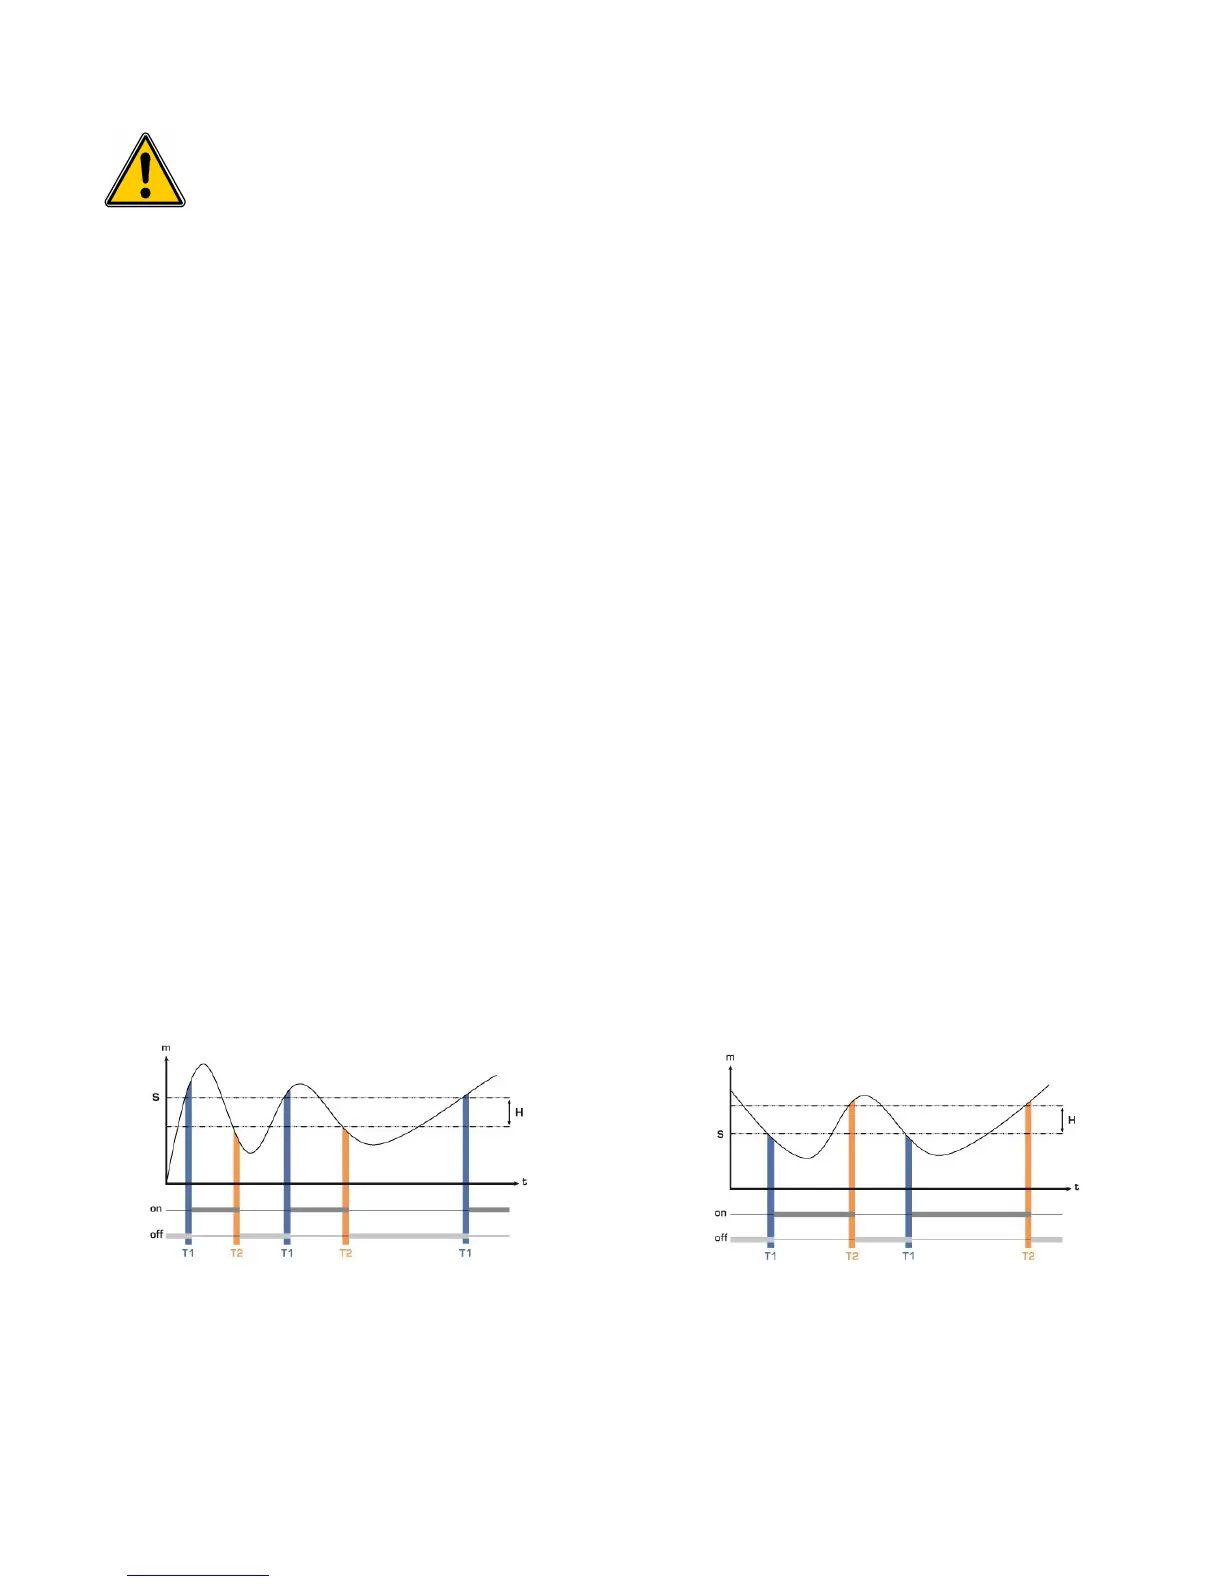
Rising edge
Measurement (m) > Threshold (S) during the time-delay T1 → Alarm
activation
Measurement (m) < Threshold (S) - Hysteresis (H) during the time-delay
T2 → Alarm deactivation
Falling edge
Measurement (m) < Threshold (S) during time-delay T1 →
Alarm activation.
Measurement (m) > Threshold (S) + Hysteresis (H) during
time-delay T2 → Alarm deactivation