10
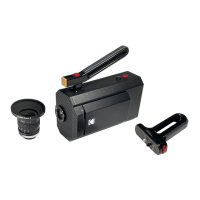
Getting Started
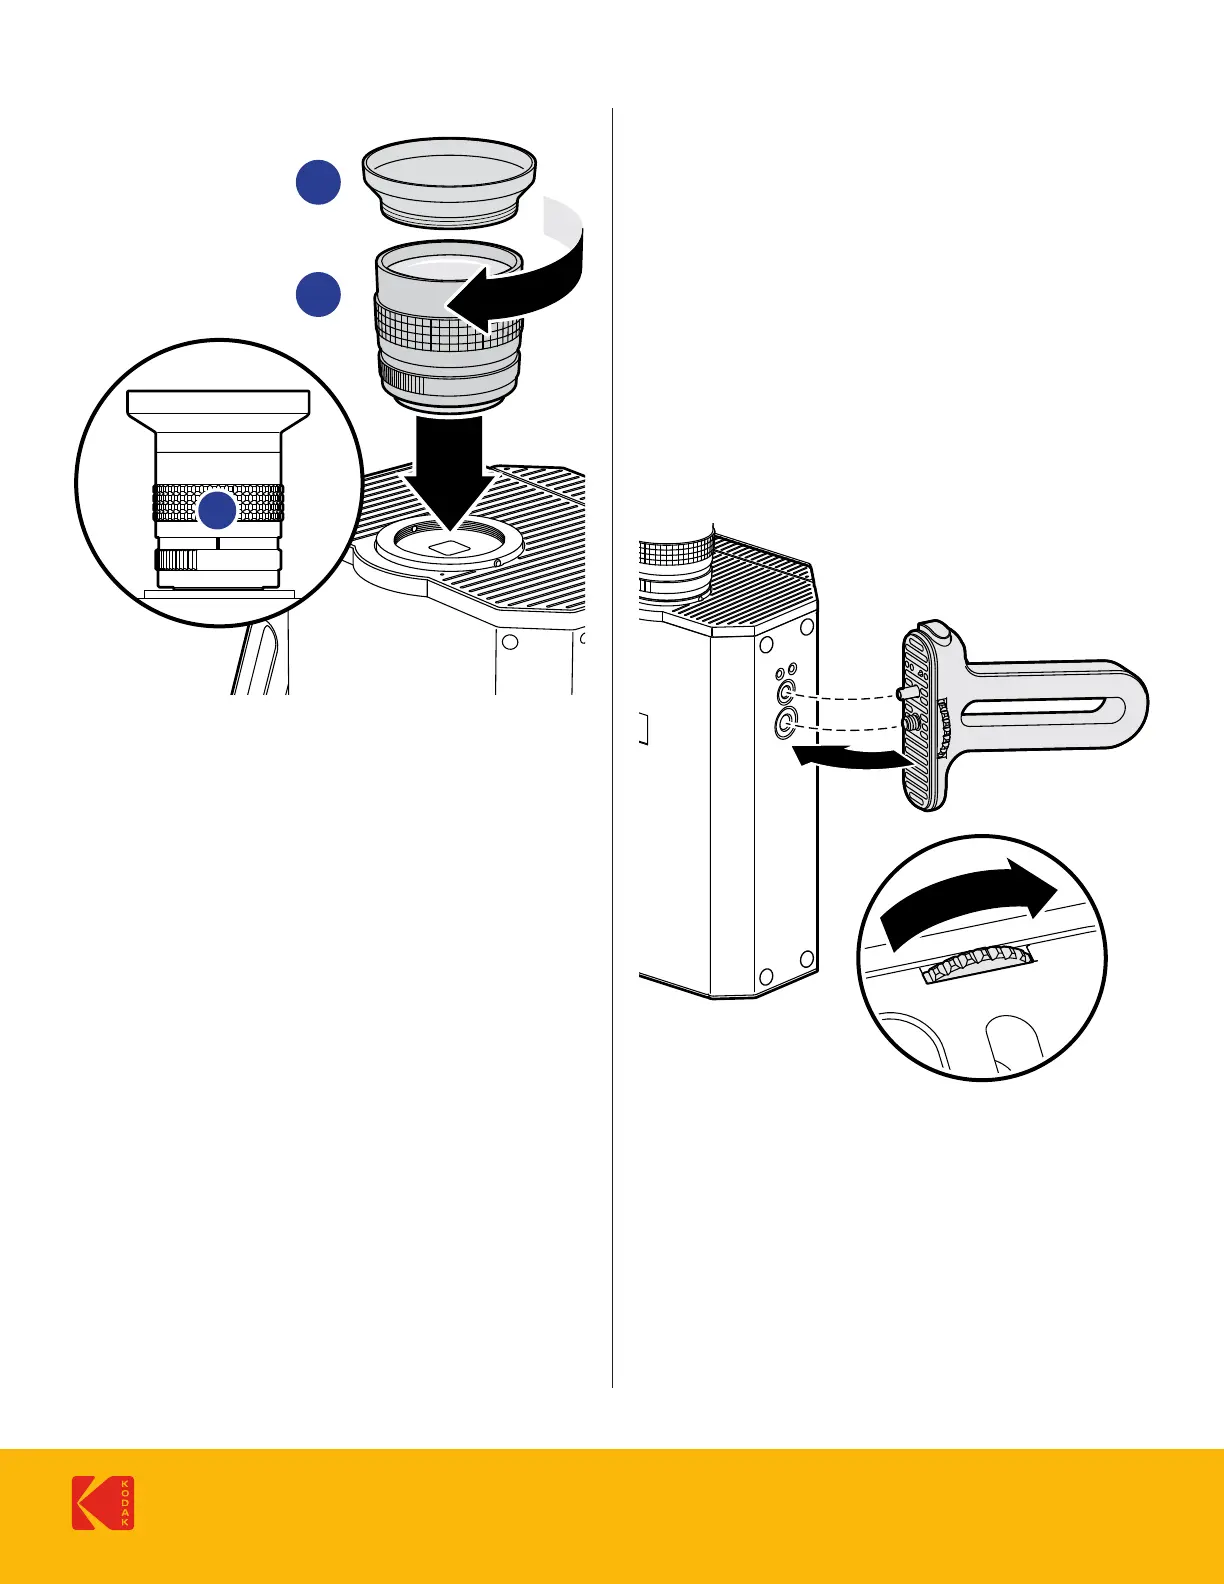
1. Remove and save all lens and camera caps.
IMPORTANT: Only use CMount lenses that are lush with
the thread. CSMount lenses will damage the thread.
2. With the lens mount facing up, carefully attach the lens
by turning it clockwise until secure. The index line must
be oriented at the top of the camera.
WARNING: Over-tightening the lens can damage the
mount and change the focus of the camera.
3. Install the lens hood (optional): Carefully screw hood
into end of lens until secure.
WARNING: Never release or change any of the visible
screws on the lens or at the mount.
ADDITIONAL INFO:
Adapters are available to combine other lenses to the
CMount.
The lens hood keeps light from hitting the lens from the
sides, to prevent glare and lens lare, and protects the lens
from accidental ingerprints and scratches.
Install the Lens
C 16
11
8
5.6
4
2
3
2
To install the pistol grip, align it with run button towards
front of camera. Turn the thumbscrew until tight.
Install Pistol Grip
The camera does not have any integrated ilter (85) for
using a tungsten ilm stock under daylight condition.
Any iltering for adjusting the color temperature or neutral
density needs to be done in front of the lens. As the built in
lightmeter works through the lens, the density of the ilter in
use will be compensated for exposure.
ADDITIONAL INFO:
When the KODAK Super 8 camera is used with the included
6mm / 1:1.2 lens, the ilter size for the lens is 40.5mm, if the
lens hood is attached, the ilter size will be 62mm.
Using a Filter