12
With the power on, the camera detects when a cartridge
has been loaded. The Add Cartridge screen will display.
1. Select Create to create “Cartridge1”.
You’ll be reminded to mark the cartridge later with that
name/number.
2. Select Film Type and then select the type you loaded.
The camera automatically adjusts the exposure range
for each ilm type.
3. If you select “Other Film” the camera light meter is
disabled. You can expose any ilm individually by using
an external light meter in cine mode.
4. Selecting “Other Film” will simplify cartridge changes
by reducing menu selection steps.
TIP: Shoot a practice roll of ilm to get familiar with your
camera and its functions.
Create Cartridge / Set Film Type
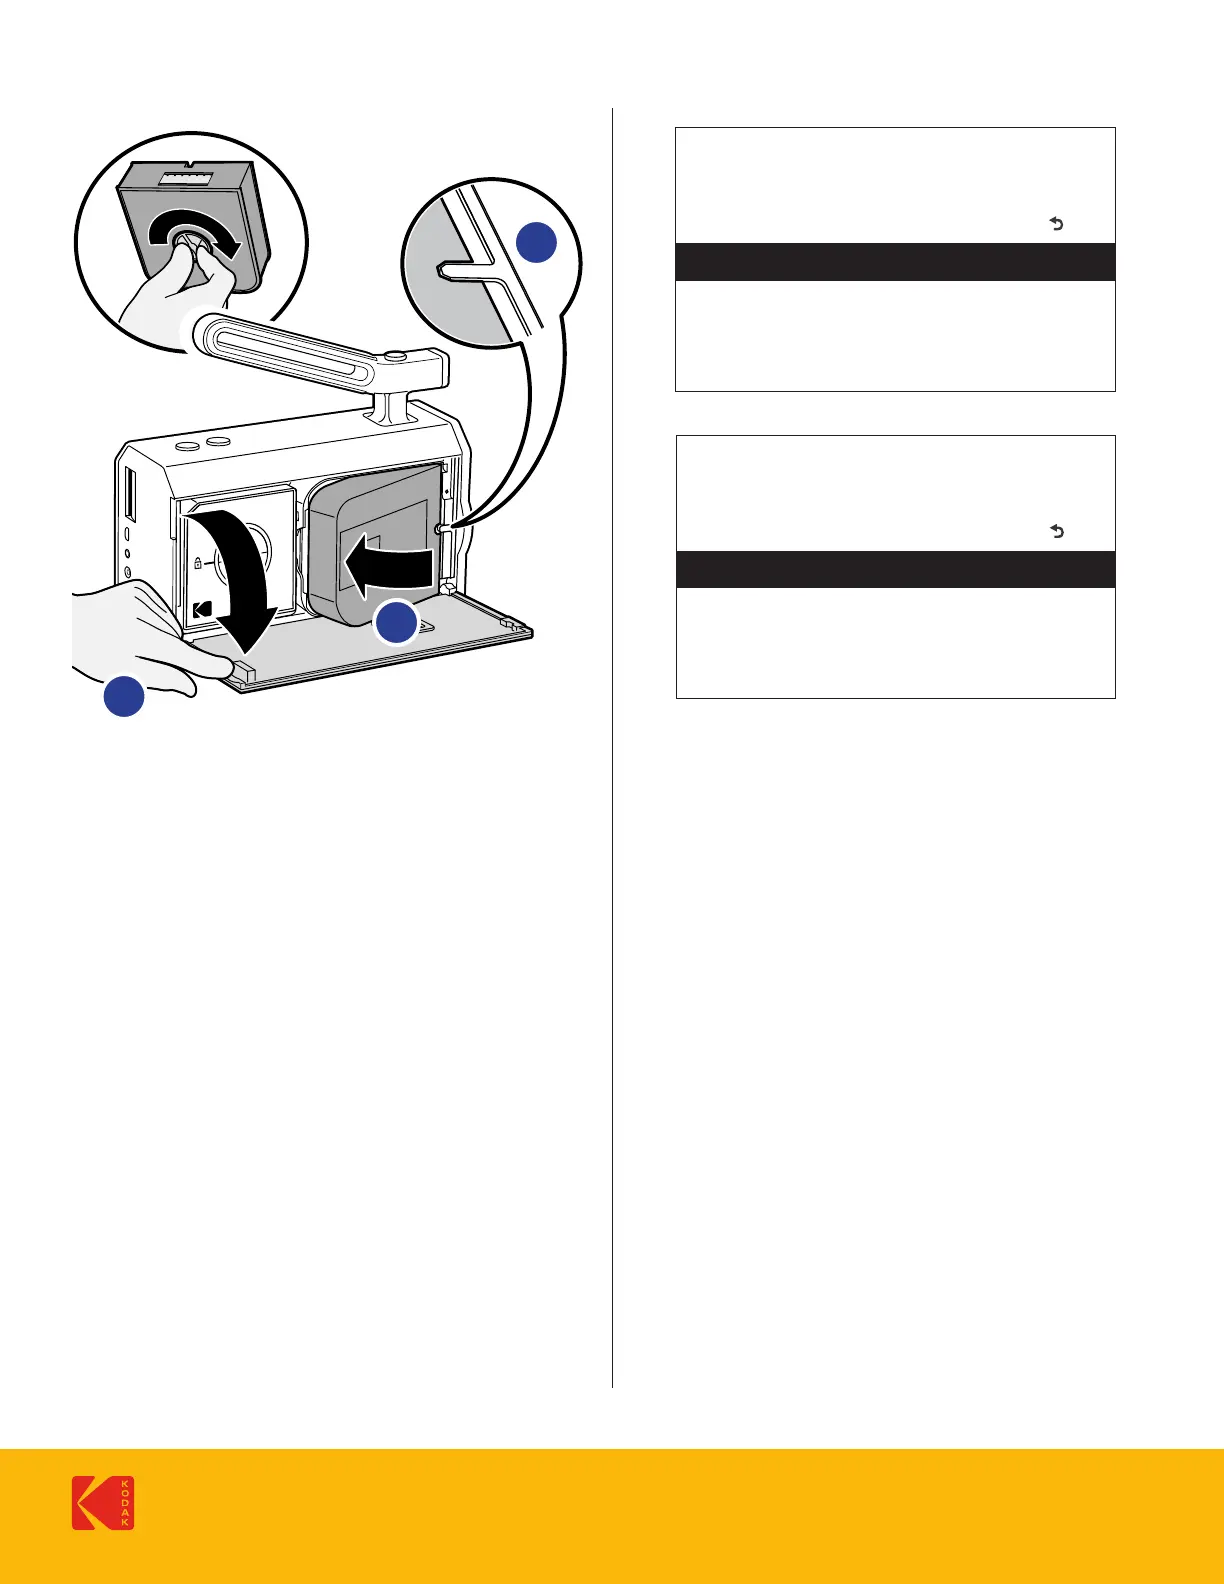
Before you load the cartridge, take the cartridge
in your hand, label to the backside and the ilmstrip
to the top. Turn the cartridge transport wheel clockwise
to take up slack in the ilm. 3 turns should take you
past the “hump” in the ilm.
IMPORTANT: Turning the wheel counterclockwise will
damage the cartridge.
1. Open the ilm door.
2. With the power on, insert the cartridge, with the
notches toward the front of the camera and the
label facing out. Align the cartridge notch with the
registration pin.
3. Push cartridge down until it snaps into place.
4. Close the ilm door.
Load the Film Cartridge
Cartridge 1 Create
50DFilm Type
Use Previous
Cancel
Add Cartridge
1
2
3
KODAK TRI-X
KODAK EKTACHROME 100D
KODAK VISION3 50D
KODAK VISION3 200T
Back
Add Cartridge | Film Type
Getting Started