CVS-126 Chapter 5 Installation
0093132702-08 5-3
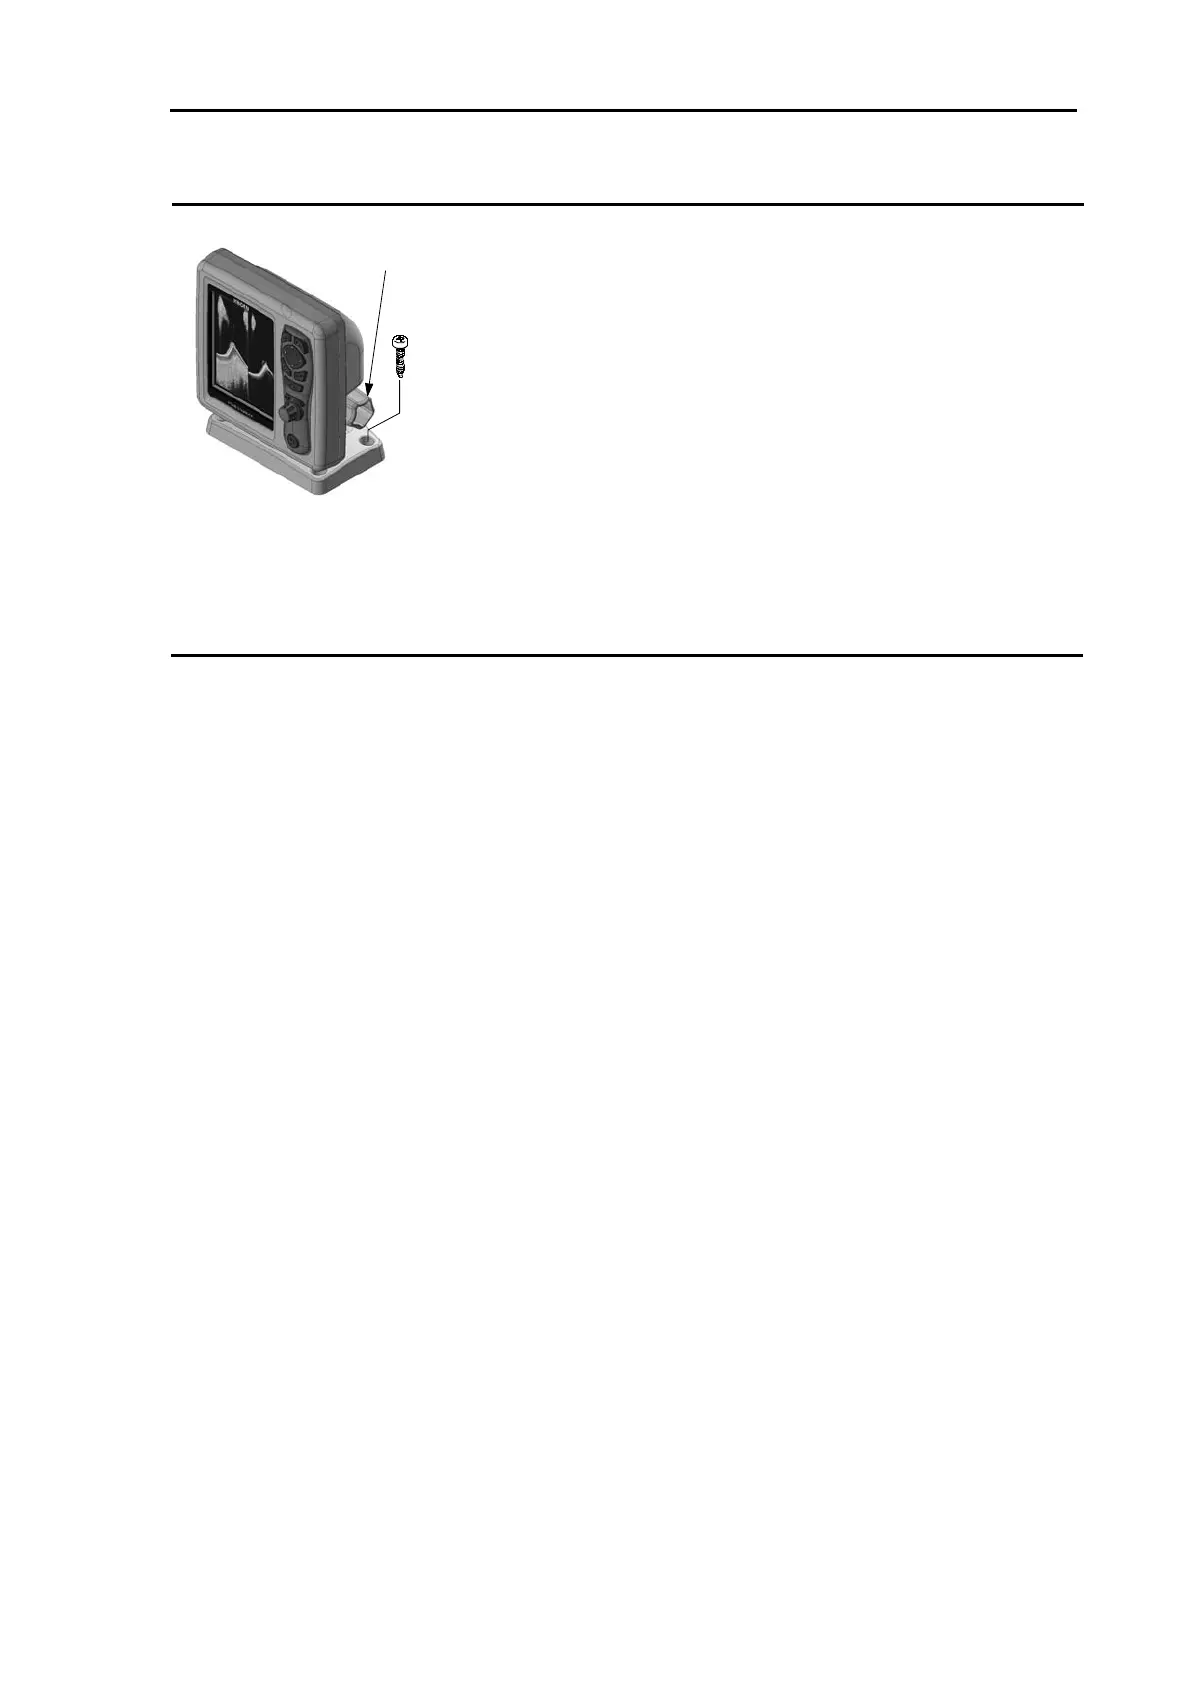
Knob bol
Turn two turns the knob bolt to
loosen it and pull the unit upward.
CVS-126 Display unit
Mounting bracket
Desk-top Installation
Fig. 5.2 Desk-top Installation
(1) Loosen the knob bolt fixing CVS-126 Display
unit to the mounting bracket, push the unit to
the left side and pull the unit upward.
(2) Place the removed unit to a safe and flat
place.
(3) Place the mounting bracket on the location
for the unit to be installed and fix it with four
screws (trans-tapping screws) supplied with
installing materials.
(4) Connect the connectors for power and
transducer to the unit respectively.
(5) Install the unit to the mounting bracket and fix
the unit by turning clockwise the knob bolt
Flush-mount Installation
(1) Make a square hole (160mm x 160mm) at the location to be installed. (See Fig. 5.4.)
(2) Turn counter-clockwise the knob bolt fixing CVS-126 Display unit to the mounting bracket to
loosen it, push the unit to the left side and pull the unit upward. The mounting bracket and knob
bolt are not used.
(3) Confirm that the unit matches with the square holes. If not matched, correct the square hole.
(4) Remove the front frame of CVS-126 Display unit, pulling it toward you. (See Fig. 5.3.)
(5) Connect the connectors for power and transducer to the unit respectively.
(6) Install the CVS-126 Display unit in the installing location (square hole) and fix it with four tapping
screws (4mm) (M4 or pan-head). (Prepare 4mm screws suitable for thickness of installing
location.)
(7) Install the front frame removed in step (4).
Fixing screw x 4
 Loading...